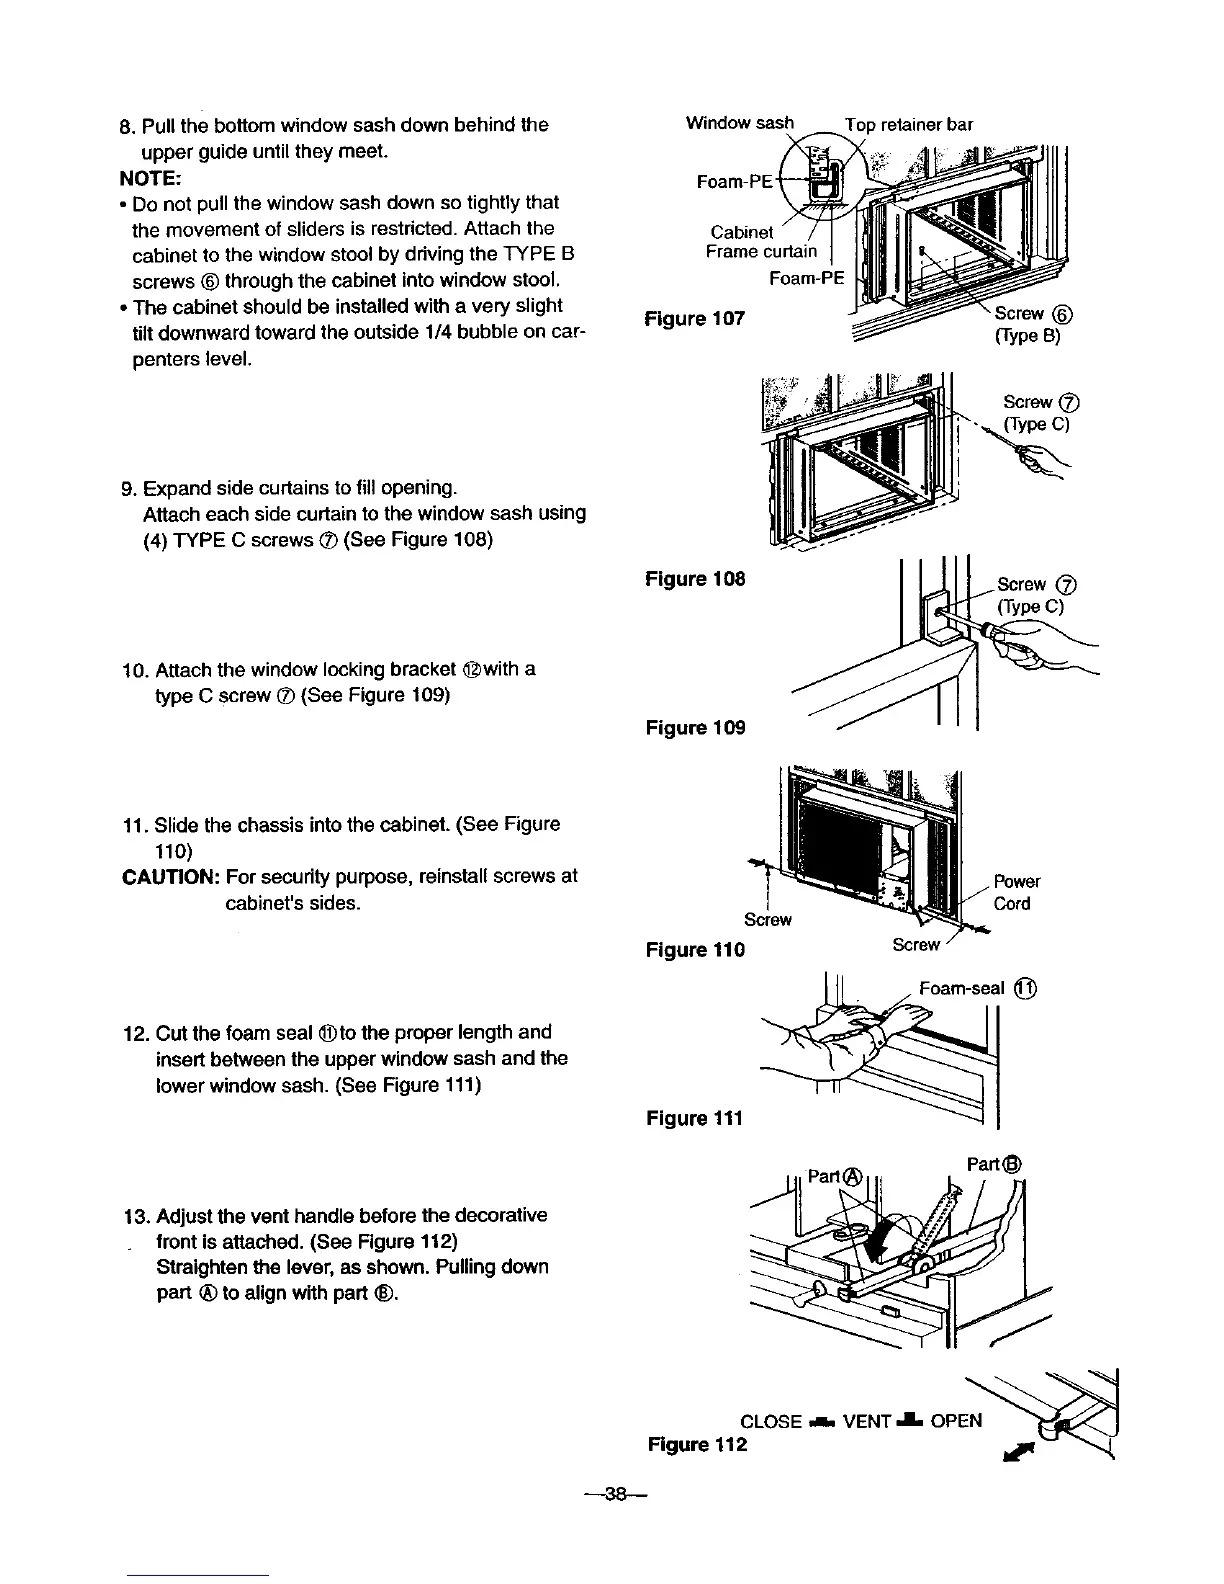
8. Pull the bottom window sash down behind the
upper guide until they meet.
NOTE:
• Do not pull the window sash down so tightly that
the movement of sliders is restricted. Attach the
cabinet to the window stool by driving the TYPE B
screws ® through the cabinet into window stool.
• The cabinet should be installed with a very slight
tilt downward toward the outside 1/4 bubble on car-
penters level.
9. Expand side curtains to fill opening.
Attach each side curtain to the window sash using
(4) TYPE C screws O (See Figure 108)
10. Attach the window locking bracket @with a
type C screw ® (See Figure 109)
Window sash
Foam-PE 4
Cabinet
Frame curtain
Foam-PE
Figure 107
Figure 108
Figure 109
Top retainer bar
•Screw (_
(Type B)
Screw (_)
(Type C)
11. Slide the chassis into the cabinet. (See Figure
110)
CAUTION: For security purpose, reinstall screws at
cabinet's sides.
12. Cut the foam seal @to the proper length and
insert between the upper window sash and the
lower window sash. (See Figure 111)
13. Adjust the vent handle before the decorative
front is attached. (See Figure 112)
Straighten the lever, as shown. Pulling down
part ® to align with part _).
Cord
Screw
Figure 110 Screw
Figure 111 _1 (_)
CLOSE ,ak VENT JL OPEN __q_ I
Figure 112 '_' _'__'_ "_