I::1
• To ensure that your beer dispenser works at the
maximum efficiency it was designed for, install it in a
location where there is proper air circulation,
plumbing and electrical connections.
• Choose a location where the beer dispenser will be
away from heat and will not be exposed to direct
sunlight.
• This beer dispenser is designed for indoor use only
and should not be used outdoors.
• This beer dispenser is a freestanding design and
should not be placed in a built-in or recessed area.
The following dimensions are the recommended clearances
around the beer dispenser.
Sides ...................... 3/4" (19mm)
Back ........................... 1" (25mm)
Read carefully and understand all installation instructions
before installing the beer dispenser. If after completing the
process you are still unsure whether the beer dispenser has
been properly installed, we recommend that you contact a
qualified installer.
Ili'b__ iii J[,iI i1_1._'_:-_(=]i--_
Follow the steps below to install the casters.
1.
Empty the inside of the cabinet completely and lay the beer
dispenser down sideways. We recommend that you place a
piece of cardboard or cloth underneath the cabinet to
prevent dents or scratches to the cabinet.
[o],VAvl:t II I"_ (:]II | I Io] _ [o] j]
2. Insert the casters into the holes on the bottom corners of
the cabinet. Tighten each caster by turning the nut clockwise
with the wrench provided.
3. Once all four casters have been tightened evenly, stand the
cabinet in an upright position.
caster
II'i¥':-t_ IJi iT, hillil'_i_ uP.l,[,_ I
Follow the steps below to install the guardrail on the worktop.
1. Place the guardrail on top of the cabinet.
2. Align all holes of the guardrail with the holes of the
cabinet.
3. Secure the guardrail to the cabinet.
[e] I[O].! I iTJ ] IiTo I f_'_ | IL! [o',]_l[o] i[,--"]
This appliance must be grounded. In the event of an
electrical short circuit, grounding reduces the risk of
electric shock by providing an escape wire for the
electric current. This appliance is equipped with a cord
containing a grounding wire and a grounded plug. The
plug must be inserted into an outlet that is properly
installed and grounded.
• Improper use of the plug may result in the risk of electric
shock.
Consult a qualified electrician or service technician if the
grounding instructions are not completely understood or
if in doubt as to whether the appliance has been
properly grounded.
ivlvji-/iiT,ii r,_[;tii0til;-]ii[;] il _,.1
This appliance must be plugged into a 15Amp, 115 Volt,
60Hz GROUNDED OUTLET.
Note: Where a standard two-prong outlet is encountered, it
is the personal responsibility and obligation of the consumer
to have it replaced with a properly grounded three-prong
outlet.
We do not recommend the use of an extension cord with this
unit.
Occasionally, there may be power interruptions due to
thunderstorms or other causes. Remove the power cord
from wall outlet when a power outage occurs. When power
has been restored, re-plug the power cord into wall outlet.
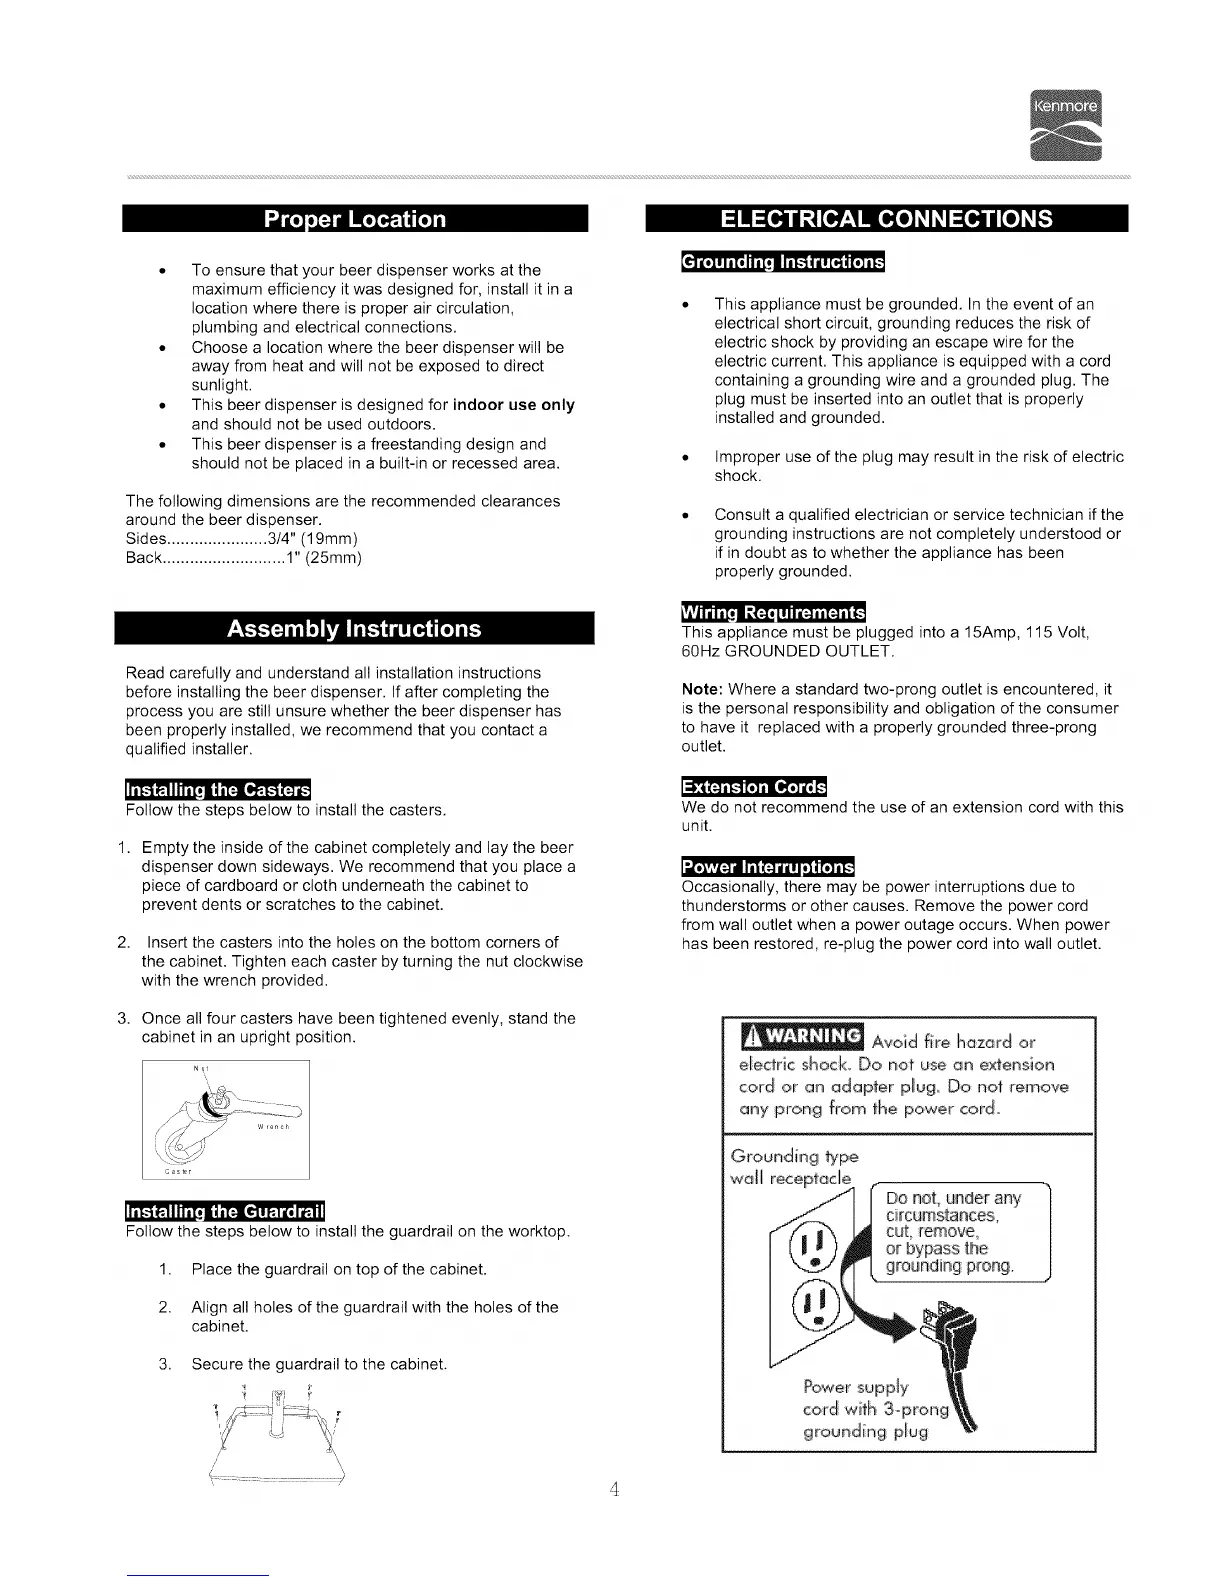
_ Avoid fire hazard or'
dectric shock° Do not use an extension
cord or an adapter plJug Do not remove
any prong from the power cord.
wdil rece
Do not, under any
cilrcumsta_ces_
cut_remove0
or bypass the
grounding prong
Power supply
cord with 3oprong
grounding plug