/ i_.1 Ij,] II[i I _I[:1 :[:_;11 _,:_i|_'_ I i[i I _Y_ L'{:I |vj oI:l -'_| i {;t | 1
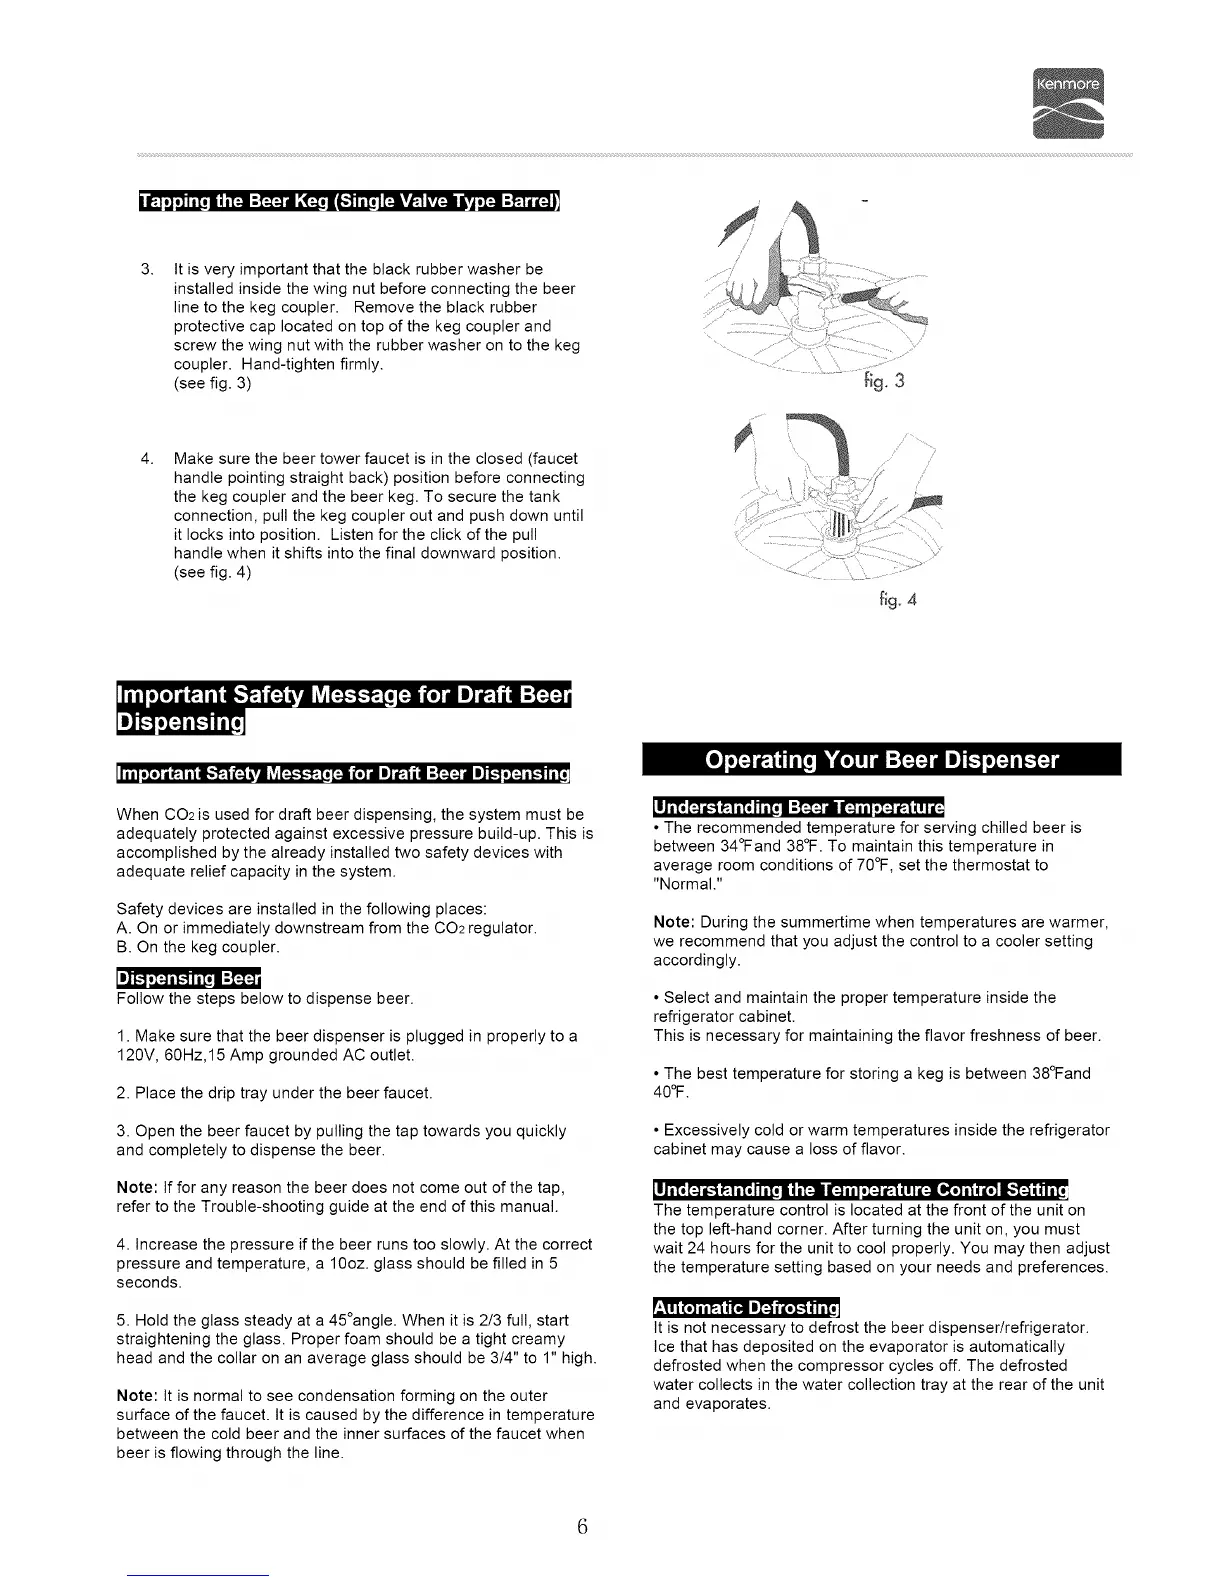
3.
It is very important that the black rubber washer be
installed inside the wing nut before connecting the beer
line to the keg coupler. Remove the black rubber
protective cap located on top of the keg coupler and
screw the wing nut with the rubber washer on to the keg
coupler. Hand-tighten firmly.
(see fig. 3)
fig. 3
4.
Make sure the beer tower faucet is in the closed (faucet
handle pointing straight back) position before connecting
the keg coupler and the beer keg. To secure the tank
connection, pull the keg coupler out and push down until
it locks into position. Listen for the click of the pull
handle when it shifts into the final downward position.
(see fig. 4)
fig. 4
When 002 is used for draft beer dispensing, the system must be
adequately protected against excessive pressure build-up. This is
accomplished by the already installed two safety devices with
adequate relief capacity in the system.
Safety devices are installed in the following places:
A. On or immediately downstream from the CO2 regulator.
B. On the keg coupler.
Ik] [:1 ol:_ i1.11i[i I :[:_:_ i
Follow the steps below to dispense beer.
1. Make sure that the beer dispenser is plugged in properly to a
120V, 60Hz,15 Amp grounded AC outlet.
2. Place the drip tray under the beer faucet.
3. Open the beer faucet by pulling the tap towards you quickly
and completely to dispense the beer.
Note: tf for any reason the beer does not come out of the tap,
refer to the Trouble-shooting guide at the end of this manual.
4. Increase the pressure if the beer runs too slowly. At the correct
pressure and temperature, a 10oz. glass should be filled in 5
seconds.
5. Hold the glass steady at a 45°angle. When it is 2/3 full, start
straightening the glass. Proper foam should be a tight creamy
head and the collar on an average glass should be 3/4" to 1" high.
Note: It is normal to see condensation forming on the outer
surface of the faucet. It is caused by the difference in temperature
between the cold beer and the inner surfaces of the faucet when
beer is flowing through the line.
LI_ [:_ I_'_ _.l l[O I I l[O I _[:1:_ II 1:_ Iil o[:] I_.i_l I _
• The recommended temperature for serving chilled beer is
between 34°Fand 38°F. To maintain this temperature in
average room conditions of 70°F, set the thermostat to
"Normal."
Note: During the summertime when temperatures are warmer,
we recommend that you adjust the control to a cooler setting
accordingly.
• Select and maintain the proper temperature inside the
refrigerator cabinet.
This is necessary for maintaining the flavor freshness of beer.
• The best temperature for storing a keg is between 38°Fand
40°F.
• Excessively cold or warm temperatures inside the refrigerator
cabinet may cause a loss of flavor.
LIr_ [:_/,,.-__l n[oh nTol _nT-_1:.]Ul oI:.]_llu I_[_o] n|{'_';II[_,_ | _InTo
The temperature control is located at the front of the unit on
the top left-hand corner. After turning the unit on, you must
wait 24 hours for the unit to cool properly. You may then adjust
the temperature setting based on your needs and preferences.
It is not necessary to defrost the beer dispenser/refrigerator.
Ice that has deposited on the evaporator is automatically
defrosted when the compressor cycles off. The defrosted
water collects in the water collection tray at the rear of the unit
and evaporates.
6