20
Reversing Door Swing
IMPORTANT
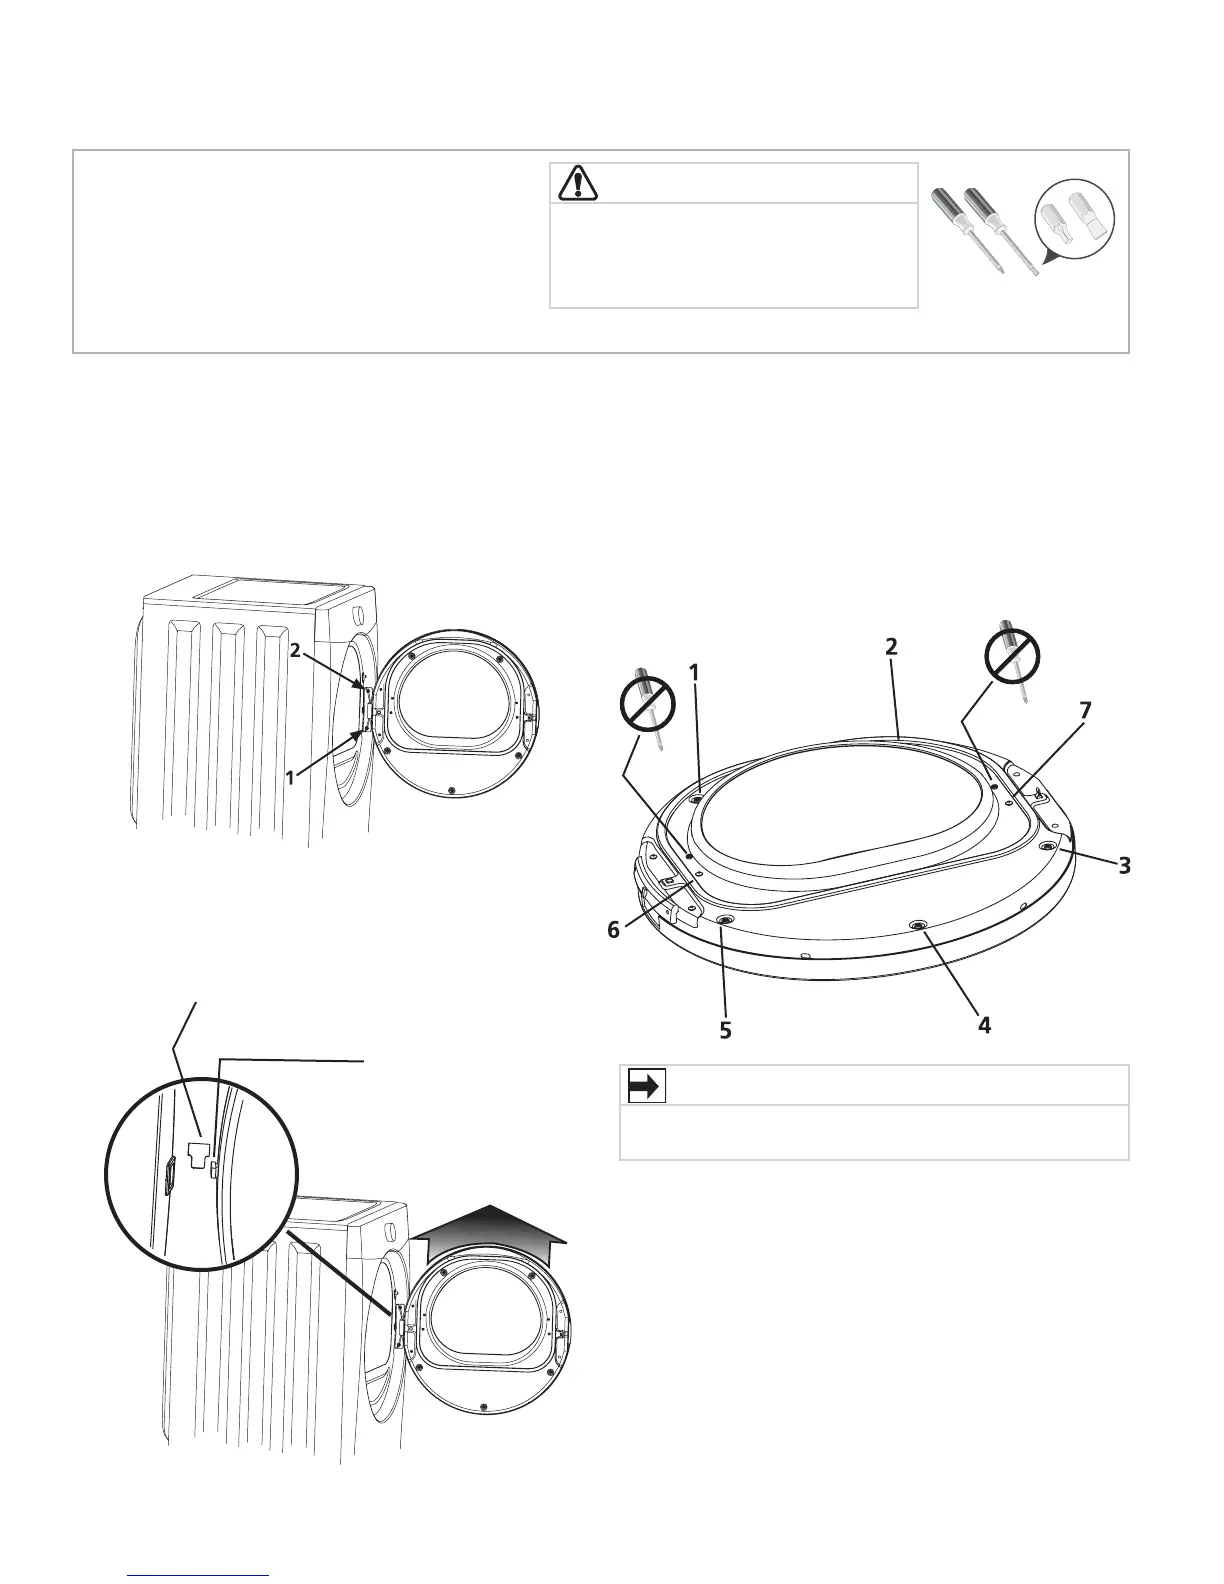
Do not attempt to remove the 2 “tamper-resistant”
screws that hold the inner glass in place.
WARNING
ELECTRICAL SHOCK HAZARD
Failure to disconnect power source
before servicing could result in personal
injury or even death.
1. Be sure you have adequate swing area before
reversing door.
2. You will need a screw driver with a #2 square
and straight bit.
3. Protect fl at work surface, such as top of dryer or
fl oor near dryer, with a soft cloth or towel.
4. Be sure dryer is unplugged from power source!
Screwdrivers with
#2 square &
straight bit
Tools needed:
Removing the door
“T” SLOT IN
FRONT PANEL
“T” POST ON
DOOR HINGE
1. Protect fl at work surface, such as top of dryer or fl oor
near dryer, with a soft cloth or towel.
2. Open dryer door and remove the two hinge screws.
Remove lower screw fi rst, then upper screw.
3. Supporting door with both hands, squarely lift door and
hinge upward approximately 3/8” (10 mm) so “T” post
on back of hinge can slide out through “T” slot on front
panel.
4. Gently place dryer door face down on fl at, covered
work surface.
5. Locate the 5 indented head screws (no. 1-5) in the small,
circular recesses (at 11, 1, 4, 6, and 8 o’clock positions)
of the inner door. Remove and save these 5 screws.
6. Locate the 2 pan head screws (no. 6-7) on the inner
door nearest the metal strike and center of hinge (9
and 3 o’clock positions). Remove and save these 2
screws.
7. Separate inner door assembly from outer door
assembly.