llllll_ IIIIIIIIIIII IIIIIII III _ ............... -
Water Fill (continued)
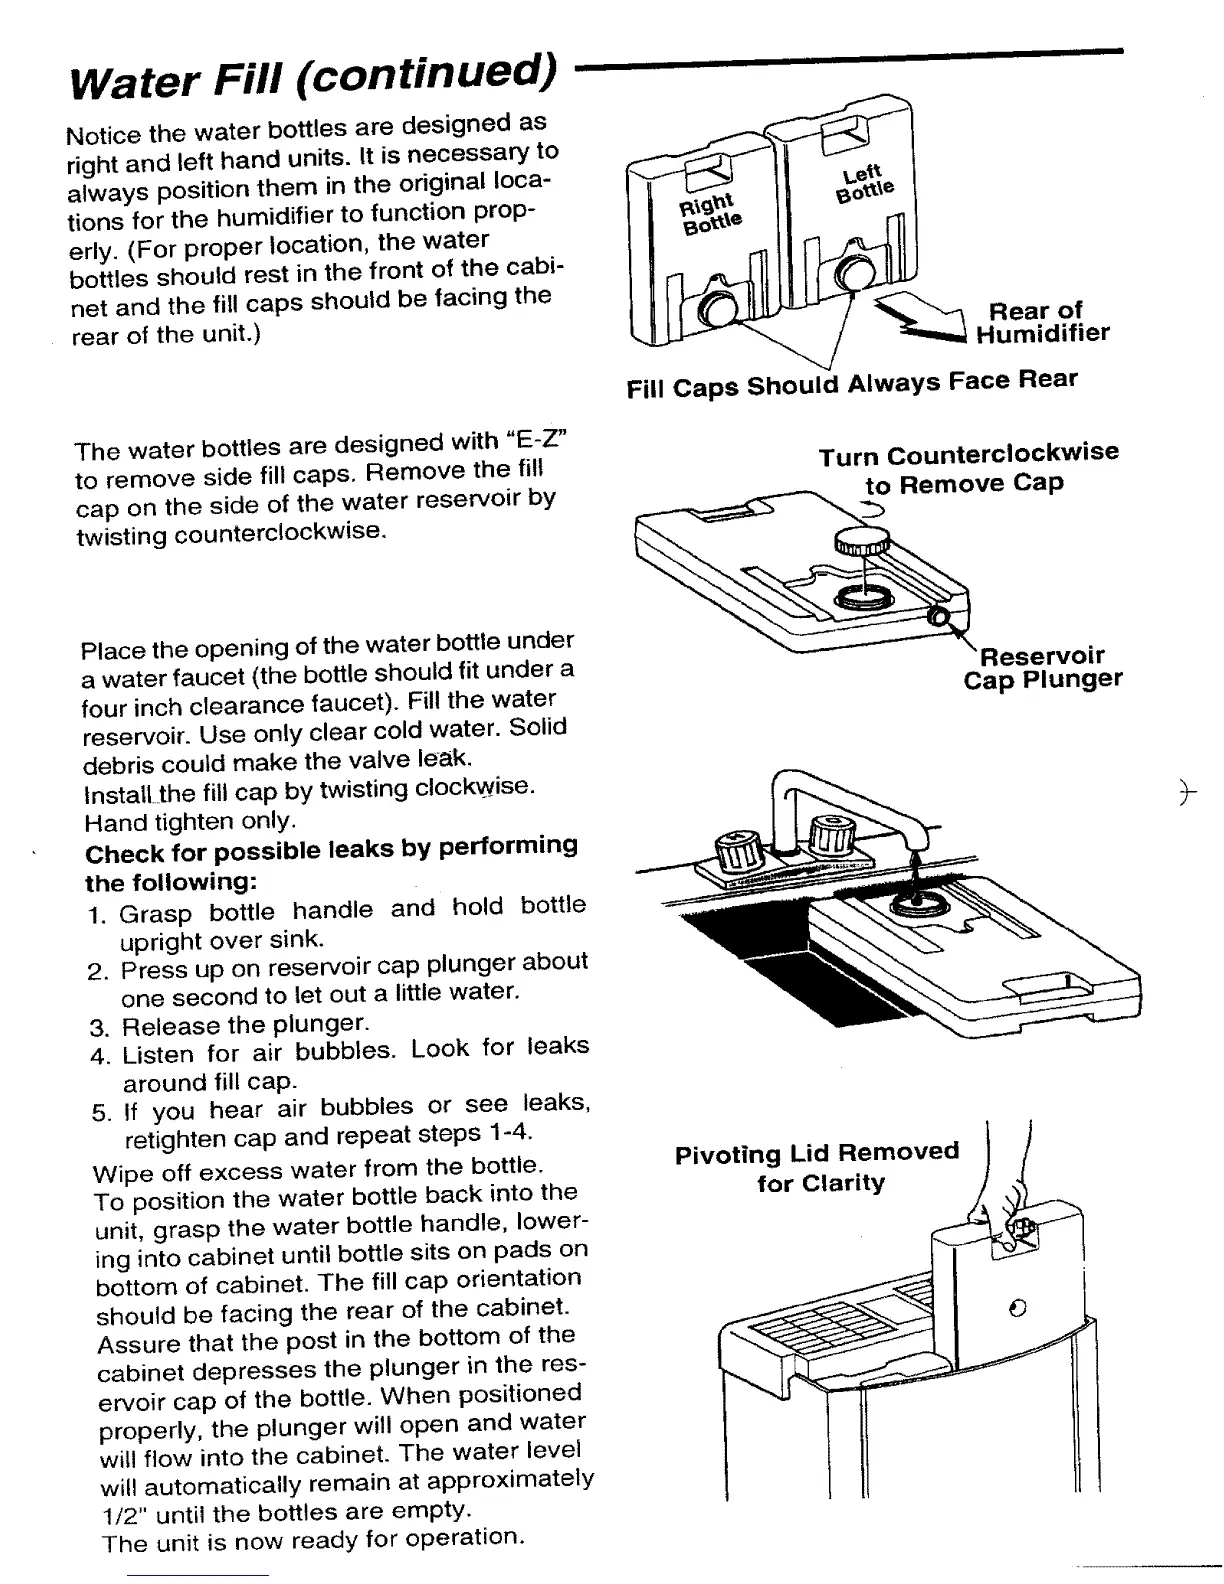
Notice the water bottles are designed as
right and left hand units. It is necessary to
always position them in the original loca-
tions for the humidifier to function prop-
erly. (For proper location, the water
bottles should rest in the front of the cabi-
net and the fill caps should be facing the
rear of the unit.)
The water bottles are designed with "E-Z"
to remove side fill caps. Remove the fill
cap on the side of the water reservoir by
twisting counterclockwise.
Rear of
Humidifier
Fill Caps Should Always Face Rear
Turn Counterclockwise
to Remove Cap
Place the opening of the water bottle under
a water faucet (the bottle should fit under a
four inch clearance faucet). Fill the water
reservoir. Use only clear cold water. Solid
debris could make the valve le-_k.
lnstalLthe fill cap by twisting clockwise.
Hand tighten only.
Check for possible leaks by performing
the following:
1. Grasp bottle handle and hold bottle
upright over sink.
2. Press up on reservoir cap plunger about
one second to let out a little water.
3. Release the plunger.
4. Listen for air bubbles. Look for leaks
around fill cap.
5. If you hear air bubbles or see leaks,
retighten cap and repeat steps 1-4.
Wipe off excess water from the bottle.
To position the water bottle back into the
unit, grasp the water bottle handle, lower-
ing into cabinet until bottle sits on pads on
bottom of cabinet. The fill cap orientation
should be facing the rear of the cabinet.
Assure that the post in the bottom of the
cabinet depresses the plunger in the res-
ervoir cap of the bottle. When positioned
properly, the plunger will open and water
will flow into the cabinet. The water level
will automatically remain at approximately
1/2" until the bottles are empty.
The unit is now ready for operation.
Reservoir
Cap Plunger
P iv°t|fg rLCdlarRitey°Ved _