Basic Operations
7English
Initial Settings
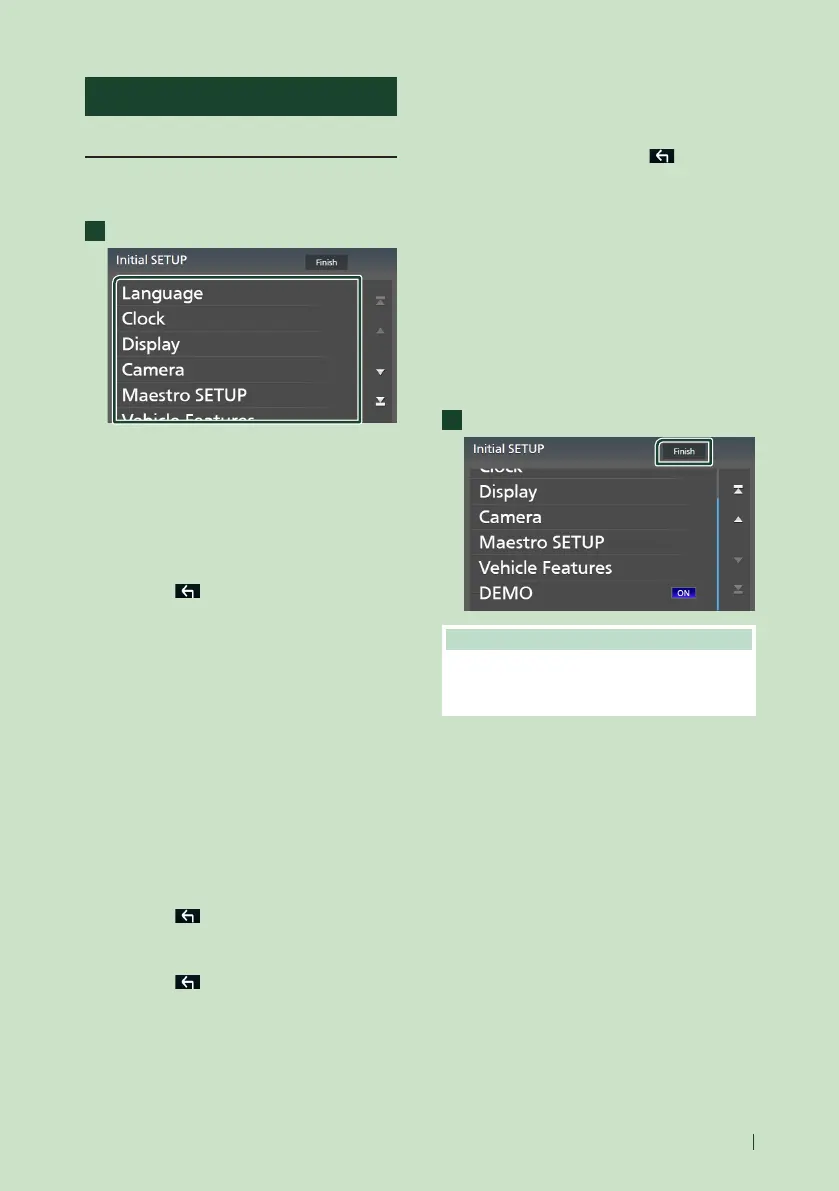
Initial SETUP
Perform this setup when you use this unit first
time.
1
Set each item as follows.
■ [Language]
Select the language used for the control
screen and setting items. Default is “American
English(en)”.
1 Touch [Language].
2 Touch [Language Select].
3 Select the desired language.
4 Touch [
].
For details, see User Interface Setup
(P.70) in the Instruction Manual.
■ [Clock]
Sets the synchronization of the clock and
adjusts it.
For details, see Date and clock settings
(P.8).
■ [Display]
Set the key illumination color.
If it is hard to see the image on the screen
even, adjust the viewing angle.
1 Touch [Display].
2 Touch [Key Color].
3 Select the desired color.
4 Touch [
].
5 Touch [Viewing Angle].
6 Select a viewing angle.
7 Touch [
].
For details, see Display Setup (P.71) in
the Instruction Manual.
■ [Camera]
Set the parameters for the camera.
1 Touch [Camera].
2 Set each item and touch [
].
For details, see Camera Setup (P.64) in
the Instruction Manual.
■ [[Maestro SETUP]
This function requires a commercial adaptor.
Consult your KENWOOD dealer for details.
■ [Vehicle Features]
This function requires a commercial adaptor.
Consult your KENWOOD dealer for details.
■ [DEMO]
Set the demonstration mode. Default is “ON”.
2
Touch [Finish].
NOTE
• These settings can be made from the SETUP
menu. See Setup (P.69) in the Instruction
Manual.

 Loading...