J
jason37Aug 28, 2025
What to do if Kenwood Car Receiver says “NO DEVICE”?
- JJulia BrowningAug 28, 2025
If your Kenwood Car Receiver displays “NO DEVICE”, connect a USB device and switch the source to USB again.
What to do if Kenwood Car Receiver says “NO DEVICE”?
If your Kenwood Car Receiver displays “NO DEVICE”, connect a USB device and switch the source to USB again.
Why is there no sound from my Kenwood KDC-HD458U Car Receiver?
If you cannot hear any sound from your Kenwood Car Receiver, adjust the volume to the optimal level and check the cords and connections.
How to fix static noise on Kenwood KDC-HD458U radio?
If your Kenwood Car Receiver is generating static noise while listening to the radio, fully extend the antenna.
What to do if “PROTECT” appears on Kenwood Car Receiver?
If the Kenwood Car Receiver displays “PROTECT” and you cannot perform any operations, ensure the speaker wire terminals are properly insulated. Then, reset the unit. If the issue persists, it may require professional attention.
What to do if Kenwood Car Receiver says “NO MUSIC”?
If the Kenwood Car Receiver displays “NO MUSIC”, connect a USB device that contains playable audio files.
What does “MEMORY FULL” mean on Kenwood KDC-HD458U?
If the Kenwood Car Receiver displays “MEMORY FULL”, the tag memory of the HD Radio receiver is full.
How to eject a disc from Kenwood KDC-HD458U Car Receiver?
If a disc cannot be ejected from your Kenwood Car Receiver, press and hold the M button to forcibly eject it. If this does not work, reset the unit.
What does “COPY PRO” mean on Kenwood KDC-HD458U?
If your Kenwood Car Receiver displays “COPY PRO”, it indicates that a copy-protected file is being played.
How to fix noise generated by Kenwood KDC-HD458U?
If noise is generated by the Kenwood Car Receiver, try skipping to another track or changing the disc.
Why do tracks not play back as intended on my Kenwood KDC-HD458U Car Receiver?
If tracks do not play back as intended on your Kenwood Car Receiver, be aware that the playback order is determined when the files are recorded.
| Tuner | AM/FM |
|---|---|
| USB Port | Yes |
| Bluetooth | Yes |
| Preamp Outputs | Yes |
| Display Type | LCD |
| Equalizer | Yes |
| Preamp Outputs (Channels) | 3 |
| Subwoofer Preamp Output | Yes |
| Detachable Face | Yes |
| AUX Input | Yes |
| iPod/iPhone Compatibility | Yes |
| Android Compatibility | Yes |
| Satellite Radio Ready | Yes |
| Steering Wheel Control Compatible | Yes |
| CD Player | Yes |
| Max Power Output | 50 Watts x 4 |
| RMS Power Output | 22 Watts x 4 |
| Audio Formats Supported | MP3, WMA |
| Preamp Voltage | 2.5 Volts |
Safety warnings about operating while driving and general precautions.
General advice on safe usage, data backup, and preventing short circuits.
Instructions for cleaning the unit and handling discs.
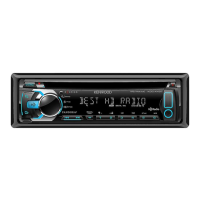
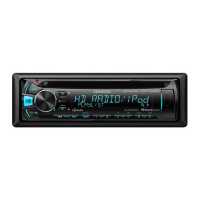
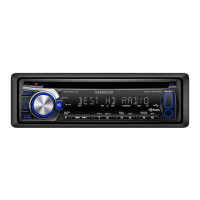
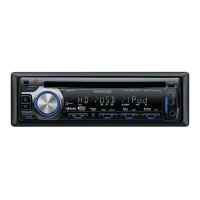
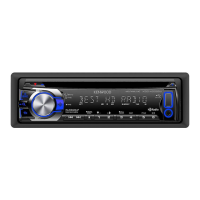
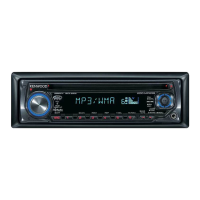
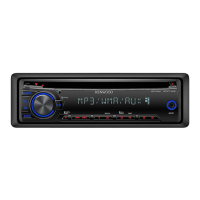
Overview of the unit's front panel controls and features.
Description of the remote control unit and its usage.
Explanation of how to interpret the manual's symbols and references.
Steps to disable the demonstration mode upon initial setup.
Instructions for setting the unit's internal clock time and format.
Configuration steps for initial setup options like audio and display.
Guide on how to find and tune into HD Radio stations.
Instructions for selecting secondary multicast channels from HD Radio stations.
Method for directly tuning to a specific frequency or channel using the remote.
Details on various tuner settings like IF BAND, AUTO MEMORY, and RECEIVE MODE.
Steps to tag a song with Program Service Data (PSD) using the unit.
Process of transferring tagged song data to an Apple device.
Guide on how to purchase tagged songs via iTunes after transfer.
How the source automatically changes and playback begins.
Instructions for selecting tracks or files from CD, USB, or iPod sources.
How to navigate and select folders for files on USB or iPod.
Controls for fast-forwarding, reversing, repeating, and random playback.
Detailed steps for selecting audio files from various lists or categories.
Using the remote to directly search for specific tracks or files.
Guide to searching for songs by typing characters via the volume knob.
Adjusting the skip search ratio for faster file navigation.
Selecting between internal or external memory on a USB device.
Steps to connect and play audio from an auxiliary device.
Renaming the auxiliary input source for easier identification.
Instructions to start streaming music from the Pandora application.
How to create custom radio stations based on songs or artists and save them.
Method for saving favorite Pandora stations for quick access.
Steps to connect and play audio from the iHeartRadio application.
Guide to finding and tuning into stations using iHeartRadio.
Navigating through city lists alphabetically for station search.
Removing stations from favorite lists or custom stations.
Covers Preset EQ, Bass Boost, Loudness, and Sound Reconstruction settings.
Details on subwoofer output, LPF, and HPF configurations.
Adjustments for speaker balance, fader, and source volume offset.
Customizing the illumination color for buttons and display.
Adjusting display and button illumination levels and brightness.
Configuring automatic or single-pass scrolling of display information.
Information on playable CDs and audio file formats.
Details on supported software and compatibility for Apple devices.
Explanation of HD Radio features like PSD, HD2/HD3 channels, and audio quality.
Information about Pandora service availability and limitations.
Details on iHeartRadio service availability and unit compatibility.
How to mute audio when receiving a phone call.
Common issues and remedies for the Pandora application.
Common issues and remedies for the iHeartRadio application.
Technical specifications for the FM and AM tuner sections.
Technical specifications for the CD playback functionality.
Technical specifications for the USB connection and playback.
Technical specifications related to audio output and processing.
Technical specifications for the auxiliary audio input.
General technical specifications including operating voltage, dimensions, and weight.
Safety warnings regarding power supply, wiring, and grounding.
Precautions for safe installation, heat dissipation, and professional consultation.
Step-by-step guide for the installation and connection process.
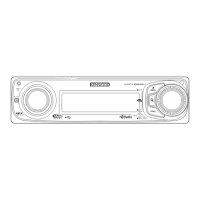
Detailed instructions for mounting the unit into the dashboard.
Steps for detaching the faceplate and removing the unit from the dash.
Diagram and explanation of the electrical wiring connections for the unit.
List of included installation components and accessories.