Do you have a question about the Kenwood TK-7180 and is the answer not in the manual?
Guidance on mounting radio and accessories, and cable routing.
Recommended locations for vehicle antenna mounting.
Considerations for positioning the radio unit for access and cooling.
Instructions for connecting the DC power leads and wiring.
Planning for control station radio location and antenna systems.
Requirements and procedure for programming the transceiver.
Setup guide for the KRK-10 remote kit.
Setup guide for the KCT-46 ignition sense cable.
Setup guide for the KCT-40 radio interface cable.
Setup for GPS receiver and controller.
Setup for the KDS-100 mobile data terminal.
Setup guide for the KAP-2 accessory.
Setup guide for the VGS-1 voice guide unit.
Setup for KES-3 and KES-5 external speakers.
Setup for KMC-32 and KMC-36 keypad microphones.
Description of different operating modes for realignment.
Procedures for entering various operating modes.
Details on entering and using Panel Test Mode.
Details on entering and using Panel Tuning Mode.
Using PC Mode for programming and tuning.
Introduction to PC Mode setup and requirements.
Steps to connect the transceiver for PC communication.
Description of the KPG-46 PC programming interface cable.
Description of the KPG-92D programming software.
Procedures for updating transceiver firmware.
Preface on firmware programming capabilities.
Connecting for firmware programming.
Step-by-step guide for firmware programming.
Functions and settings within firmware programming.
Transferring settings between transceivers.
How to enter passwords for clone mode.
Procedure to check firmware version.
Procedure for adjusting the clock.
Flowchart for clock adjustment steps.
Installing the ignition sense cable for power control.
Step-by-step connection of the KCT-46.
Connecting the KCT-40 for data/terminal interface.
Step-by-step connection of the KCT-40.
Table detailing terminal functions for various connectors.
Installing the KAP-2 for horn alert/PA functions.
Step-by-step installation of the KAP-2 unit.
Installing the KRK-10 remote control kit.
Procedure for removing the front panel.
Installing the main panel of the KRK-10.
Installing the rear panel of the KRK-10.
Connecting KRK-10 panels with the cable.
Installing the VGS-1 unit for voice guidance.
Step-by-step installation of the VGS-1 unit.
Connecting external speakers.
Connecting the KES-3 external speaker.
Procedure to connect KES-3 speaker.
Installing and configuring the KES-5 external speaker.
Pinout for the KAP-2 cable connector.
Connecting the voice scrambler board.
Connecting the ANI board.
Connecting the GPS receiver.
Step-by-step installation of the GPS receiver.
Installing GPS receiver and VGS-1 together.
Precautions and steps for disassembling the TX-RX PCB.
General precautions before starting disassembly.
Removing speaker hardware and holder for TK-7180.
Removing the holder for TK-7189.
Precautions to follow when reassembling components.
Steps for reassembling the TX-RX PCB.
Note on securing the Audio IC with correct screws.
Procedure for installing the final shield case.
Procedure for installing the power supply cable.
Procedure for installing the top packing.
Procedure for installing the D-sub cap for water resistance.
Installing the holder and speaker fixture for TK-7180.
Installing the holder for TK-7189.
Procedure for installing the packing for waterproofing.
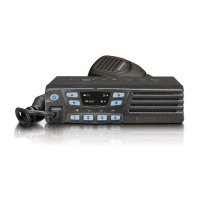
Overview of the transceiver's features and capabilities.
Description of the double conversion superheterodyne receiver.
Details of the receiver's front-end circuitry.
Description of the first mixer stage in the receiver.
Description of the IF amplifier stages in the receiver.
Description of the audio amplifier circuit.
Description of the squelch circuit operation.
Description of the transmitter's functional circuits.
Description of the microphone input and signal path.
Description of the modulation level adjustment circuit.
Description of the drive and final power amplifier stages.
Description of the automatic power control circuit.
Description of the frequency synthesizer unit.
Details on the frequency synthesizer's components and operation.
Description of the control circuit and CPU.
Description of the power supply circuit and its components.
Description of the transceiver's display unit and controls.
Pinout and function for the microprocessor IC404.
Pinout and function for the display unit microprocessor IC902.
Pinout and function for the shift register IC403.
List of components for the switch unit.
List of components for the display unit.
List of components for the TX-RX unit.
General parts list for the TK-7180/7189.
Parts list for the TK-7189 switch unit.
Parts list for the display unit, covering TK-7180 and TK-7189.
Parts list for the display unit.
Parts list for the TX-RX unit.
Parts list for the TX-RX unit (continued).
Parts list for the TX-RX unit (continued).
Parts list for the TX-RX unit (continued).
Parts list for the TX-RX unit (continued).
Parts list for the TX-RX unit (continued).
Parts list for the TX-RX unit (continued).
Parts list for the TX-RX unit (continued).
Parts list for the TX-RX unit (continued).
Overview of the transceiver's controls.
Operation features and entry for Panel Test Mode.
Table of frequencies and adjustment requirements.
List of test frequencies for alignment.
Procedures for test signaling and parameter adjustments.
Preparations and steps for transceiver tuning.
Guide to placing the transceiver in tuning mode.
Reference frequencies for level adjustments.
List of adjustable items and their display format.
Flowchart detailing the adjustment procedures.
List of required test equipment and major specifications.
Details and diagram for the microphone test cable.
Information about the VGS-1 check jig.
General adjustment procedures applicable to common settings.
Adjusting power supply voltage and modulation.
Adjusting VCO lock voltage in Panel Test Mode and Tuning Mode.
Adjustments specific to the transmitter section.
Procedure to adjust the transceiver's frequency.
Procedure to adjust frequency shift 1.
Procedure to adjust frequency shift 2.
Procedure to adjust maximum high power output.
Procedure to adjust maximum low power output.
Procedure to adjust high power output.
Checking high power output in Panel Test Mode.
Procedure to adjust low power output.
Checking low power output in Panel Test Mode.
Adjusting DQT balance for different channel bandwidths.
Adjusting maximum deviation for different bandwidths.
Checking microphone sensitivity in Panel Test Mode.
Adjusting QT deviation for different bandwidths.
Adjusting DQT deviation for different bandwidths.
Adjusting LTR deviation for different bandwidths.
Adjusting DTMF deviation for different bandwidths.
Adjusting MSK deviation for different bandwidths.
Adjusting TONE deviation for different bandwidths.
Adjusting receiver sensitivity levels.
Checking receiver sensitivity in Panel Test Mode.
Adjusting squelch levels for different bandwidths.
Adjusting low RSSI for different bandwidths.
Adjusting tight squelch for different bandwidths.
Adjusting high RSSI for different bandwidths.
Diagram showing adjustment points on PCBs.
Terminal functions for the TK-7189 switch unit.
Terminal functions for the display unit.
Terminal functions for TX-RX unit A/3.
Terminal functions for TX-RX unit B/3.
Terminal functions for CN427 connector.
Terminal functions for CN429 connector.
Solder land details for the ANI board.
Component and foil side views of the TK-7189 switch unit PCB.
Component and foil side views of the TK-7189 switch unit PCB (continued).
Component and foil side views of the display unit PCB.
Component and foil side views of the display unit PCB (continued).
Component and foil side views of the display unit PCB (continued).
Component side view of the TX-RX unit (A/3) PCB.
Component side view of the TX-RX unit (C/3) PCB.
Foil side view of the TX-RX unit (A/3) PCB.
Foil side view of the TX-RX unit (C/3) PCB.
Component side view of the TX-RX unit (B/3) PCB.
Component side view of the TX-RX unit (B/3) PCB (continued).
Foil side view of the TX-RX unit (B/3) PCB.
Foil side view of the TX-RX unit (B/3) PCB (continued).
Foil side view of the TX-RX unit (B/3) PCB (continued).
Schematic diagram for the switch unit.
Schematic diagram for the display unit.
Schematic diagram for the TX-RX unit (B/3).
Schematic diagram for the TX-RX unit (B/3) (continued).
Schematic diagram for the TX-RX unit (B/3) (continued).
Schematic diagram for the TX-RX unit (C/3).
Schematic diagram for the TX-RX unit (B/3) (continued).
Schematic diagram for the TX-RX unit (B/3) (continued).
Schematic diagram for the TX-RX unit (B/3) (continued).
Schematic diagram for the TX-RX unit (B/3) (continued).
Signal levels within the receiver section.
Signal levels within the transmitter section.
External view of the KRK-10 kit.
Description of KRK-10 components.
Parts list for the KRK-10 kit.
Parts list for the KRK-10 unit.
Parts list for the KRK-10 interface unit.
Exploded view and packing details for the KRK-10 kit.
Component side view of the KRK-10 interface unit PCB.
Foil side view of the KRK-10 interface unit PCB.
Schematic for the KRK-10 interface unit (A/2).
Schematic for the KRK-10 interface unit (B/2).
Terminal functions for CN1 connector (radio side).
Terminal functions for CN3 connector (radio side).
Terminal functions for CN2 connector (display side).
Terminal functions for CN4 connector (display side).
Overview of the KAP-2 accessory.
Overview of the KCT-40 accessory.
Overview of the KMC-35 microphone.
Overview of the KMC-36 keypad microphone.
Overview of the KCT-46 accessory.
Exploded view and packing details for the KRK-10 kit.
Component side view of the KRK-10 interface unit PCB.
Foil side view of the KRK-10 interface unit PCB.
Schematic for the KRK-10 interface unit (A/2).
Schematic for the KRK-10 interface unit (B/2).
Terminal functions for CN1 connector (radio side).
Terminal functions for CN3 connector (radio side).
Terminal functions for CN2 connector (display side).
Terminal functions for CN4 connector (display side).
General specifications of the transceiver.
Receiver performance specifications according to EN standard.
Transmitter performance specifications according to EN standard.
| frequency range | 136~174MHz |
|---|---|
| number of channels | Max. 512 |
| channel spacing (wide) | 25, 30kHz |
| channel spacing (narrow) | 12.5, 15kHz |
| operating voltage | 13.6V DC ± 15% |
| standby current drain | 0.4A |
|---|---|
| receive current drain | 1.0A |
| transmit current drain | 9.0A |
| duty cycle | Transmit : 20% |
|---|---|
| operating temperature range | –22°F~+140°F (–30°C~+60°C) |
| frequency stability | ± 0.00025% (–22°F~+140°F) |
| sensitivity (12dB SINAD) wide | 0.25µV |
|---|---|
| sensitivity (12dB SINAD) narrow | 0.28µV |
| selectivity wide | 80dB |
| RF power output | 30 to 1W |
|---|---|
| spurious response | 70dB |
| microphone impedance | 600Ω |
| antenna impedance | 50Ω |
|---|---|
| dimensions (W x H x D) | 6-5/16 x 1-3/4 x 6-3/16 in. (160 x 45 x 157 mm) |
| weight | 3.31lbs. (1.5kg) |