This document is an instruction manual for Kenwood's TK-690, TK-790, and TK-890 series transceivers, which are designed for land mobile applications. The manual provides essential information for unpacking, preparing, operating, and maintaining these devices.
Function Description:
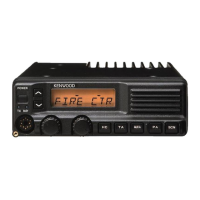
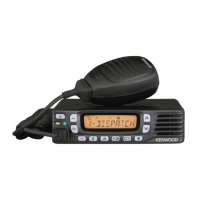
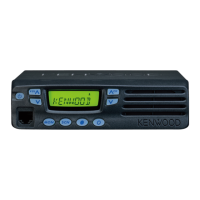
The Kenwood TK-690, TK-790, and TK-890 series are VHF/UHF FM transceivers. These devices are designed for dependable communication in land mobile environments, ensuring personnel can operate at peak efficiency. They incorporate advanced technology to provide quality and a range of features.
Important Technical Specifications:
The manual covers the following models:
- TK-690H: VHF FM Transceiver
- TK-790: VHF FM Transceiver
- TK-790H: VHF FM Transceiver
- TK-890: UHF FM Transceiver
- TK-890H: UHF FM Transceiver
The transceivers operate on 12V negative ground systems only.
The power cable assembly includes a 15A fuse.
The microphone cable can be ordered separately as E30-3313-X8.
Usage Features:
Basic Operations:
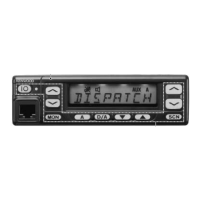
- Switching Power ON/OFF: Press the POWER switch to turn the transceiver ON or OFF. The display backlight illuminates when powered ON.
- Adjusting Volume: Turn the VOL control clockwise to increase volume and counterclockwise to decrease it.
- Selecting a Group: Use the GRP Up/Down keys or the CH control to increase or decrease group selection.
- Selecting a Channel: Use the Channel Up/Down keys or the CH control to increase or decrease channel selection.
- Making a Call: Select the desired group and channel. Ensure the channel is not in use (BUSY indicator will light if in use). Press and hold the PTT (Push To Talk) switch on the microphone, speak into the microphone (approximately 3 to 4 cm from lips), then release PTT to receive. Replace the microphone on the hanger when the call is finished.
Programmable Functions:
The GRP Up, GRP Down, MON, SCN, and PF1 ~ PF9 keys can be programmed with various functions. Users can consult their dealer for more information on these functions.
- Channel Up/Group Up & Channel Down/Group Down: Increase or decrease channel/group number. Momentary press changes by one step; pressing and holding scrolls through numbers.
- AN (Channel Name): Switches the display between Group/Channel number and alphanumeric Group/Channel name. A tone sounds with each switch.
- AUX A/AUX B/AUX C: Turns the respective output port ON or OFF. The corresponding icon appears/disappears, and a tone sounds.
- CH 1 (CH 1 Direct) / CH 2 (CH 2 Direct) / CH 3 (CH 3 Direct) / CH 4 (CH 4 Direct) / CH 5 (CH 5 Direct): Directly selects specific Group 1/Channel directories.
- D/A (Delete/Add): Adds/deletes a channel/group from the scanning sequence. Pressing momentarily adds a channel; pressing and holding for 2 seconds adds a group. To delete, press while the channel/group is displayed. While scanning, this key can temporarily delete an undesired channel from scan (requires more than 2 channels in sequence). To restore, turn scan OFF, then ON.
- DIM (Dimmer): Adjusts display and key backlight brightness. Also turns TX/BUSY indicators and DTMF microphone keypad backlight ON or OFF.
- EMG (Emergency Call): Initiates an emergency call (requires ANI board). No tone or display change during call. Turn transceiver power OFF to end.
- HA (Horn Alert): Turns Horn Alert ON or OFF. Activates if a call with 2Tone or DTMF signaling is received from the base station. A tone sounds and HA (or HORN ALERT) appears on the display when ON.
- HC (Home Channel):
- Fixed: Selects the pre-programmed Home Channel.
- Toggle: Selects the Home Channel; pressing again returns to the previous channel. If used during scanning, a second press returns to the revert channel.
- IC (Intercom): (Requires dual head configuration) Turns intercom ON or OFF. Allows communication between control head operators via PTT without transmitting over air. A tone sounds and INTERCOM appears. Works during scanning and receiving calls.
- MON (Monitor): Cancels QT/DQT and 2-Tone/DTMF signaling squelch. Press and hold for 2 seconds to hear background noise (unmute audio). MON icon appears when active.
- OPT (Scrambler): (Requires optional scrambler board) Turns scrambler ON or OFF. A tone sounds and OPT icon appears when enabled. To change the scrambler code:
- Press and hold OPT for 1 second (tone sounds, CODE appears).
- Use GRP Up/Down keys or CH control to select desired setting.
- Press OPT (tone sounds, returns to normal channel).
- OST (Operator Selectable Tone): Activates a signaling tone from the pre-programmed QT/DQT list. OST icon appears. To select a decode/encode pair:
- Press and hold OST for 1 second (tone sounds).
- Use GRP Up/Down keys or CH control to select desired pair (TONE and number or OST and name appear).
- Press OST (tone sounds, returns to normal channel).
- PA (Public Address): Uses transceiver as a PA amplifier. A tone sounds and PA (or PUBLIC ADDRESS) appears. Works during scanning and receiving calls.
- RCL (Channel Recall): During scan, selects the last called channel (rCL or RCL appears). Pressing again returns to the previous channel.
- SCN (Scan): Starts or stops scanning. A tone sounds, SCN (or SCAN) icon appears, and SCAN or OFF HOOK revert channel number appears. An error tone sounds if fewer than 2 channels are in sequence. Scan can be ON HOOK (microphone on hook to activate) or OFF HOOK (activates regardless of microphone position). When a signal is received, scan halts, audio unmutes, and channel number/name appears. Priority channels (P1, P2) are periodically checked; transceiver switches automatically if a signal appears on a priority channel. To enter carrier squelch scan, press MON while scan is in progress.
- SP (Speaker Internal/External): Switches between internal and external speakers. A tone sounds and SP icon appears when "External" is selected. All audio emits from PA speaker when external is selected.
- SPM (Speaker 1-2 Mute): (Requires dual head configuration) Disables speaker audio from the other control head. A tone sounds and MUTE appears with the muted head number.
- SQ (Squelch Level): Manually adjusts squelch level:
- Press SQ (tone sounds, SQL or SQUELCH appears with current level).
- Use GRP Up/Down keys or CH control to select desired level.
- Press SQ (tone sounds, returns to normal channel).
- TA (Talk Around): Makes a call without using a repeater. A tone sounds and tA (or TA) appears on the 3-digit display. Useful for communicating with nearby mobiles.
DTMF Calls (with optional KMC-28 DTMF microphone):
- Manual Dialing: Press and hold PTT (or if Keypad Auto PTT is enabled, no PTT press needed), then press desired DTMF keys.
- Redialing: Redials the last 16-digit number. Press
* (A appears), then 0. Redial memory is erased if power is switched OFF.
- Auto Dialing (dealer enabled/disabled):
- Store:
- Press
# (D appears).
- Enter up to 16 DTMF digits (press and hold PTT, then
2, 5, 8, 0, *, # for A, B, C, D, *, # respectively).
- Press
#.
- Select memory channel (1~9) by pressing a DTMF key.
- Confirm:
- Press
# (D appears).
- Press
* (D- appears).
- Press memory channel key (1~9) to confirm stored number (digits appear, DTMF tones sound).
- Send:
- Press
* (A appears).
- Press memory channel key (1~9) to send stored number (transmission begins, digits appear).
- Clear:
- Press
# (D appears).
- Press
# again (D-CLR appears).
- Press memory channel key (1~9) to erase stored number.
Other Transceiver Functions (dealer-set):
- Time-out Timer (TOT): Automatically inhibits transmission after a specified time if PTT is held down. A warning tone sounds; release PTT to stop.
- Busy Channel Lockout (BCL): Prevents interference with other stations. If PTT is pressed on an in-use channel, a warning tone sounds, and transmission is inhibited. Release PTT to stop. If BCL override is enabled, press PTT again within 0.5 seconds to transmit.
- Operator Selectable Priority Channel: Sets Priority1 and Priority2 channels. To set P1, press and hold SCN, then press MON 3 times. To set P2, press and hold SCN, then press MON 2 times.
- 2-Tone/DTMF Signaling: Opens squelch only upon receiving the correct code. CALL icon flashes.
- Transpond: If enabled, transceiver automatically sends an acknowledgment signal.
- Alert Tone: If enabled, an alert tone sounds upon receiving the signal.
- Roll Over/Dead End:
- Roll Over: When reaching maximum/minimum number using GRP Up/Down keys or CH control, the number rolls over to the opposite extreme and continues.
- Dead End: When reaching maximum/minimum number, the value stops changing. User must rotate CH control in the opposite direction.
- Dead Beat Disable (DBD): After receiving a DBD code, the transceiver sends an acknowledgment, and transmission is disabled. A DBD reset code re-enables transmission.
- Timed Power OFF: (Requires ignition-sense connection to the 9-pin rear connector) When vehicle ignition is turned OFF, a timer starts. After the pre-selected time, the transceiver turns OFF. The timer resets when ignition is turned ON and OFF.
Maintenance Features:
- Installation: Instructions for mounting the transceiver, connecting the power cable, antenna, and microphone are provided. It emphasizes securing the transceiver with the supplied mounting bracket for passenger safety.
- Troubleshooting: The manual advises consulting a Kenwood dealer, authorized service facility, or the factory for detailed information and service.
- Safety Notices: Includes warnings regarding explosive atmospheres (turn OFF transceiver when fueling or near blasting caps), injury from radio frequency transmissions (maintain distance from antenna), and potential malfunction of vehicle electronic equipment due to RF energy.
- FCC Warnings: Informs users that unauthorized changes or modifications to the equipment may cause harmful interference and revoke the user's authority to operate the equipment. Provides measures to correct interference (reorient antenna, increase separation, connect to different circuit, consult dealer).