14
EN
Connecting system control cords after connecting a KENWOOD
audio component system lets you take advantage of convenient
system control operations.
This unit is compatible only with the [SL-16] mode. The system
control operation is not available if the unit is connected in the
[XS8], [XS], or [XR] connection mode.
If your component has the mode select switch, set the connected
components to the [SL16] mode.
• You may connect the system control cord to either the up or down
jack.
EXAMPLE: [SL16] mode connections
The underlined portion represents the setting of the system control
mode.
• In order to take advantage of the system control operations, the
components must be connected to the correct jacks. To use a CD
player it must be connected to the CD jacks. To use a cassette deck
(or MD recorder) it must be connected to the MD/TAPE jacks.
When using more than one CD player (etc.) only the one connected
to the specified jacks may be connected for system control.
• Some CD players and cassette decks are not compatible with the
[SL16] system control mode. Do not make system connections
with equipment that is not [SL16] compatible.
• Some MD players are not system control compatible. You cannot
make system control connections to this kind of equipment.
Notes
1. [SL16] equipment cannot be combined with [XR], [XS], and [XS8]
equipment for system operations. If your equipment consists of
this kind of combination, please do not connect any system control
cords. Even without system control cords, normal operations can
be carried out without effecting performance.
2. Do not connect system control cords to any components other
than those specified by KENWOOD. It may cause a malfunction
and damage your equipment.
3. Be sure the system control plugs are inserted all the way in to the
system control terminals.
Connecting the system control
Setting up the system
SYSTEM CONTROL OPERATIONS
Remote Control
Lets you operate this unit with the system remote supplied with the
receiver.
Automatic Operation
When you start playback from a source component, the input selector
on this unit switches to that component automatically.
Synchronized Recording
Lets you synchronize recording with the start of playback when
recording from CD, MD or analog discs.
Operation
When the STANDBY indicator is lit, the power turns ON when you press
the POWER
key on the remote control. When the power comes ON,
press the key you want to operate.
• When pressing more than one remote control key successively,
press the keys securely by leaving an interval of 1 second or more
between keys.
Notes
1. The supplied batteries may have shorter lives than ordinary batteries
due to use during operation checks.
2. When the remote-controllable distance gets shorter than before,
replace both batteries with new ones.
3. Placing the remote sensor in direct sunlight, or in direct light from
a high frequency fluorescent lamp may cause a malfunction.
In such a case, change the location of the system installation to
prevent malfunction.
Preparing the remote control
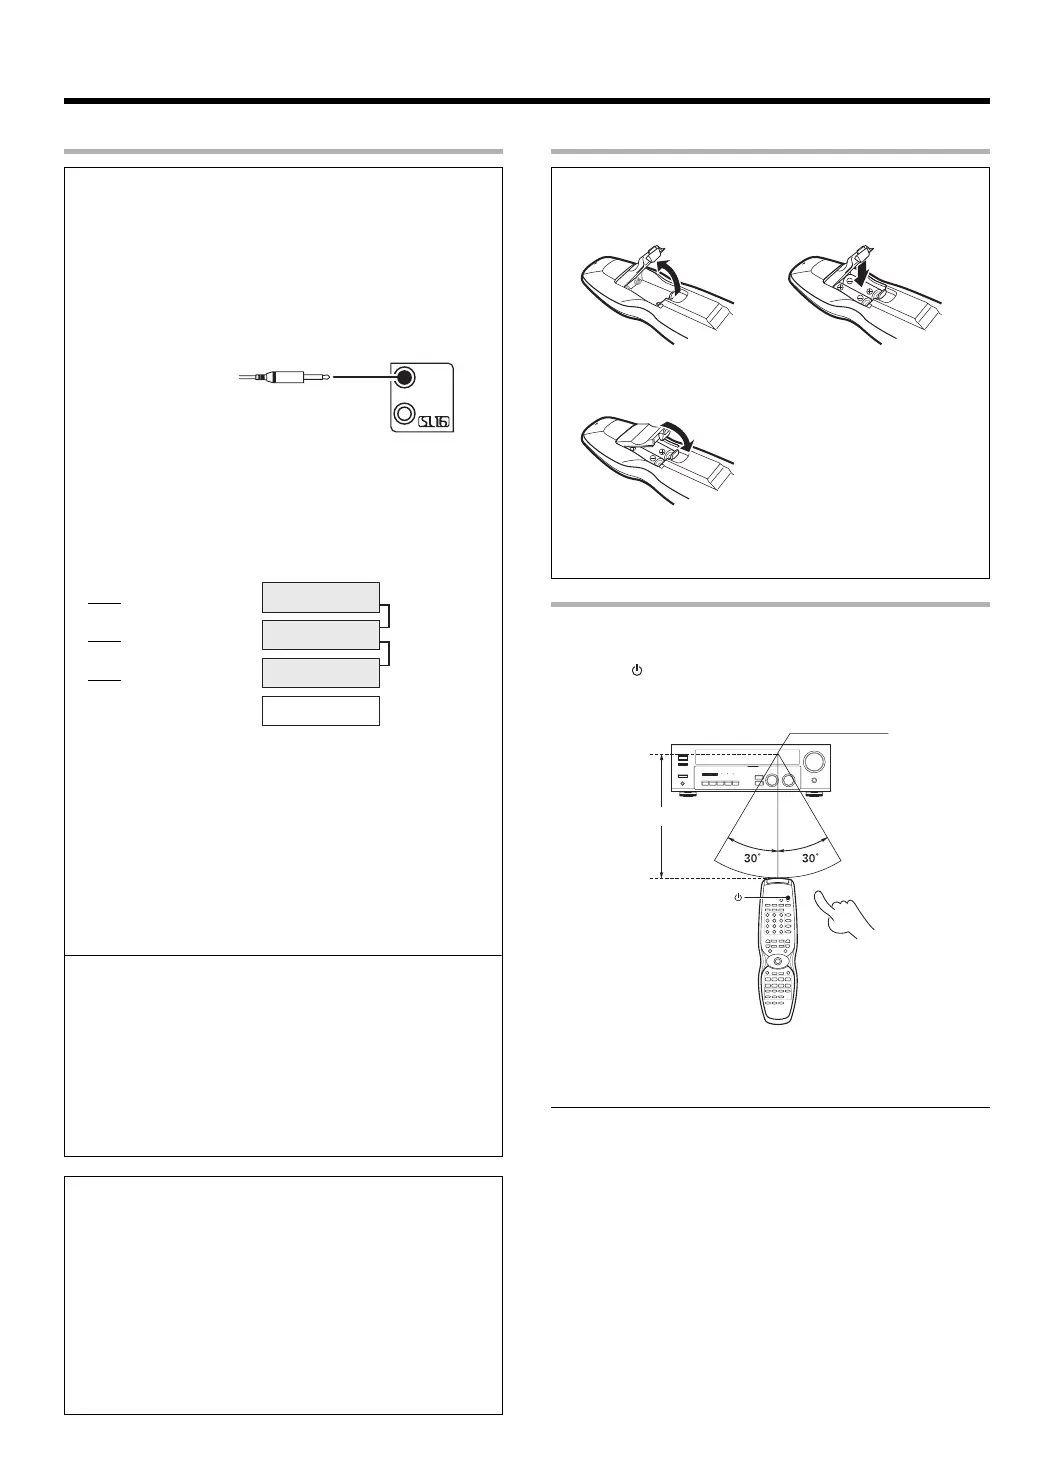
Loading the batteries
1 Remove the cover. 2 Insert the batteries.
3 Close the cover.
• Insert two AA-size (R6) batteries as indicated by the polarity markings.
SYSTEM
CONTROL
SYSTEM CONTROL
cord
Receiver
Cassette deck
or MD recorder
CD player
Record player
SYSTEM
CONTROL
cord
[
SL16]
[
SL16] [XS] [XS8] [XR]
[
SL16] [XS] [XS8]
[XS]
Operating range
(Approx.)
Remote sensor
Infrared ray system
6 m
POWER
*5228/07-14/EN 14/06/2002, 11:54 AM14
 Loading...