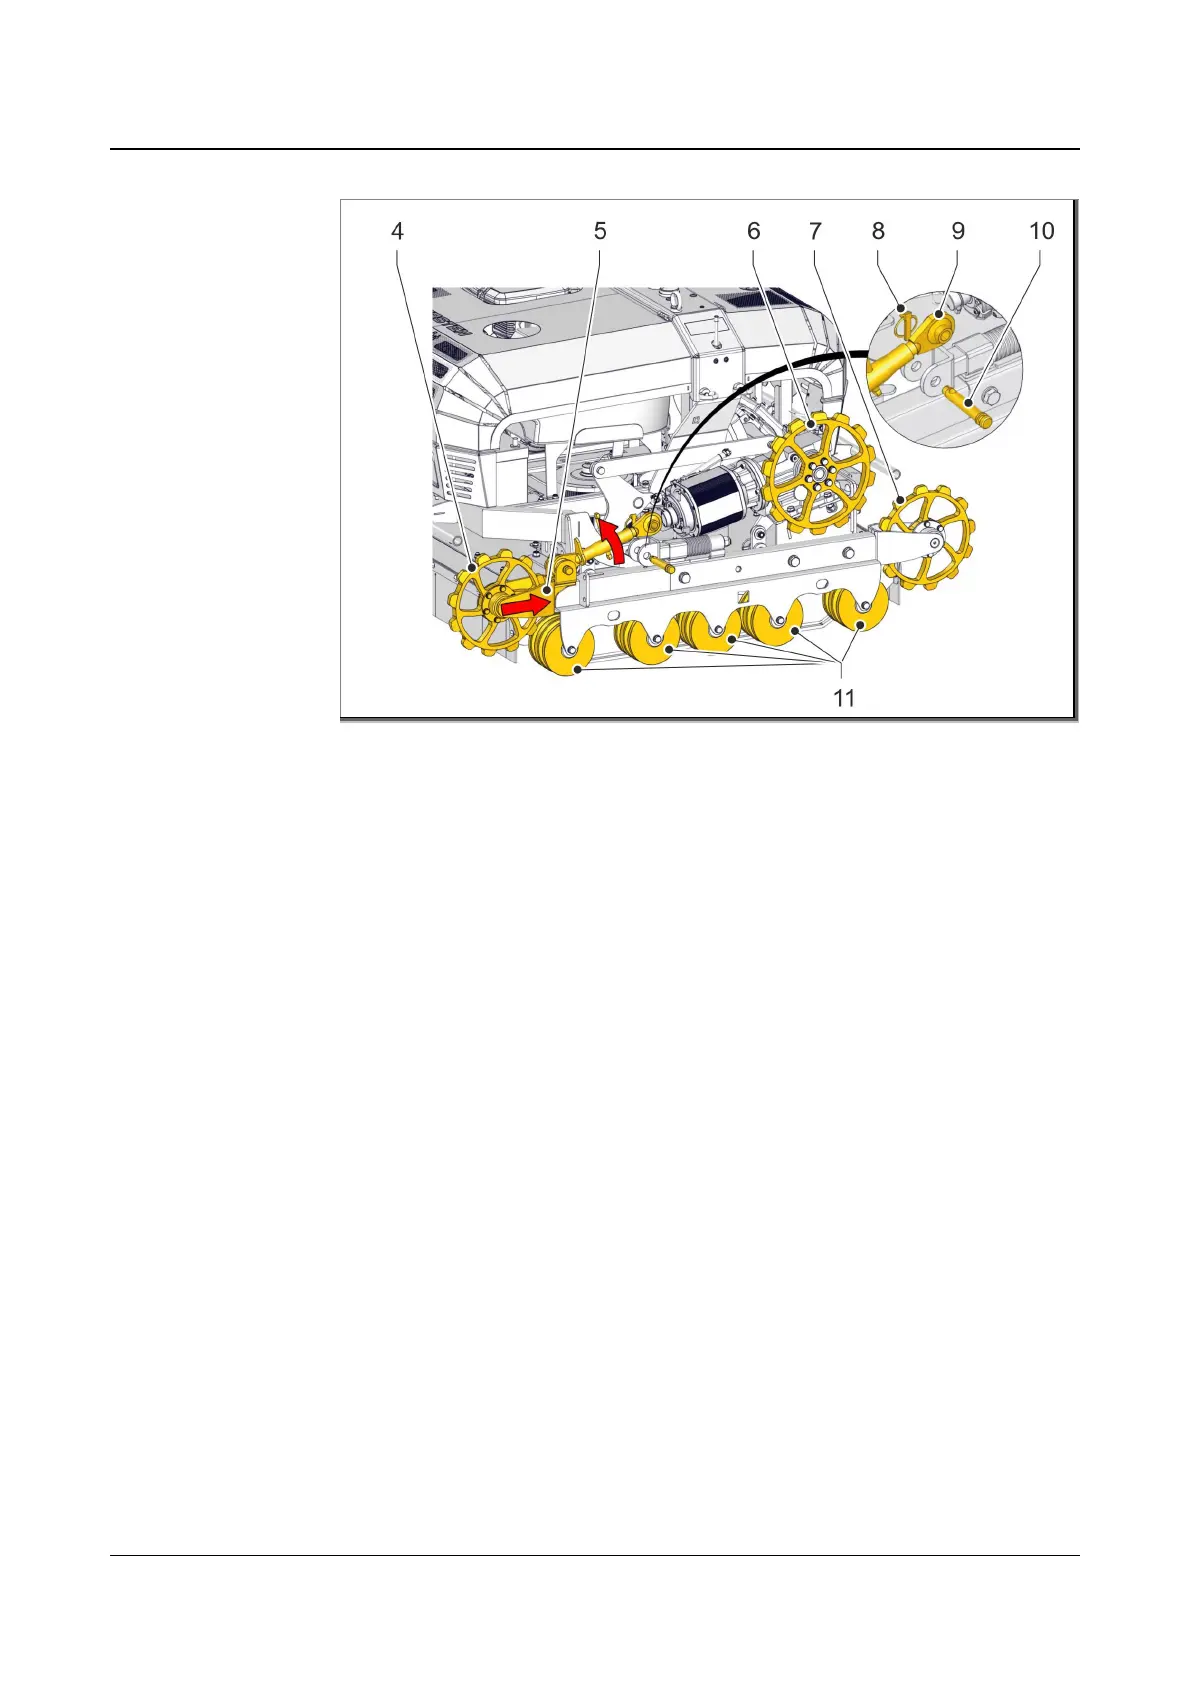
: Lifting up the drive chain
4 Front diverting wheel
5 Sliding element
6 Drive wheel
7 Rear diverting wheel
8 Locking pin
9 Manual clamping mechanism
10 Connecting bolt
11 Rollers
4. Twist the manual clamping mechanism (9) together and push the sliding
element (5) in fully.
5. Open the locking pin (8) of the connecting bolt (10) and pull it out of the
connecting bolt (10).
6. Pull the connecting bolt (10) out of the manual clamping mechanism (9).
7. Swivel the manual clamping mechanism (9) upwards on one side and push
the sliding element (5) as far into the roller carrier (11) as you can.
8. Place the drive chain on the rollers (11) from below.
9. Guide the drive chain over both the front (4) and rear (7) diverting wheels.
10. Place the drive chain on the drive wheel (6).
11. Slide out the sliding element (5) as far as possible using your hand.
12. Swivel the manual clamping mechanism (9) back into place and connect it to
the frame with the connecting bolt (10).
13. Insert and close the locking pin (8).