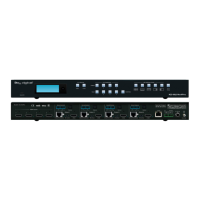
Quick Setup Guide
Begin with the KD-MLV4X4PRO and KD-EXMLVRx units, all source, display devices, audio system, and
any other connected peripherals powered off.
Connect
1. Connect video sources into the HDMI input ports
2. Connect video displays / projectors to the HDMI output ports on the main and Rx units
3. Connect CAT5e/6 cabling from the main unit’s UHDoTP outputs to the RX unit’s UHDoTP input
4. Connect audio using the digital or analog outputs ports located on the main unit.
5. Connect Control System. For KD-App control and/or IP control from a control system or PC, connect
TCP/IP port to network. RS-232 and IR control may also be utilized
6. (Optional) Connect IR to / from Rx units
a. If controlling display/projector: Connect from control system into IR In/Out ports of main unit
and connect IR emitter to the IR Out port of the respective Rx unit (1→1 … 4→4).
b. If controlling video source: Connect IR sensor to Rx unit to collect line-of-site IR from a
remote. Connect IR emitter to the respective IR In/Out port of main unit (1→1 … 4→4).
7. Connect power. Screw-in power supply to the KD-MLV4X4PRO unit, and then connect power to
outlets.
8. Power on sources, displays, and audio systems to begin use.
Configure
Configure KD-MLV4X4PRO with Key Digital Management Software Pro (KDMS Pro). Download HERE
1. Connect to KD-MLV4X4PRO from your PC using the USB micro port on the face of the unit
2. Open the KDMS Pro software and perform a USB scan (2a). Choose “NO” and Start Scan when the
USB Device Scan prompt appears (2b)
3. Choose the detected device from the Devices window (fig. 3)
4. Enter the desired unit name (4a), IP address (4b) and IP gateway (4c) settings for the unit
5. Save (5)
6. Select the desired EDID handshake for each video source (6)
7. (Optional) Set the direction of the IR signal. The default setting / signal flow is IR In on the MLV4x4Pro
and IR out on the Rx units to control the connected displays/projectors.
8. Set the desired Input/Output names by entering the Input/Output Settings section of the properties
window and selecting the Change Input/Output Name button (7a), selecting the desired input/output
(7b), entering the desired name (7d) and pressing the Change button (7d).