Installation Note N9010-90067 15
Option EXM, External Mixing Upgrade Kit
Add EXT MIXER Connector and Cable to Front Frame Assembly
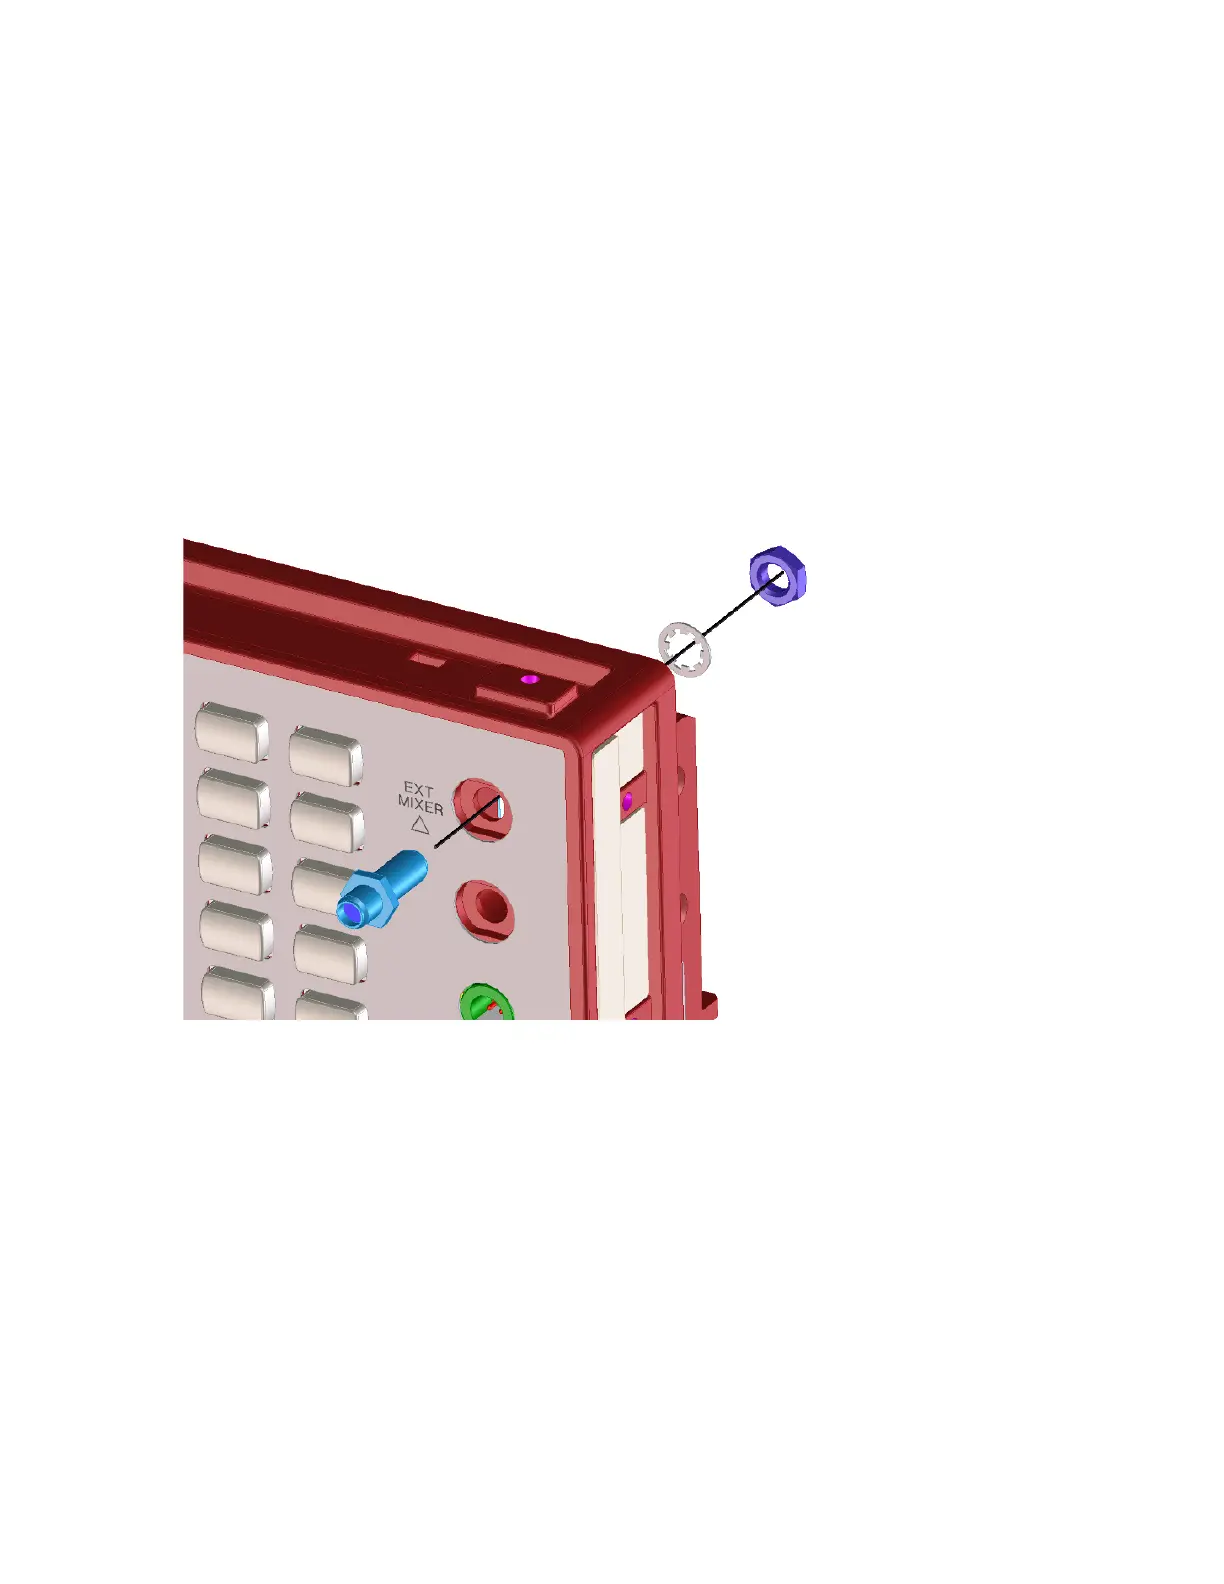
1. Locate the SMA female to SMA female connector (1250-1666), ¼” lock washer (2190-0067),
and ¼” hex nut (2950-0223) in the kit. If the SMA connector includes hardware, discard that
hardware and use the 2190-0067 lock washer and 2950-0223 hex nut included in this kit.
2. Remove the hole-plug in the top-most hole in the upper right corner of the front frame
assembly.
3. Insert the SMA female to SMA female connector in the hole in the front frame assembly from
the front of the assembly. The hex feature on the connector should engage with the recess in
the front frame assembly. Refer to Figure 8, “Attaching SMA Female Connector,”. Secure the
connector using the ¼” lock washer and ¼” hex nut from the rear. Torque to 21 inch-pounds.
Figure 8 Attaching SMA Female Connector
4. Locate the External Mixing, Front Panel semi-rigid coax assembly in the kit, part number
N9020-20166. This is W27. Note that this cable is symmetrical; either end can be connected to
the front-panel connector.
5. Connect one end of W27 to the SMA female connector as shown in Figure 9, “Connecting W27
to Ext Mixer Connector,”.
6. Orient W27 so that the cable slopes upward from the Ext Mixer connector at a 15 degree
angle. The top of the connector should be approximately level with the top of the shield over
the Front Panel Interface board. Refer to Figure 10, “Proper Orientation of W27,”. Torque the
cable nut on the Ext Mixer connector to 10 inch-pounds.