128 Keysight FieldFox Handheld Analyzers Service Guide
Repair and Replacement Procedures
Removing and Replacing the Case Group Parts
7-
8. Position the rear case directly over, and aligned with, the front case and
the side panels as shown.
9. Make sure the battery cable is tucked in between the measurement group
assemblies and the speaker side panel and that it is not in the path of the
screw hole indicated.
10.Firmly press the cases together being careful not to damage the gaskets.
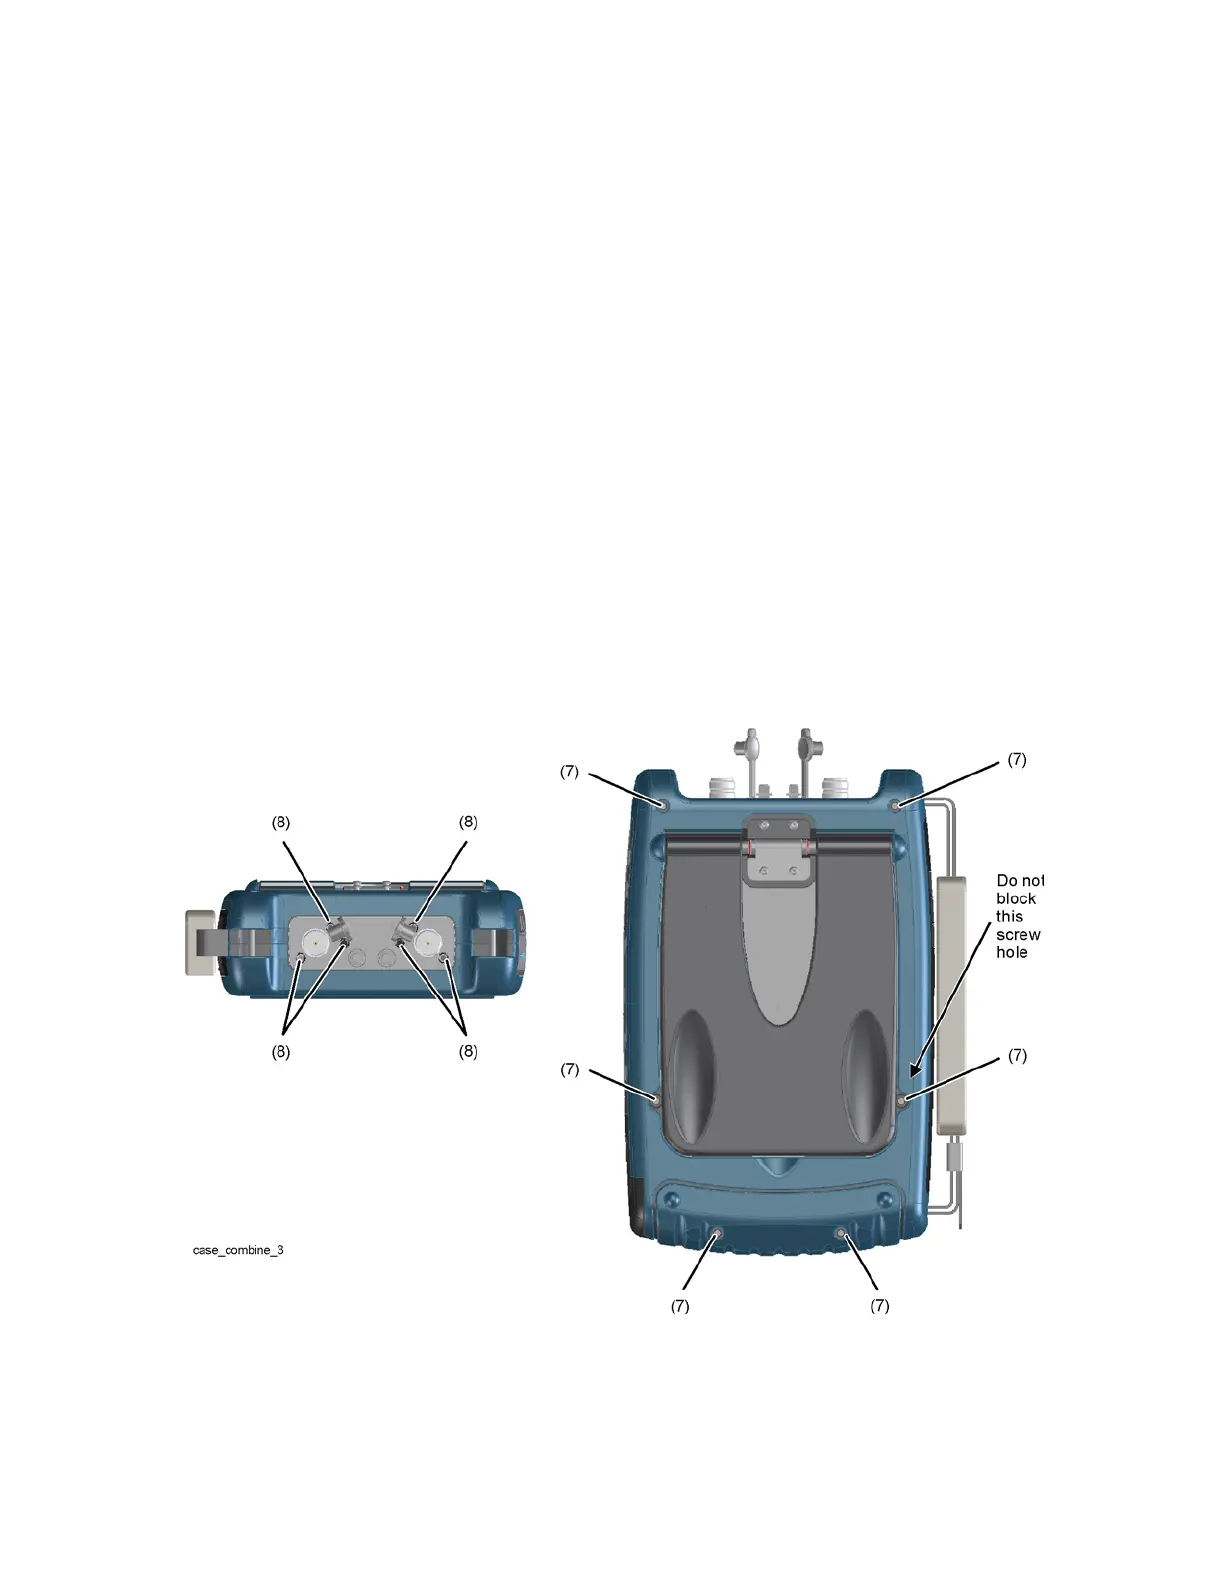
11. Refer to Figure 7-16. Install six new screws (7) to secure the rear case to
the front case. These new screws are provided in the Repair and
Re-assembly Kit.
The N995xA and N996xA models have an additional six screws that secure
the rear case. Refer to Figure 7-17. Install the six screws (1) including two
that are behind the kickstand. Torque to 9 inch-pounds.
Torque all screws to 9 inch-pounds.
12.Refer to Figure 7-16. Tighten the six or eight screws (8) that secure the RF
top panel. Torque to 9 inch-pounds.
Figure 7-16 Combining the Front and Rear Cases (3)
 Loading...