9
SoloX Subwoofers
Mounting
Mounting
Now that you have opened the box and read
“The Adventures of Sam Stikman” and decided on which
enclosure design to use, you may now remove the SoloX from
it’s box. Please follow the instructions
lined out here to insure proper
installation.
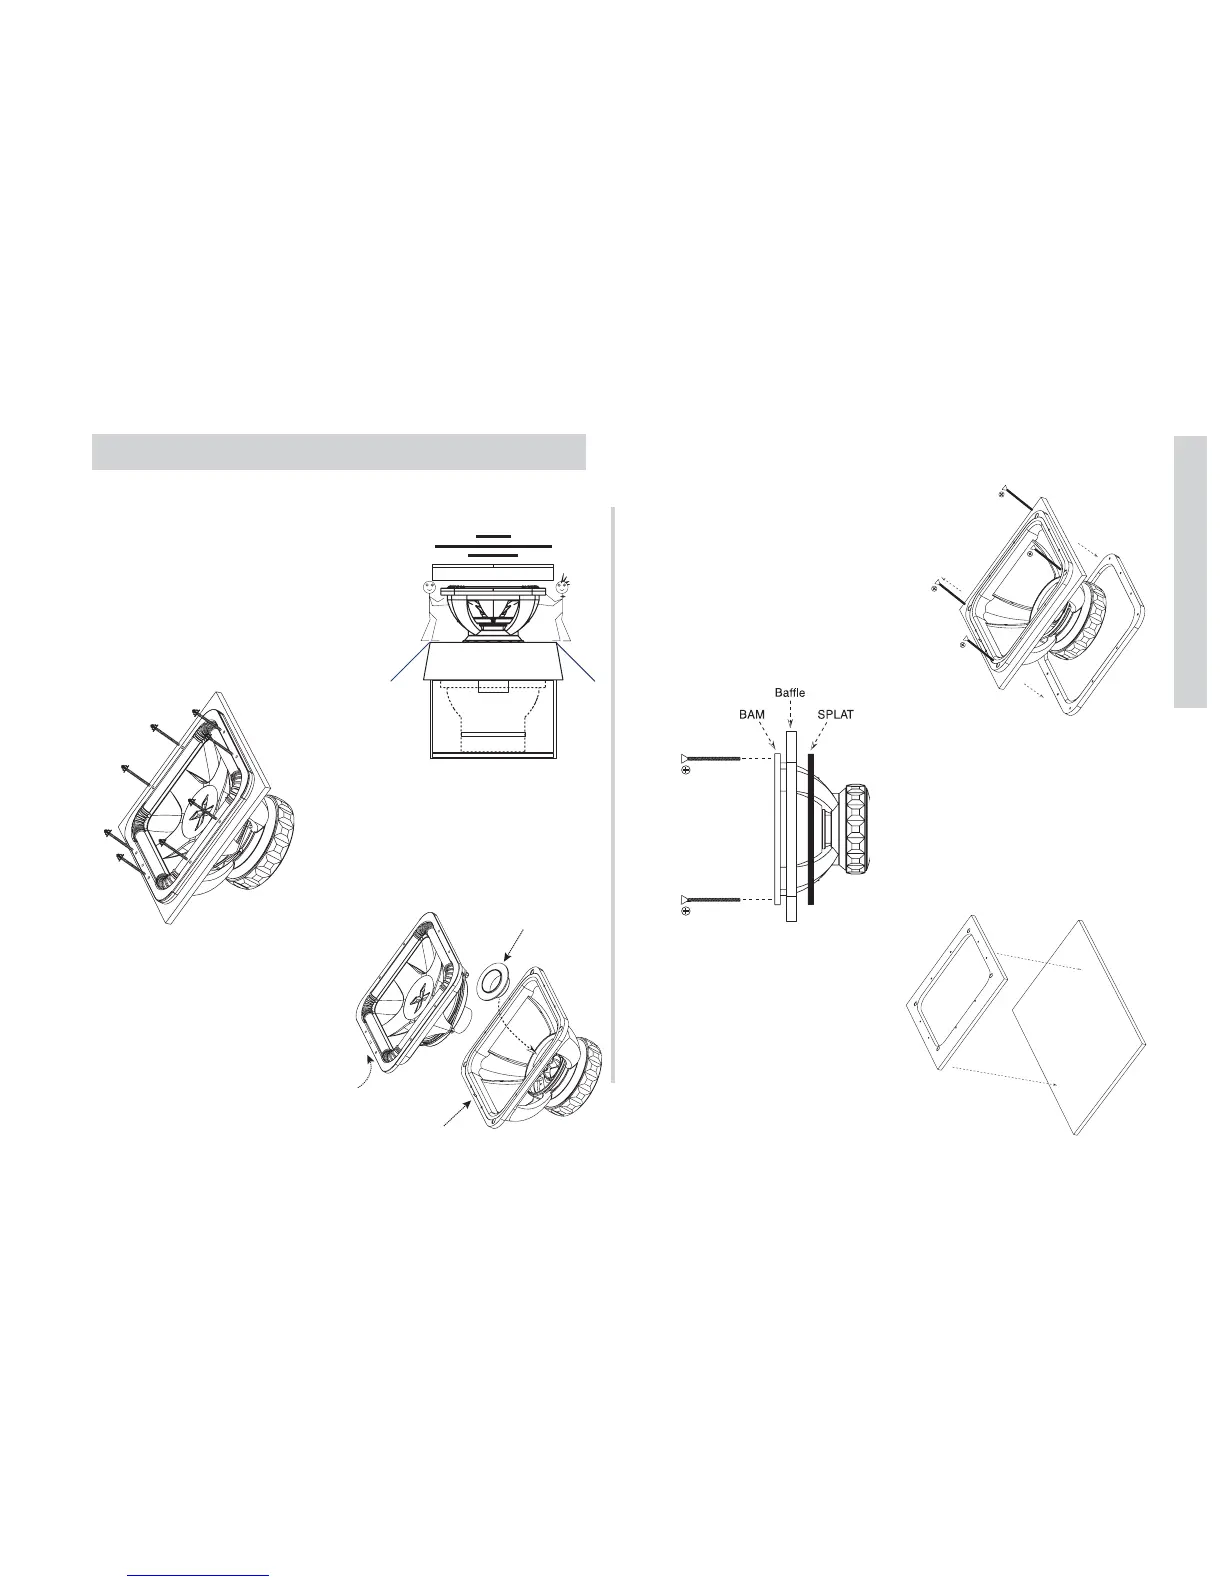
1. With assistance, remove the
SoloX from the cardboard facilitation
chamber.
2. Once out of the carton remove
the (8) eight bolts securing the
SPAIR to the BAM and wood baffle
assembly. Place SPAIR in safe
clean location!
ATTENTION!
3. Install the Gap Cap into the
BAM around the pole-piece to
protect the motor assembly from
debris while you are installing the
woofer. If any metal shavings
were to fall into the gap, they
would be next to impossible to
remove! Please use the Gap
Cap!
4. With the Gap Cap now
installed remove the (4) Phillips
Head Machine Screws that lock
the BAM to the wood baffle
assembly.
The SPLAT and wood baffle will
now come free from the BAM.
The baffle will now become your
mounting template.
5. Place the wood template on
your enclosure baffle to mark the
holes for mounting.




 To Next Page