Do you have a question about the Kidde i12010SCA and is the answer not in the manual?
Specific model number for the smoke alarm: i12010SCA.
Indicates compliance with safety standards like UL listed and Homologué.
Describes the 120V AC operation with sealed 3V Lithium battery backup.
Steps to take immediately when alarm sounds, including alerting children.
Guidelines for evacuation: checking doors, crawling low, and escape routes.
Instructions for calling 911 and accounting for family members at a meeting place.
Strict warning against re-entering a burning building until cleared by officials.
Situations where smoke alarms may not be effective, per NFPA 72.
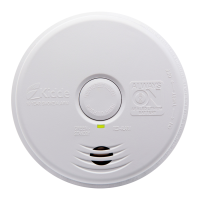
Details the alarm model, dual station capability, and its ten-year limited warranty.
States the unit is only approved to interconnect with other Kidde products.
Provides a toll-free number for operation or installation questions.
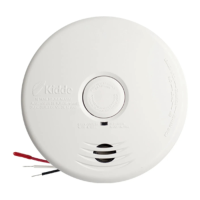
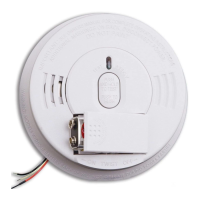
The primary control for testing, silencing, and resetting the alarm.
The dual-color (Green & Red) LED for status indication.
The component that emits the audible alarm signal.
A mechanism to deter unauthorized removal of the alarm from its mounting.
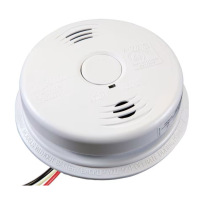
The terminals for connecting the alarm to the AC power supply.
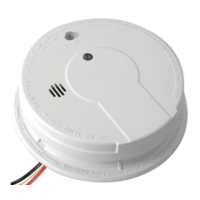
Details like 85-decibel alarm, ionization sensor, and sealed battery backup.
Notes its ability to connect with other Kidde smoke and CO alarms.
Describes signals for SMOKE ALARM and LOW BATTERY conditions.
Indicates end-of-life with a double chirp and flash every 30 seconds.
Signals a malfunction with a chirp and LED flash every 30 seconds.
How the alarm monitors air for products of combustion.
Discusses ionization vs. photoelectric sensing and fire unpredictability.
Emphasizes regular testing and proper battery installation for reliable operation.
Advice on installing on each level, in hallways, and near sleeping areas.
Importance of placing alarms in rooms where sleepers might close doors.
Recommends mounting in the center of the ceiling for optimal coverage.
Details distances from walls and ceilings for standard installation.
Instructions for mounting on sloped, peaked, or cathedral ceilings.
Specific guidance for mobile homes, considering insulation and temperature.
Warning against installing near garages, kitchens, bathrooms, or fuel-burning appliances.
Avoids dusty/greasy areas, high airflow, and insect-prone locations.
Specifies acceptable operating temperature (4.4°C-37.8°C) and humidity (85%) ranges.
Must be installed per NFPA 72 and by qualified electricians.
Requires 120V AC from a non-switchable circuit, not GFCI protected.
Details on running interconnect wires and resistance limits (max 10 ohms).
Mandatory instruction to turn off power before wiring the alarm.
Instructions for the unused red wire in single-station setups.
Max 24 devices, 18 total alarms, and 305m wire run in an interconnect system.
Consequences of improper connection: damage, failure, shock hazard.
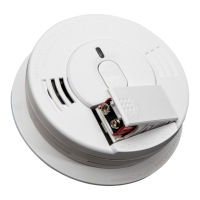
Securing the bracket using screws and ensuring proper alignment.
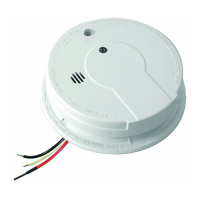
Pulling the AC connector through the mounting bracket's center hole.
Rotating the alarm onto the bracket until it ratchets into place.
Verifying the green AC Power On Indicator is lit.
How to test the alarm safely using the test/reset button.
Emphasizes the necessity of weekly testing for reliable functionality.
Lists compatible Kidde smoke, CO, and combo alarms, and accessories.
Smoke alarms take precedence over CO alarms when both conditions are present.
Temporarily desensitizes alarm for nuisance alarms for up to 9 minutes.
How to put the alarm into HUSH mode using the test/reset button.
Warning to identify smoke source and ensure safety before using HUSH.
Describes red LED flashes for smoke alarm, low battery, end of life, and unit error.
Details green LED for standby, alarm memory, initiating alarm, trouble fault, and HUSH mode.
How to break posts to engage the tamper-resist tab for locking.
Procedure to press the tab and rotate the alarm off the bracket.
How to remove the alarm by rotating it in the 'OFF' direction.
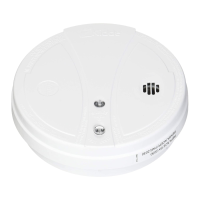
Alarm uses a sealed 3V Lithium battery lasting its lifetime.
Indicates low battery with chirps and flashing LEDs.
Chirps twice every 30 seconds after 10 years, requiring immediate replacement.
Deactivation is permanent, stops detection, and depletes battery.
Steps to remove alarm, locate label, break label, and slide tab to OFF.
Improper deactivation can cause lithium battery fire or hazard.
Weekly testing and monthly vacuuming of cover and vents.
Avoid detergents, solvents, sprays near unit; do not paint.
Protect sensors in a plastic bag during floor finishing or painting projects.
Key elements: familiarization, practice drills, meeting places, and calling 911.
Ensuring children hear and respond appropriately to alarms.
Responsibility of capable individuals to assist others during an alarm.
Avoiding smoking in bed, unattended cooking, and child play with lighters.
Training on recognizing alarms, escape plans, and 'Stop, Drop, Roll'.
Importance of placement and knowing how to use fire extinguishers.
Mandatory installation locations for smoke alarms per NFPA 72.
Suggests extra alarms for unprotected areas and lists recommended locations.
Information on the radioactive element used in ionization sensors.
Details coverage for defects in material, workmanship, or design for ten years.
Lists conditions that void the warranty, like damage or improper maintenance.
Provides product support line number and website for inquiries.
| Brand | Kidde |
|---|---|
| Model | i12010SCA |
| Category | Smoke Alarm |
| Language | English |