EasyManua.ls Logo

Kimberly-Clark PROFESSIONAL 09217 - User Manual

Default Icon
3 pages
Print Icon
To Next Page IconTo Next Page
Loading...
For available spare parts contact your sales representative.
Enclosed
Product Codes
09217 White
(x4) (x4)
Install Dispenser Bracket
Installation
IMPORTANT! For secure mounting, follow these
instructions thoroughly. Ensure that the proper
mounting hardware is used for the appropriate
wall type.
1. Assess wall surface material to determine if
screw anchors are required.
2. Mount the dispenser with the bottom edge
at the desired height using a minimum of 4
screws, usually 48” inches above the oor or
12” above the counter (Figure 1). Please refer
to local ADA guidelines for nal placement.
INSTRUCTIONS DE MONTAGE POUR LES
BOITES DISTRIBUTRICES
IMPORTANT! Pour un montage sécurisé, suivez
attentivement ces instructions. Assurez-vous que le
matériel de montage approprié est utilisé pour le type de
mur.
1. Évaluez le matériau de la surface du mur pour
déterminer si des vis d’ancrage sont nécessaires.
Form 034169
1.
Tools Required:
Use correct
drill bit for
anchor size
KIMBERLY-CLARK PROFESSIONAL®
UNIVERSAL FOLDED TOWEL DISPENSER
KIMBERLY-CLARK PROFESSIONNEL® DISTRIBUTRICE
UNIVERSEL DE SERVIETTES PLIÉES
*Check for ADA
regional & local
installing/mounting
requirements.
48” from oor
12” from
counter
Question and Answer IconNeed help?

Do you have a question about the Kimberly-Clark PROFESSIONAL 09217 and is the answer not in the manual?

Overview

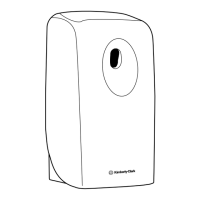
The Kimberly-Clark Professional Universal Folded Towel Dispenser is a wall-mounted or counter-mounted unit designed to dispense folded paper towels. It is available in white (Product Code 09217) and is intended for use in commercial and public restrooms, kitchens, and other areas where hand drying is required.

Function Description:

The primary function of this device is to provide a convenient and hygienic way to dispense folded paper towels. Users can pull towels from the bottom opening of the dispenser, and the design ensures that towels are presented one at a time, promoting controlled usage and reducing waste. The dispenser is designed to be refilled with folded towels, which are loaded from the top.

Important Technical Specifications:

  • Mounting Options: The dispenser can be mounted on a wall or placed on a counter.
    • Wall Mounting: When wall-mounted, the bottom of the dispenser should be at least 48 inches from the floor, and the top should be no more than 24 inches from the counter. For ADA compliance, the bottom of the dispenser should be at least 24 inches from the floor, and the top should be no more than 48 inches from the floor. The mounting requires four screws, usually 48 inches above the floor or 12 inches above the counter.
    • Counter Mounting: When placed on a counter, the dispenser sits directly on the surface.
  • Dimensions: The dispenser has specific dimensions to accommodate folded towels and ensure proper dispensing. While exact dimensions are not provided, the visual representation suggests a compact design suitable for various spaces.
  • Material: The dispenser is constructed from durable materials, likely plastic, to withstand frequent use in commercial environments.
  • Color: White (Product Code 09217).
  • Tools Required for Installation:
    • Measuring tape
    • Pencil
    • Level
    • Drill
    • Drill bit (size depends on anchor size)
    • Screwdriver
    • Hammer (optional, for anchors)

Usage Features:

  • Easy Loading: The dispenser features a top-loading mechanism for refilling. To load, the user opens the dispenser using the provided key (Figure 1). When loading towels, short folded edges should face downward and forward through the dispensing opening (Figure 2). It is crucial not to overload the cabinet to ensure proper dispensing.
  • Visual Towel Level Indicator: The dispenser is designed so that the towels are refilled when they reach the bottom of the side lens (Figure 3). This allows for easy monitoring of towel levels without needing to open the dispenser.
  • Optional Push Button: The dispenser includes an optional push button feature. This button can be installed in a hardware packet. To install, raise the end of the lock spring and slide the push button under the lock spring with the wide edge facing toward the edge of the door, then insert the button through the hole in the door (Figure 1, Optional Push Button section). This button likely provides an alternative or additional method for opening the dispenser for loading or maintenance.
  • Decorator Strip Installation: The dispenser allows for the installation of a decorator strip. To install, the decorator strip is desired, open the cover, and slide the decorator strip into place (Figure 1, Decorator Strip Installation section). This feature allows for customization or aesthetic enhancement of the dispenser.
  • ADA Compliance: The installation instructions provide guidance for mounting the dispenser to comply with ADA (Americans with Disabilities Act) guidelines, ensuring accessibility for individuals with disabilities. This includes specific height requirements for wall mounting.

Maintenance Features:

  • Cleaning: While not explicitly detailed, the smooth surfaces of the dispenser are likely easy to wipe clean with appropriate cleaning solutions, ensuring hygiene in public spaces.
  • Refilling: The easy-loading mechanism facilitates quick and efficient refilling of towels, minimizing downtime and ensuring a continuous supply.
  • Durability: The robust construction of the dispenser is designed for long-term use in high-traffic environments, reducing the need for frequent repairs or replacements.
  • Secure Closure: The dispenser can be locked using a key, preventing unauthorized access to the towels and reducing tampering or theft. The optional push button may also serve as an additional security or access mechanism.

Installation Instructions Summary:

  1. Assess Wall Surface: Determine if screw anchors are required based on the wall material.
  2. Mount Dispenser: Position the bottom edge of the dispenser at the desired height using a minimum of four screws. For ADA compliance, ensure the bottom edge is at least 24 inches above the floor or 12 inches above the counter. The top edge should be no more than 48 inches from the floor.
  3. French Installation Instructions (Instructions de Montage Pour Les Boites Distributrices):
    • Evaluatez le matériau de la surface du mur pour déterminer si des vis d'ancrage sont nécessaires.
    • Montez le distributeur avec le bord inférieur à la hauteur souhaitée à l'aide d'un minimum de 4 vis, généralement à 48 pouces au-dessus du sol ou à 12 pouces au-dessus du comptoir (Figure 1). Veillez à vous référer aux directives locales de l'ADA pour le placement final.

Loading Instructions Summary:

  1. Open Dispenser: Open the dispenser using the provided key (Figure 1).
  2. Load Towels: When loading towels, make sure short folded edges are down and facing forward through the dispensing opening (Figure 2). Do not overload the cabinet.
  3. Refill Indication: Refill when towels reach the bottom of the side lens (Figure 3).
  4. French Loading Instructions (Instructions de Chargement Boite Distributrice de Papier):
    • Charger afin que le papier se déroule au centre de la boîte distributrice (Figure 1).
    • Lors du chargement des serviettes, assurez-vous que le bord court plié est vers le bas et orienté vers l'avant à travers l'ouverture de distribution (Figure 2).
    • Il est recommandé de remplir ce distributeur lorsque les serviettes atteignent le centre de la lentille latérale (Figure 3).

This dispenser is designed to be a reliable and user-friendly solution for towel dispensing in various settings, emphasizing ease of installation, use, and maintenance while adhering to accessibility standards.

Kimberly-Clark PROFESSIONAL 09217 Specifications

General IconGeneral
BrandKimberly-Clark
ModelPROFESSIONAL 09217
CategoryDispenser
LanguageEnglish

Related product manuals