EasyManua.ls Logo

Kimberly-Clark SCOTT 09505 User Manual

Default Icon
3 pages
To Next Page IconTo Next Page
Page #1 background imageLoading...
Page #1 background image
Enclosed
Product Codes
09505 White, 09506 Black
SCOTT® PERSONAL SEAT COVER DISPENSER
DISTRIBUTRICE DE COUVRE-SIÈGES INDIVIDUELS SCOT
Install Dispenser Bracket
Installation
IMPORTANT! For secure mounting, follow these
instructions thoroughly. Ensure that the proper
mounting hardware is used for the appropriate wall
type.
1. Open dispenser. Keys and screws are
included with each dispenser (Figure 1).
2. Mark wall such that lever is 48” from the
oor so dispenser can be mounted directly
above the toilet bowl.
3. With lever at proper level, place open
dispenser back against wall and attach
(Figure 2). Note: use four screws to keep
dispenser secure.
OPTIONAL PUSH BUTTON LOCK FEATURE
Dispenser comes with plug in place. To convert to
pushbutton operation:
1.
(x4) (x4)
(x1)
Tools Required:
Use correct
drill bit for
anchor size
Form 034172
48” from
oor
*Check for ADA
regional & local
installing/mounting
requirements.
Question and Answer IconNeed help?

Do you have a question about the Kimberly-Clark SCOTT 09505 and is the answer not in the manual?

Kimberly-Clark SCOTT 09505 Specifications

General IconGeneral
Model09505
CategoryDispenser
TypePaper Towel Dispenser
MaterialPlastic
ColorWhite
Mounting TypeWall Mount
Capacity1 Roll
MountingWall
BrandKimberly-Clark
Dispenser TypeRoll
Compatible WithScott brand paper towels

Summary

Product Codes and Installation Guide

Product Identification

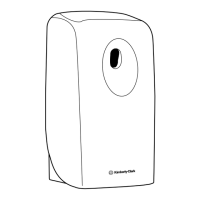
Identifies product codes for Scott dispensers: 09505 White and 09506 Black.

Installation Overview

Provides instructions for installing the Scott Personal Seat Cover Dispenser, emphasizing secure mounting.

Included Components and Tools

Lists enclosed dispenser hardware (screws, anchors) and required installation tools like a tape measure and drill.

Mounting Height Requirement

Specifies mounting the dispenser lever 48 inches from the floor, checking ADA requirements.

Securing the Dispenser

Details placing the dispenser against the wall and attaching it securely using four screws.

Optional Push Button Lock Feature

Lock Feature Conversion

Explains how to convert the dispenser from its default plug-in state to pushbutton operation.

Related product manuals