12
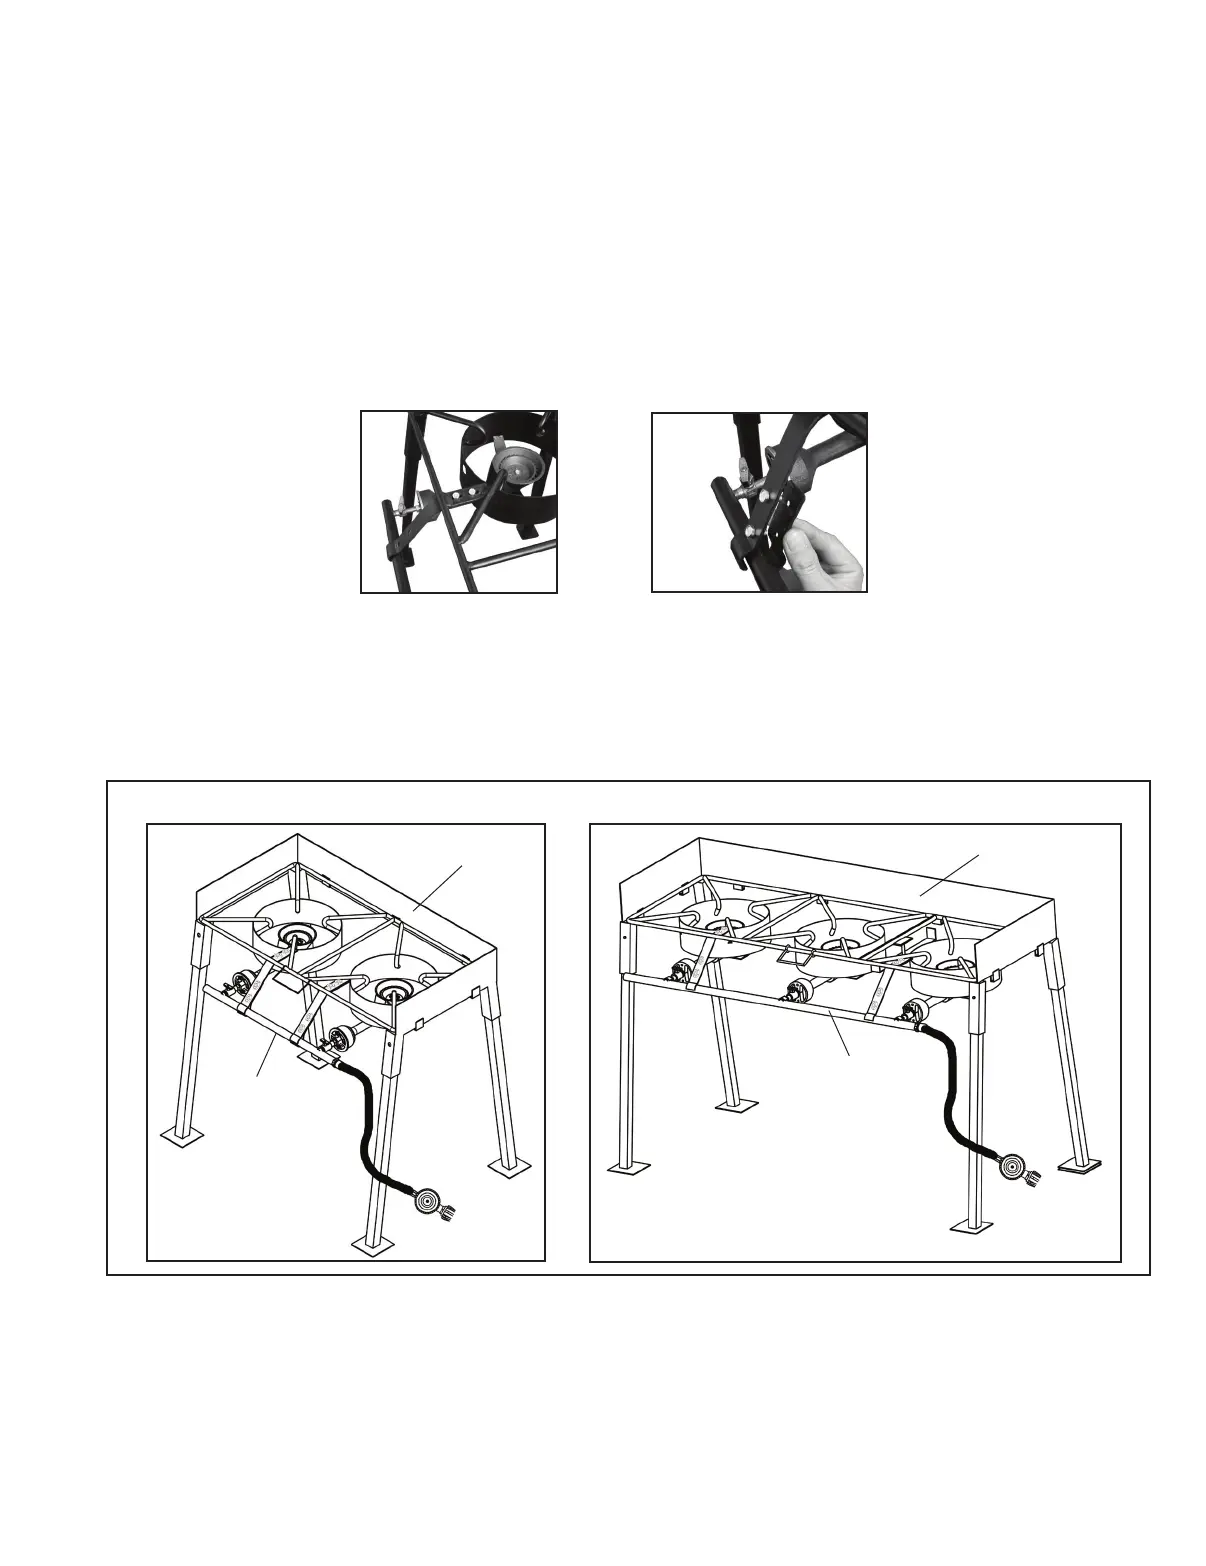
5) Installation of Manifold and Support Brackets
a. Align the male swivel end fittings on the manifold to the venturi tubes on the castings. Hand
tighten the male swivel fittings into the castings. Once tightened, use an adjustable wrench
to tighten the swivel fittings an additional 1 to 1 1/2 turns. Use caution not to over tighten and
snap the brass fittings. Once manifold assembly is installed into the castings, fully tighten
castings into cooker frame using an adjustable wrench.
b. Locate the manifold support brackets - (2 long “bent” brackets and 2 short brackets.) Always
assemble and use the manifold support brackets included in your package. The manifold
support brackets add additional support to the installed manifold assembly when properly
installed. Align the two holes of one long “bent” bracket to the two holes on one of the
pre-welded steel tabs (located between the cooker frame and windshroud.) The long “bent”
bracket should be located underneath the steel tab. The curved end of the long “bent”
bracket should be located above the manifold. Wrench tighten with supplied bolts,
lockwashers and nuts (see below Figure 4).
c. Align the two holes on the short and long support brackets (curved ends of each piece
should wrap around manifold.) Wrench tighten with supplied bolts, lock washers and nuts
(see above Figure 5).
d. Repeat the above procedure for the second support bracket. See below Figure 6 for picture
of properly installed manifold support brackets and manifold. NEVER use the manifold as a
handle for carrying the cooker.
Figure 4
Figure 5
Figure 6
6) To attach windguard shield to the top frame, align the windguard shield to top frame as per
above diagram. Slide windguard into receiving U Clips welded to the cooker frame.
7) Go to the Use and Care section of this manual for further instructions.
*Model May Vary
From Picture
*Model May Vary
From Picture
Windguard
Windguard
Manifold
Assembly
Manifold
Assembly
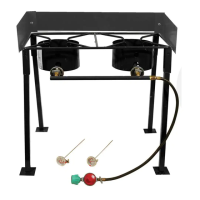
CS29
CS42