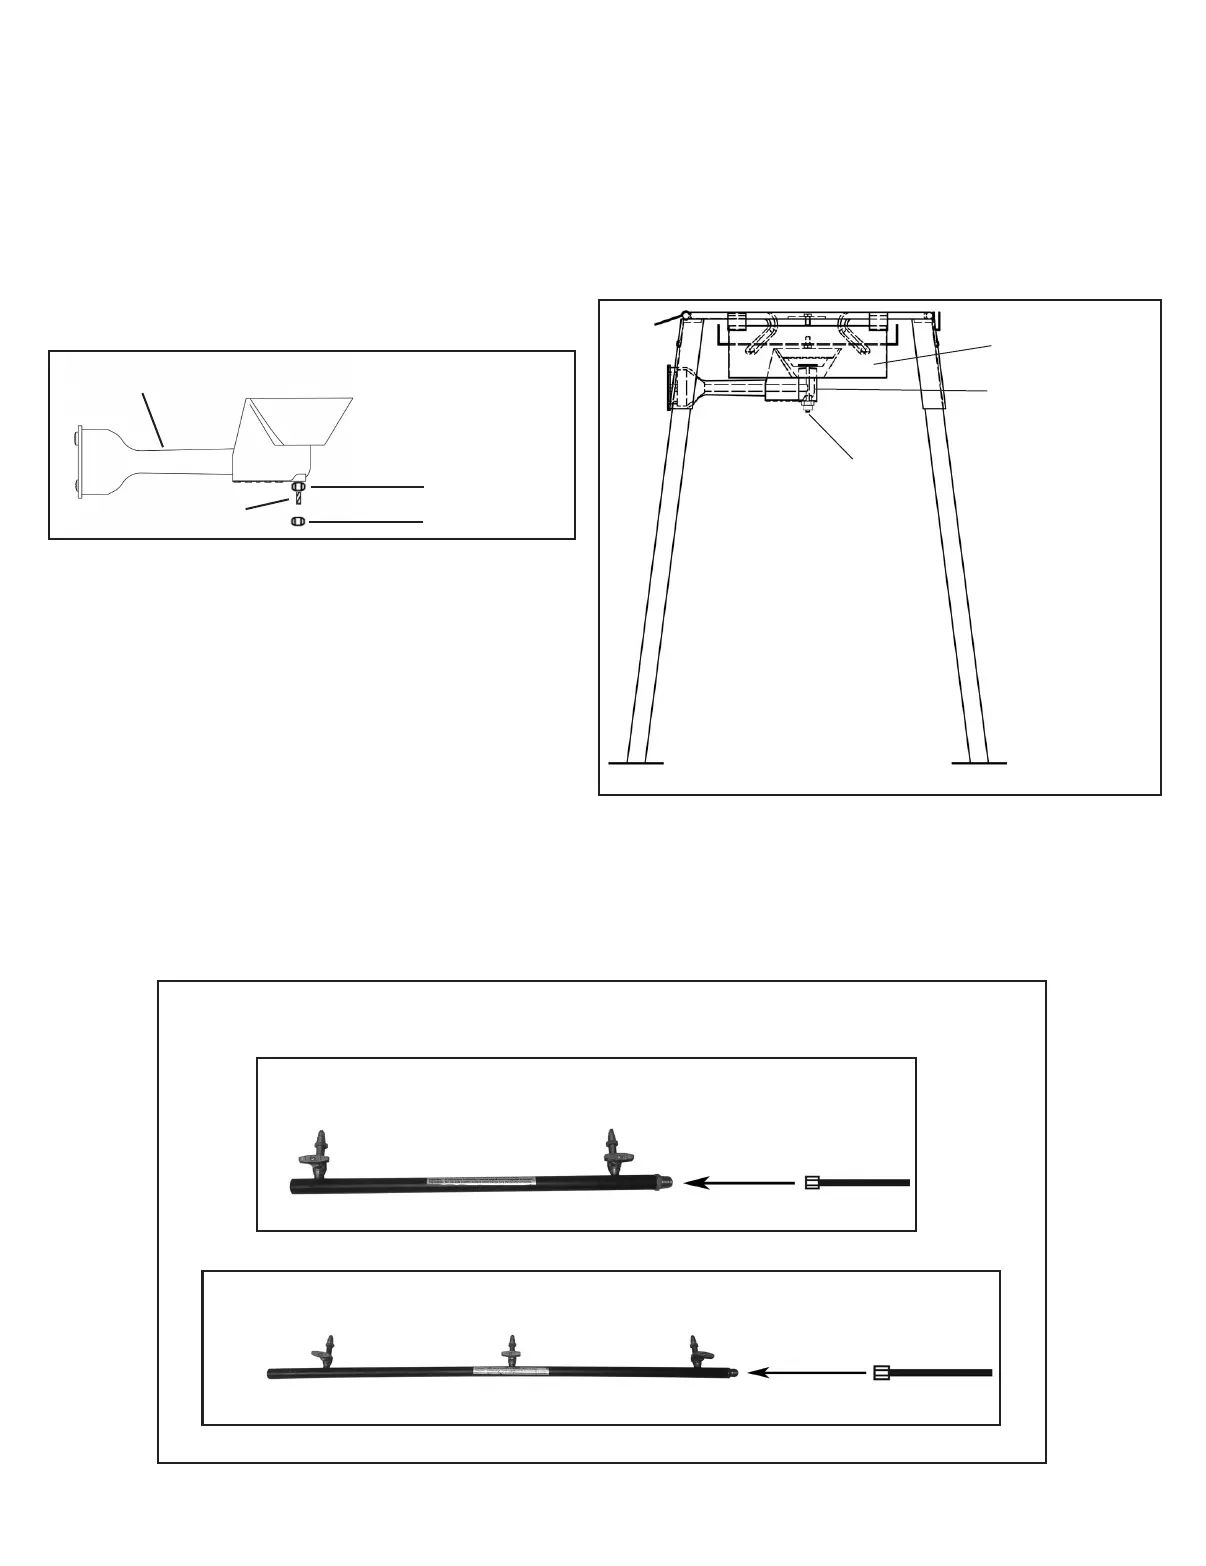
3) Repeat the below instructions for each casting.
a) Remove top nut from casting bolt. Leave bottom nut attached and tightened (if applicable.)
b) Place the casting bolt through the hole on the flat bar casting support bracket as pictured
below. The venturi tube of the burner should be located underneath the windshroud.
c) Reinstall nut to casting bolt. Tighten with adjustable wrench but leave some “play” to allow for
movement when installing manifold. Do not fully tighten castings into cooker frame until after
the manifold swivel fittings are installed into the castings as per directions on page 12. Once
manifold assembly is installed into the castings, fully tighten castings into frame using an
adjustable wrench. Make sure the castings are pointing straight up and are sturdy.
4) Locate the hose/regulator and manifold assembly. The manifold included in your package
includes brass components. Care should be taken in installation, transport and storage of the
appliance as brass components can easily be damaged if mishandled.
Tighten the 3/8 female flare swivel ending of the hose and regulator onto the manifold as pictured
in Figure 3 below, with a torque wrench, up to a torque of 95 to 105 lb./inch. Alternatively, hand
tighten securely and then, using a wrench, tighten an additional 1 to 1 1/2 turns.
Bottom Nut
(If Applicable)
Top Nut
Casting Bolt
Casting Bolt
Venturi Tube
Shroud
Flat Bar
Casting
Support
Bracket
* Model May Vary
From Picture
11
Figure 3 - HOSE AND MANIFOLD CONNECTION
CS29
CS42