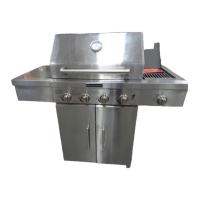
14. Push control knob onto valve control stem.
7. Attach the bottom of the side shelf to the side panel (A) of the
grill by tighten the 2 screws loosen on the grill side panel in
step 4. See illustration in step 8.
8 Attach the side shelf to the control panel (C) by inserting the
6. Attach the top of the side shelf to the grill (B) by inserting the 3
screws removed in Step 3 into the side shelf from inside the
grill hood and tighten. See illustration in Step 8.
.
screw removed from the grill control panel in step 4. Tighten
the screw.
AB
15. The igniter battery is not factory installed. A “AA” size
alkaline battery is located in the accessory box on the grill
grate. Install battery at this time following the instructions
A
A. Control knob
C
in “ Replacing the Igniter Battery” section. Please see
page 29.
Attach Left Side Shelf
1. Unpack left side shelf.
2. Open grill lid.
3. Remove 3 screws from the side of the side shelf.
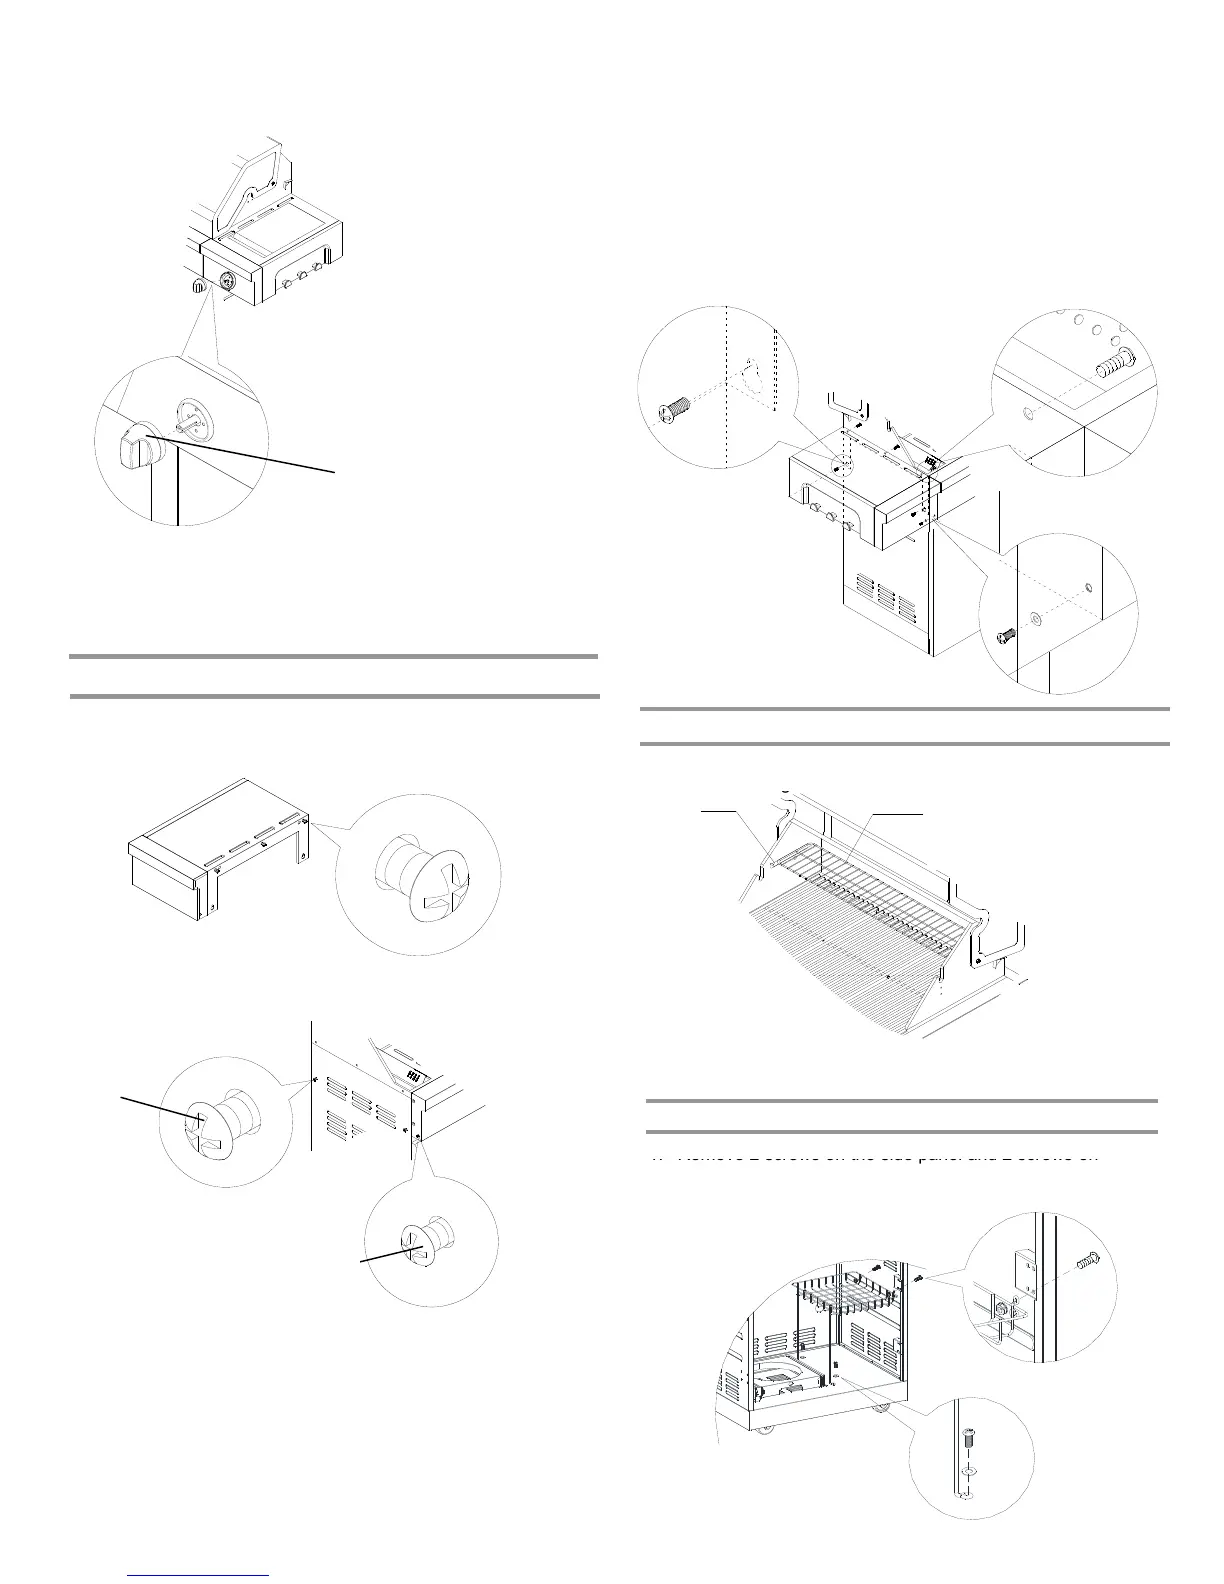
1. Replace the grill grates.
2. Place warmin
rack on brackets as shown.
Complete Assembly
A B
A
4. Loosen 2 screws on the grill side panel but not remove them
completely and remove 1 screw on the grill control panel.
A. Warming rack bracket
B. Warming rack
Attach Cart Basket
Remove 2 screws on the side panel and 2 screws on
A. Grill control panel screws
B. Grill side panel screw
B
the bottom panel.
2. Attach basket to the side panel and bottom panel by using
the screws removed in step 1.
5. Align the bottom key holes of shelf.
assembly to the 2 screws on the grill side panel which
loosened in step 4 that the searing side burner bowl assembly
will be hung on the 2 screws.
15