3. Place the level(s) on shelf or shelves. Check to see whether
the refrigerator is level from front to back.
4. Use the leveling bolts to adjust the leveling legs until the
refrigerator is level from front to back.
5. Be sure that all four leveling legs contact the floor and
support the full weight of the refrigerator.
6. Make final check to ensure the refrigerator is level.
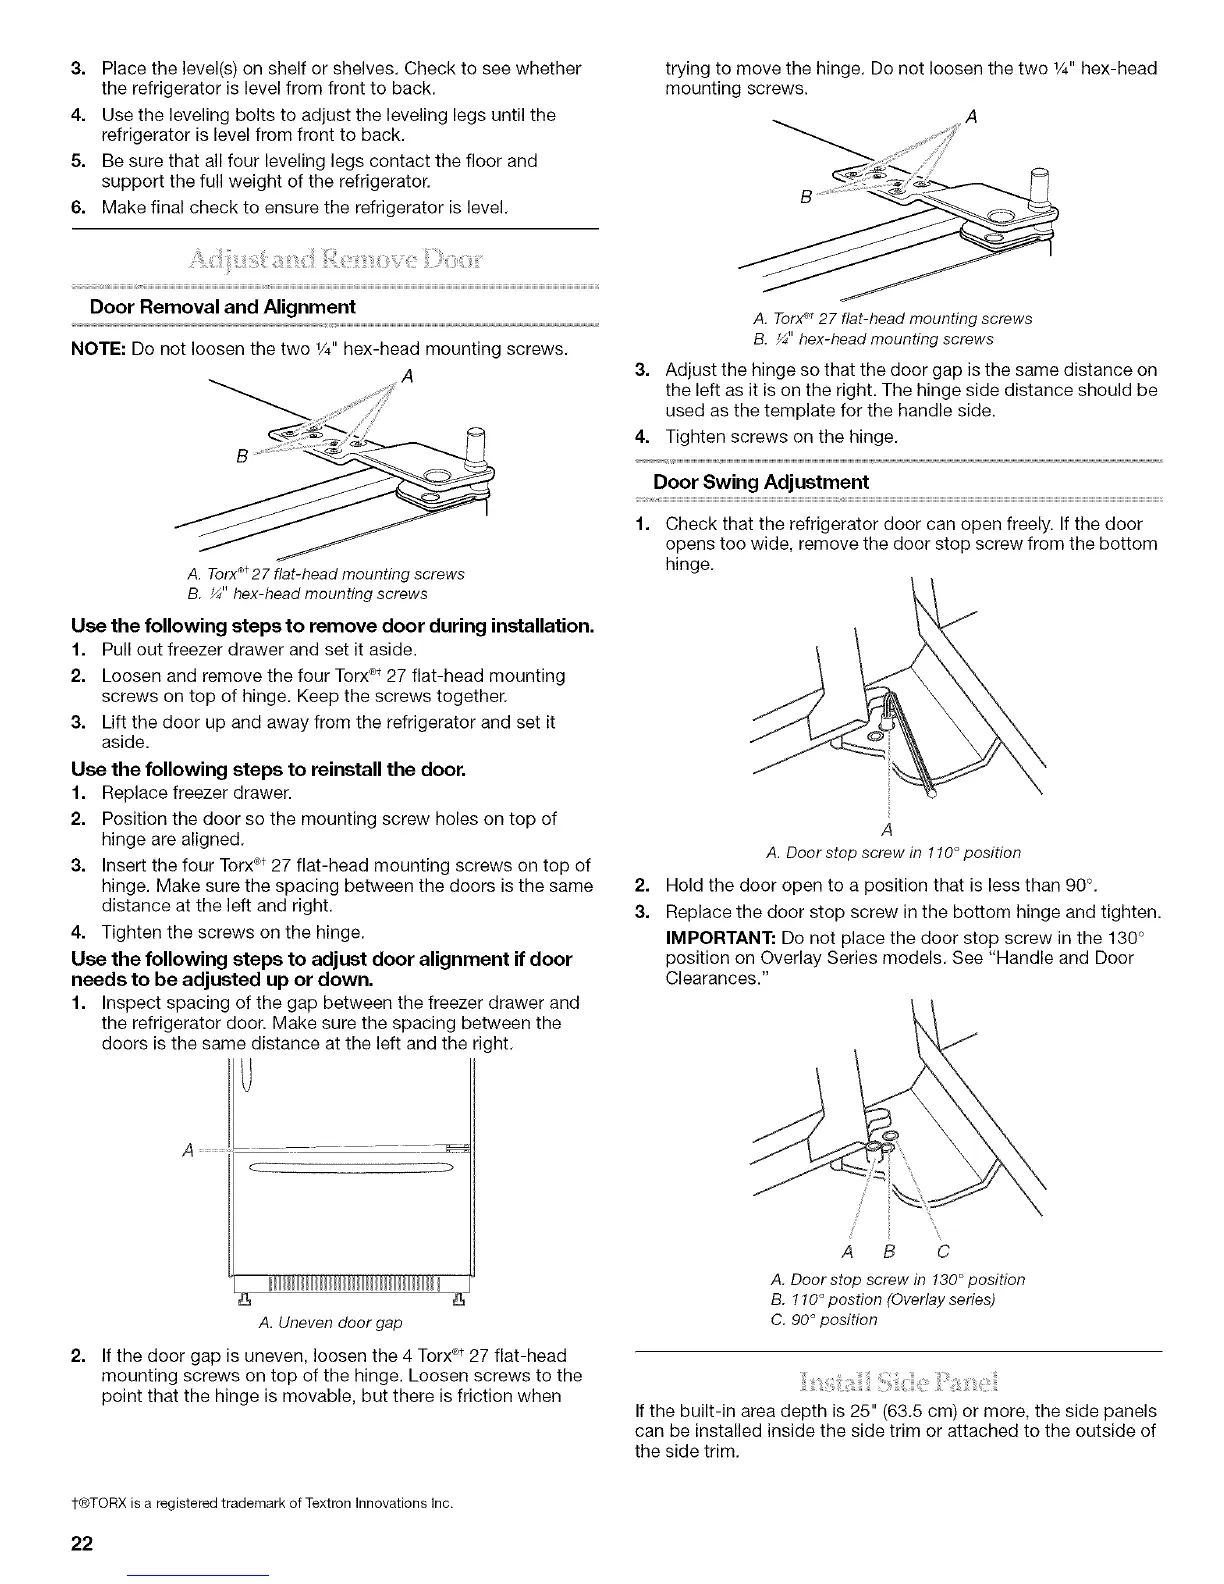
Door Removal and Alignment
NOTE: Do not loosen the two 1/4"hex-head mounting screws.
A
A. Torxc_t27 flat-head mounting screws
B. ¼" box-head mounting screws
Use the following steps to remove door during installation.
1. Pull out freezer drawer and set it aside.
2. Loosen and remove the four Torx®t27 flat-head mounting
screws on top of hinge. Keep the screws together.
3. Lift the door up and away from the refrigerator and set it
aside.
Use the following steps to reinstall the door.
1. Replace freezer drawer.
2. Position the door so the mounting screw holes on top of
hinge are aligned.
3. Insert the four Torx®t27 flat-head mounting screws on top of
hinge. Make sure the spacing between the doors is the same
distance at the left and right.
4. Tighten the screws on the hinge.
Use the following steps to adjust door alignment if door
needs to be adjusted up or down.
1. Inspect spacing of the gap between the freezer drawer and
the refrigerator door. Make sure the spacing between the
doors is the same distance at the left and the right.
U
( >
2.
_lllllllllllllllllllllllllllll_ I
A. Uneven door gap
If the door gap is uneven, loosen the 4 Torx®t27 flat-head
mounting screws on top of the hinge. Loosen screws to the
point that the hinge is movable, but there is friction when
trying to move the hinge. Do not loosen the two %" hex-head
mounting screws.
A
A. Torx_ 27 flat-head mounting screws
B. ¼" hex-head mounting screws
3. Adjust the hinge so that the door gap is the same distance on
the left as it is on the right. The hinge side distance should be
used as the template for the handle side.
4. Tighten screws on the hinge.
Door Swing Adjustment
1. Check that the refrigerator door can open freely. If the door
opens too wide, remove the door stop screw from the bottom
hinge.
2.
3.
A
A. Doorstop screw in 110°position
Hold the door open to a position that is less than 90°.
Replace the door stop screw in the bottom hinge and tighten.
IMPORTANT: Do not place the door stop screw in the 130 °
position on Overlay Series models. See "Handle and Door
Clearances."
.....i' ii
A B C
A. Door stop screw in 130°position
B. 110°postion (Overlayseries)
C. 90°position
If the built-in area depth is 25" (63.5 cm) or more, the side panels
can be installed inside the side trim or attached to the outside of
the side trim.
1-®TORX is a registered trademark of Textron Innovations Inc.
22