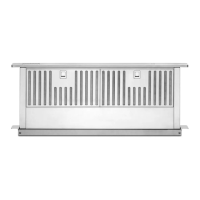
• The hood has two identical brackets for
attaching the chimney.
Attach the first bracket (G – the side with fixing
holes facing upwards – see Fig. 6) to the wall
next to the ceiling, using the support bracket as
a template (the small slots cut in the bracket
should coincide with the centre lines previously
traced on the wall), mark 2 holes with a pencil,
drill the holes and attach the bracket with 2
screws and plugs.
Attach the second bracket (M – the side with
holes for attaching facing upwards – see Fig. 6)
above the lower bracket at a distance of
200mm, attach the bracket with 2 screws and
plugs. 2 rubber strips should be attached to the
sides of this second bracket (one strip on each
side – cut the rubber strip provided into two
identical halves).
• Recirculation mode Only: fit the deflector to
the chimney support bracket. Fig. 6
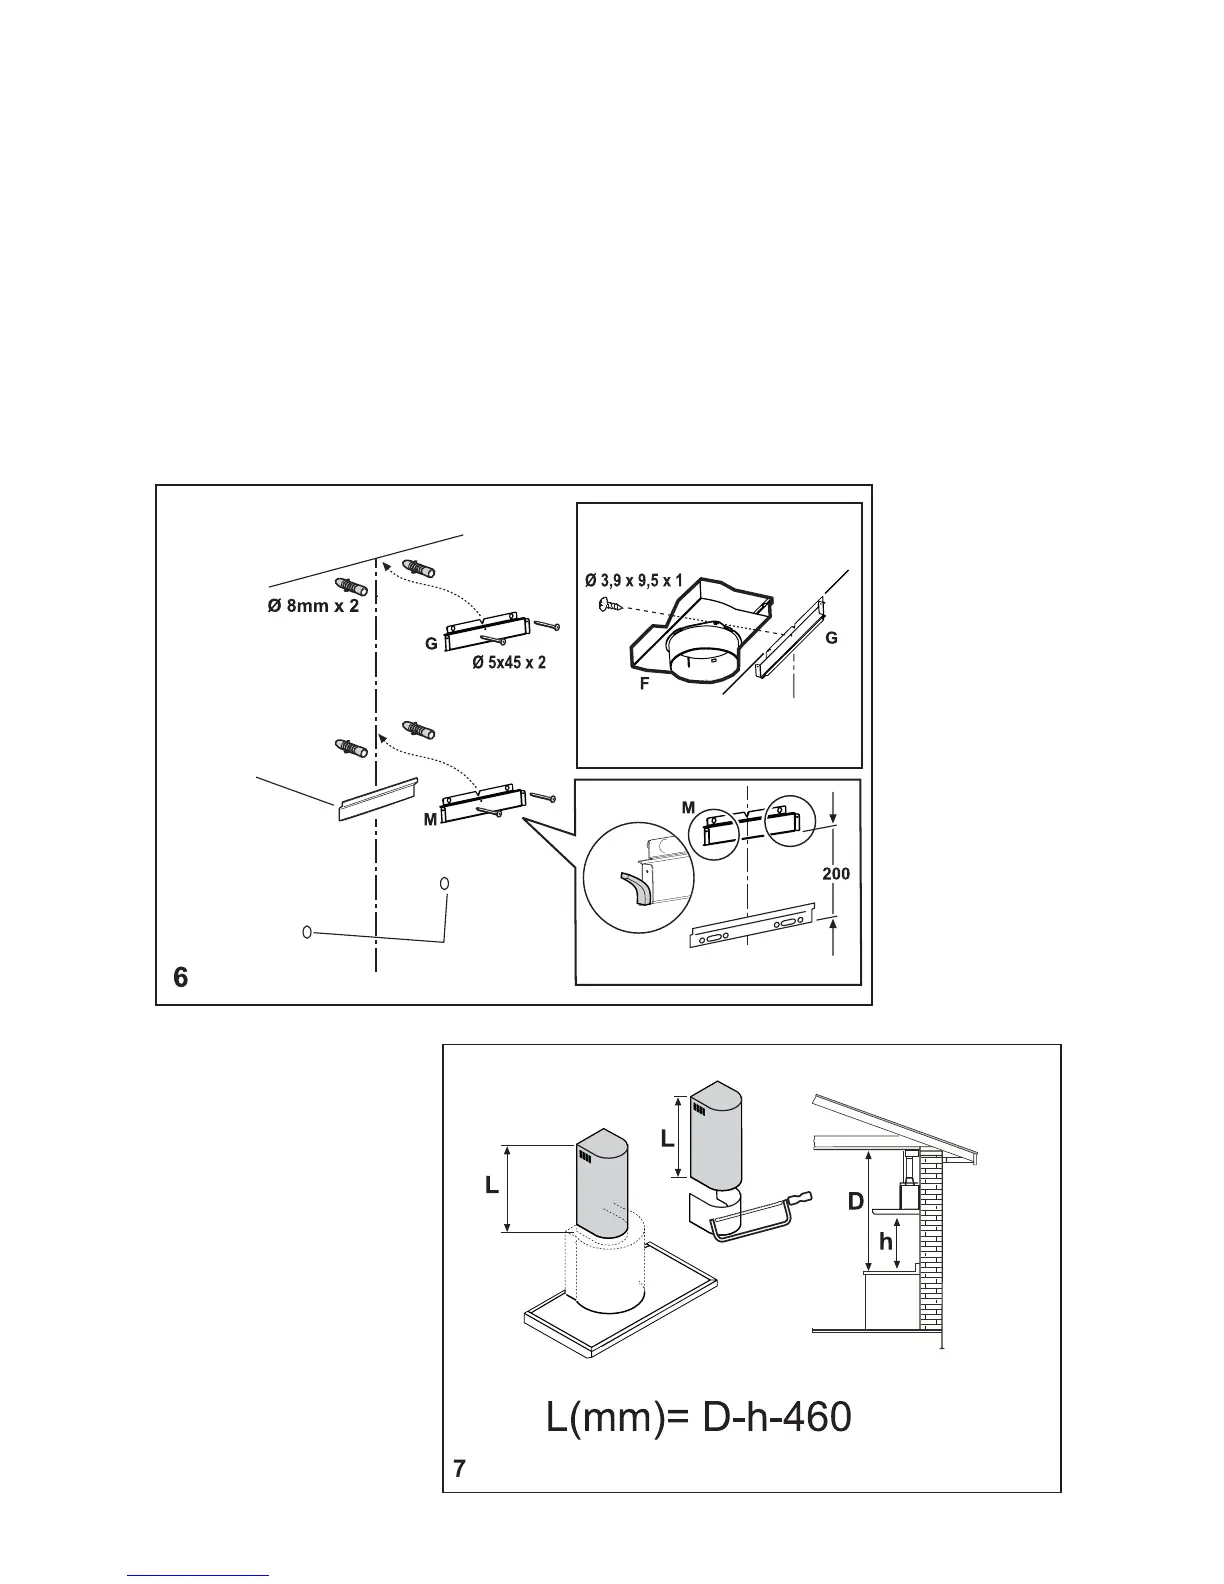
• Chimney size: the chimney is supplied in a
standard size and can then be cut to measure as
shown in Fig. 7.
Installation
9