19
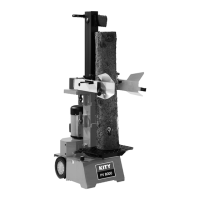
Pour fendre du bois
•Poserlabûchesurleplateau,lamaintenirsolidement
à deux mains, abaisser les poignées, d s que le coin
péntredanslabûche,repousserlespoignéesversl‘extérieur
enappuyantverslebaspourempcherquelapressions‘exerce
surlestôlesdemaintien.
• Nefendrequedesbûchessciéesdroit.
• Fendreleboisverticalement.
• Ne jamais fendre une bûche posée horizontalement ou
en travers.
• Porterdesgantsadaptéspourfendredubois.
Manièredetravaillerrationelle
- Position supérieure: env 5 cm au-dessus de la bûche
- Position inférieure env. 10 cm au-dessus du plateau
Mise en service de la machine
Assurezvousque lamachineest montéecomplètement
et conformément aux instructions. Avant chaque utilisa-
tion,contrôlez:
• lesendroitsdéfectueuxdescâblesderaccordement
(ssures,coupuresetc.),
• leséventuellesdétériorationsdelamachine,
• sitouteslesvissontsolidementserrées,
• lesfuitesdusystèmehydraulique
• leniveaud’huile
Purge d’air, Figure 9
Purgezlesystèmehydrauliqueavantdemettrelefendeur
de bûches en marche.
• DesserrezleclapetdepurgeAdequelquestours,pour
que l’air puisse s’échapper du réservoir à huile.
• Pendantlefonctionnement,laissezleclapetouvert.
• Avantdemettrelefendeurdebûchesenmarche,refer-
mez le capuchon pour empêcher que de l’huile puisse
couler.
Silesystèmehydrauliquen’estpaspurgé,l’airenfermé
endommage les joints et donc l’ensemble de l’outil!
Mise en marche/Arrêt, Figure 10
Appuyez sur le bouton vert pour mettre l’outil en marche.
Appuyez sur le bouton rouge pour l’arrêter.
Remarque: Vérifier le fonctionnement de la mise en mar-
che/arrêt avant chaque utilisation, en appuyant une fois
sur le bouton vert, puis sur le rouge.
Sécuritéantiredémarrageintempestifaprèsunecoupure
de courant (déclencheur de potentiel zéro)
En cas de coupure de courant, de débranchement invo-
lontaire ou de coupe-circuit défectueux, l’appareil s’arrête
automatiquement. Pour le remettre en marche, appuyez
une nouvelle fois sur le bouton vert.
• Placethelogonthetable,holditwithbothhandles,
press the handles down. As soon as the splitting knife
enters the wood, push the handles down and to the
outside at the same time. This prevents the wood from
putting pressure on the holder plates.
• Onlysplitstraightcutlogs.
• Splitthelogsinverticalposition.
• Neversplitinhorizontalpositionoracross.
• Wearprotectivegloveswhensplitting.
Rational working method
- Upper position approx. 5 cm above log.
- Lower position approx. 10 cm above table.
Putting into operation
Make sure the machine is completely and expertly assem-
bled. Check before every use:
• Theconnectioncablesforanydefectivespots(cracks,
cuts etc.).
• Themachineforanypossibledamage.
• Thermseatofallbolts.
• Thehydraulicsystemforleakage.
• Theoillevel.
Venting, Fig. 9
Before working with the log splitter, vent the hydraulic
system.
• ReleasetheventingcapAbyafewrevolutionssothe
air can escape from the oil tank.
• Leavethecapopenduringtheoperation.
• Beforeyoumovethelogsplitter,closethecapagain
in order not to lose any oil.
If the hydraulic system is not vented, the enclosed air will
damage the gaskets and with it the complete log splitter.
Switching on and off, Fig. 10
Press the green button for switching on.
Press the red button for switching off.
Note: Check the function of the ON/OFF unit before every
use by switching on and off once.
Restarting safety in case of current interruption (no-volt re-
lease).
In case of current failure, inadvertent pulling of the plug,
or a defective fuse, the machine is switched off automati-
cally.
For switching on again, press anew the green button of
the switch unit.
End of work
• Movethesplittingknifetothelowerposition.
• Releaseoneoperatingarm.
• Switchthemachineoffandpullthepowerplug.
BA PV 8000.indd 19 28.09.11 12:04