DocumentNo.:KE-0015-00 Sheet:19/37
IIIStrainerInstallation
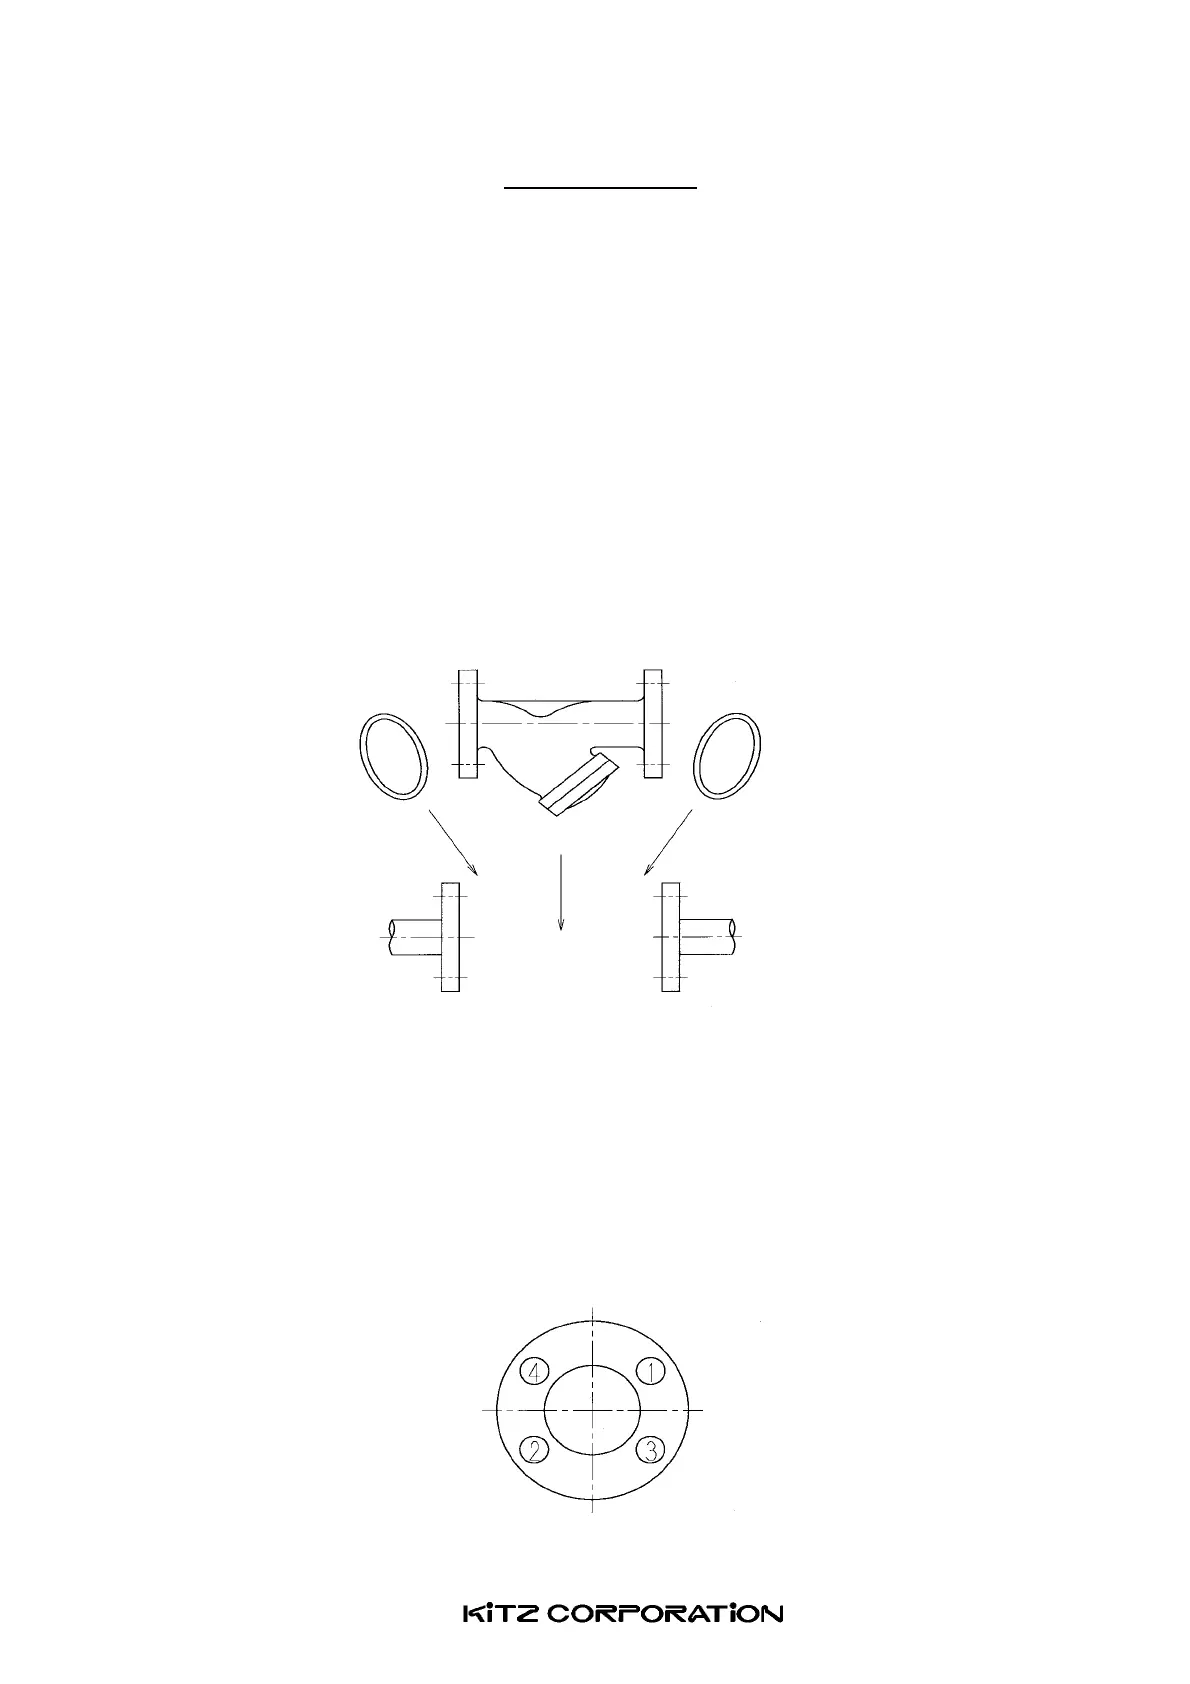
6. InstallationProcedureforflangedstrainers
6.1
Pipesandstrainersshouldbeaccuratelyaligned.
6.2
Theappropriatespace shouldbe keptbetweenpipeflangesforthestrainerfaceto
dimensionsincludingthegasketthickness.
6.3
Placethestrainerbetweenthepipeflanges.Insertboltsthroughthebottomboltholes
andtightenthemlightly.Thiswillsupportthestrainer during theremaining stepsof
installation.
6.4
Inserta gasket betweenthestrainerand pipeflanges. It is recommended to apply
lubricant(gasketpaste)togasketfaces.
6.5
Makesure the position of the boltsused in the lower bolt holes of the flange. The
gasketalignmentshallbedeterminedbythesebolts.
6.6Threadboltsthroughtheotherboltholesandlightlytightenthem.
6.7Tightenboltsevenly,graduallyandalternatelyinastarpatternasshownhere.
Theendsofalltightenedboltsshouldequallyprotrudebeyondnuts.
Gasket
 Loading...