19
EN
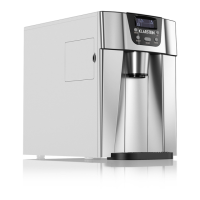
Device Components
1 Transparent window 7 Operation panel
2 Upper cover 8 Air outlet
3 Evaporator 9 Water inlet
4 Float switch 10 Air inlet
5 Ice detection plate 11 Power cable
6 Storage for ice cubes / water tank 12 Water outlet (bottom)
INSTALLATION
Select installation location
1. Place the appliance on a stable and at surface.
2. Keep the appliance away from heat sources and direct sunlight, to avoid affecting
the ice-making performance.
3. Keep the appliance in a well-ventilated place, leave at least 20cm space near the
wind inlet and outlet of ice maker’s heat dissipation.
4. Do not use the appliance when placed in too cold or too hot environment. If the
environment temperature is lower than 10 °C or over 43 °C, the machine will have
problems with making ice.
5. Do not use outdoors.
Preparation
1. Remove all packaging components.
2. Check whether the appliance and the accessories included are complete.
3. Put the appliance on a proper position.
4. Clean the appliance before use.
OPERATION
1. After moving the appliance, allow it to stand for 30 minutes, before turning it on.
Then plug the appliance in.
2. Pour water into the water tank or connect the water tap to the water inlet of the ice
cube machine (connect the water inlet only to water outlets with drinking water
quality).