Do you have a question about the Klipsch LightSpeaker and is the answer not in the manual?
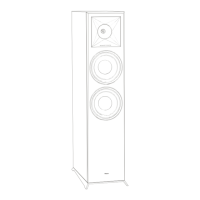
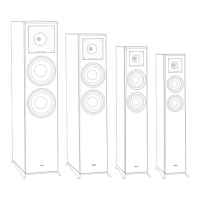
Introduces the product's advanced audio and lighting capabilities, highlighting its innovative design.
Emphasizes the product's quick and simple installation process, requiring minimal time and effort.
Explains the lightning flash symbol indicating dangerous voltage and the risk of electric shock.
Explains the exclamation point symbol, alerting users to important operating and maintenance instructions.
Provides essential safety notes regarding dry location use, avoiding cover removal, and protection from moisture.
Covers instructions on water proximity, cleaning methods, ventilation, and heat sources.
Details servicing requirements, conditions requiring service, weight considerations, and prohibited installation locations.
Outlines restrictions against exposure to weather and use in totally enclosed recessed luminaires.
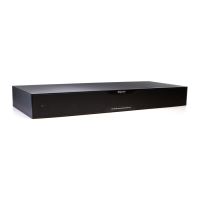
Showcases key features like wireless connectivity, amplifier replacement, speaker quality, and LED lighting technology.
Explains how the system integrates wireless audio and green lighting into standard recessed fixtures for easy home use.
Details the 10W LED's brightness equivalence, power saving, and long operational life.
Describes the system's ability to support up to 8 speakers and divide a home into two unique zones for independent control.
Highlights the benefit of no wiring and the ability to take the system when moving, leaving no trace of installation.
Lists the physical items provided in the package, including trim rings and the lens.
Notes that the LightSpeaker System requires a separate Transmitter and Remote for full functionality.
Guides users on selecting the best fixture location based on room usage and speaker spacing for optimal sound.
Instructs users to check for a standard Edison connector, as the LightSpeaker is incompatible with other types.
Crucial safety instruction to turn off circuit breakers to all lighting fixtures before beginning installation.
Advises testing the LightSpeaker's fit directly into the recessed fixture before proceeding with installation.
Explains how to select and attach the correct trim ring (thicker for 6", thinner for 5" fixtures) for a snug fit.
Details how to rotate the three SimpleTabs™™ on the speaker's back for secure mounting in 5" or 6" fixtures.
Continues the adjustment of SimpleTabs for 6" recessed fixtures, ensuring a secure fit.
Guides on setting the zone switch to 'one' and the left/right stereo switch for proper audio configuration.
Provides further details on zone setup and stereo channel selection for multiple speakers.
Explains two methods for installing the LightSpeaker: Easiest Install and Simple Tab Install.
Details how to screw the LightSpeaker into the socket and push it firmly into the fixture for a secure fit.
Provides instructions on how to safely remove the installed LightSpeaker from its recessed fixture.
Directs users to pair the transmitter with the speakers, referencing the owner's manual or website for details.
Encourages users to enjoy their newly installed and functional LightSpeaker system.
Details the procedure for removing the lens from the LightSpeaker before it is installed in the fixture.
Explains how to remove the lens after the LightSpeaker has been installed, using indentations around the lens.
Warns users not to touch the LED or speaker baffle when hot, advising to allow the unit to cool down.
Provides recommendations for spacing speakers based on ceiling height for the best stereo imaging and sound quality.
Details the LED's brightness, dimmability, and lifespan, comparing it to incandescent bulbs.
Explains how the wireless transmitter receives signals and the digital amplifier processes audio for efficient sound.
Describes the high-performance woofer, disperser, and optional accessories like flanges and frosted lenses.
Lists key technical data including frequency response, amplifier power, and maximum SPL.
Provides detailed measurements and weight for the LightSpeaker, including various configurations with and without flanges/lenses.
Identifies potential interference sources such as metal studs, microwaves, and 2.4 GHz devices.
Outlines the warranty period for LED light and other components, and what KLIPSCH will repair or replace.
Details the process for obtaining warranty service, including contacting dealers and providing proof of purchase.
Lists conditions that void the warranty, such as serial number alteration or unauthorized repairs, and specific exclusions like cosmetic damage.
Clarifies warranty limitations, consumer rights, and states that the warranty does not cover products sold 'AS IS'.
Provides phone and email contact information for customer support and questions.
Encourages users to register their product online at www.klipsch.com/register for product registration.
States compliance with FCC Rules Part 15, outlining conditions for operation and potential interference.
Confirms compliance with Canadian ICES-003 Class B specifications for digital apparatus.
Warns users that unauthorized changes or modifications can void their authority to operate the equipment.
Provides the corporate headquarters address and directs users to the website for detailed installation instructions.
Lists toll-free phone number, operating hours, and email address for Klipsch Technical Support.
Suggests visiting the website to explore options for expanding the light and sound system with additional products.
Covers initial steps: powering off, checking connectors, and testing the unit's fit in the fixture.
Details attaching the trim ring, adjusting SimpleTabs, and setting zone/stereo switches.
Guides on securing the unit, pairing the transmitter, and connecting audio sources for operation.
| Connectivity | Bluetooth |
|---|---|
| Color Options | White |
| Bulb Type | LED |
| Dimmable | Yes |
| Socket Type | E26 |
| Water Resistance | No |
| Type | Wireless Speaker Light |
| Woofer | 2.5 inch |
| Color Temperature | 2700K |
| Power Source | AC Power |