7/11/2005 VERSION 2.0 18
9.2.3. Return sizing
When fabricating offsets, the blank size is determined by the angle of elbow to be bent and the length of the
overhang that the offset is to fit. The following is an example for a 2 x 3-in A size downspout to be angled
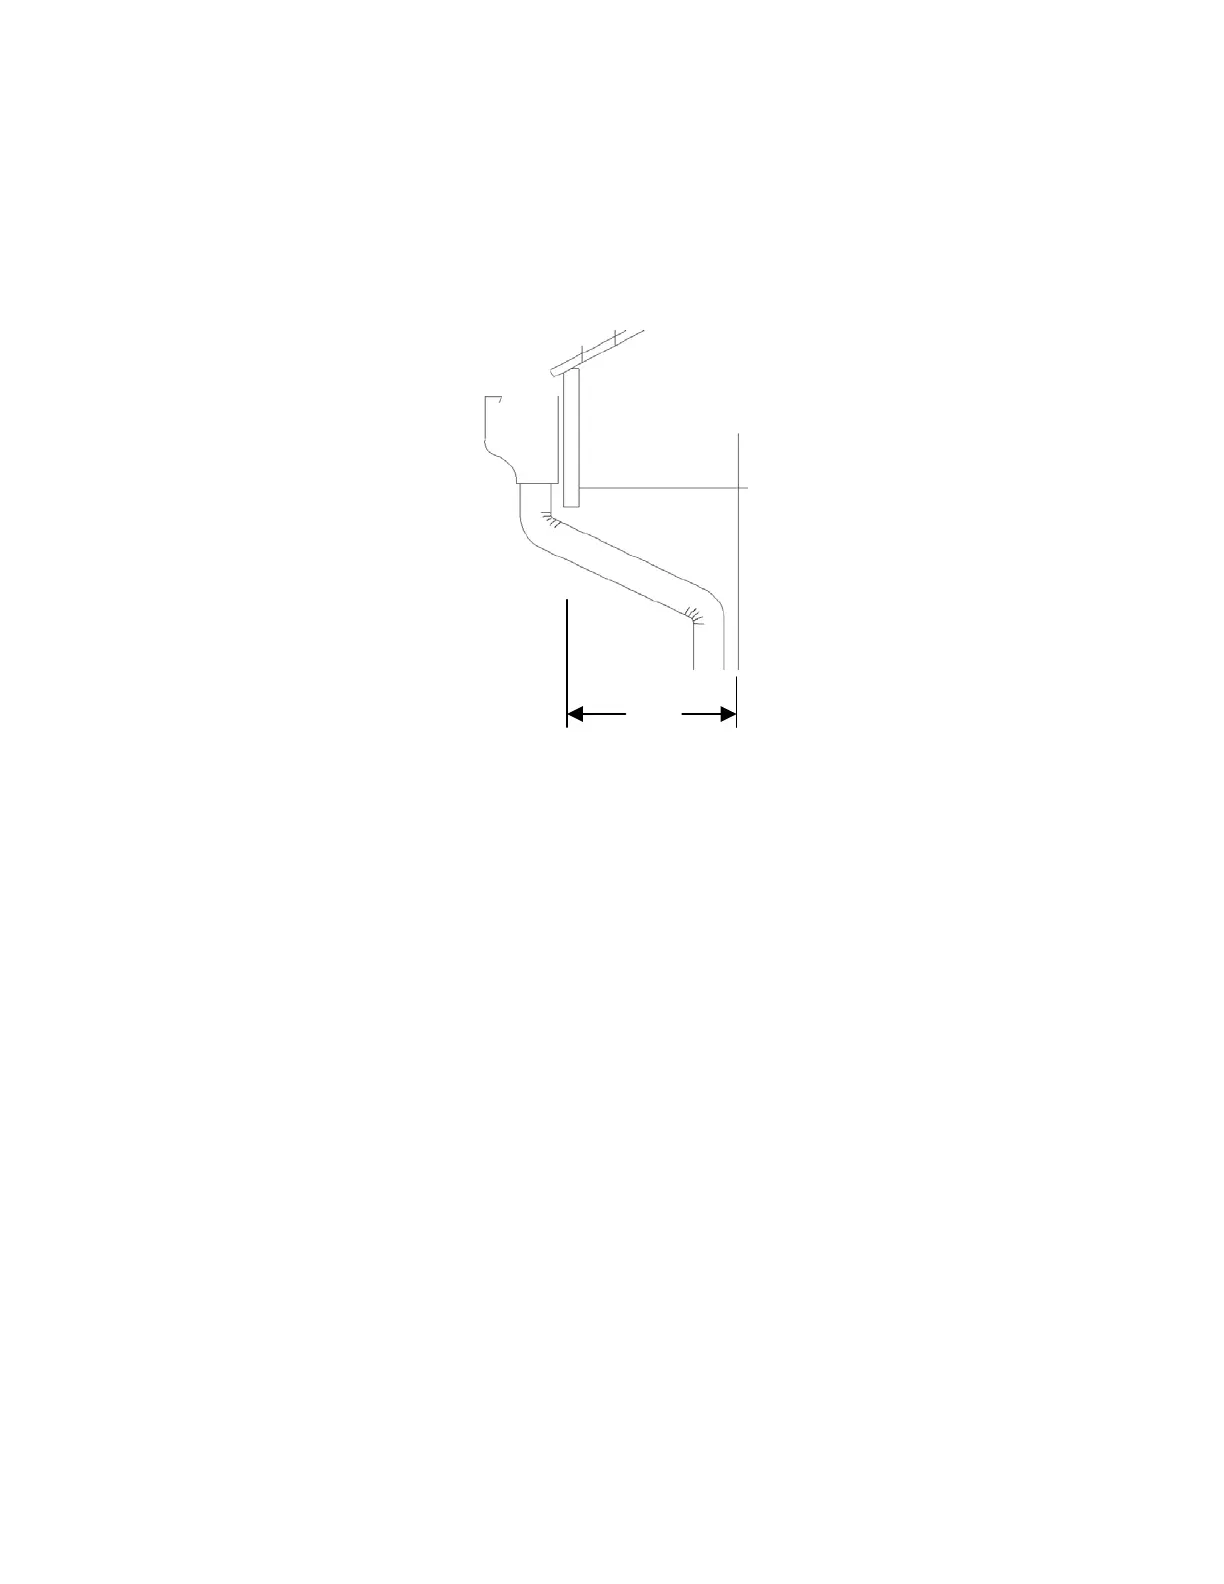
at 75 degrees with an overhang of 18-in.
Figure 9-2: Sizing of a blank to create an offset.
The two elbow sections are both 75 degrees (approximately 6 crimps apiece). Measure the distance from
the wall to the fascia and add one inch for every crimp in the offset. In this case, the total approximate
length of the blank will be 30-in.
*These are provided as guidelines. They will vary due to machine and the material used *
9.3. CUTTING ELBOW BLANKS
It is important to cut then ends of elbow blanks squarely. This will ensure a straight crimp and reduce
twisting of the blank. Use a fine tooth, high grade, nonferrous metal cutting saw blade. The blade should
have between 150 and 200 teeth on a 10” blade.
9.4. INSERTING A BLANK
Extend indexing plunger and twist 90 degrees so that when released, it does not reengage. This will allow
the advancing assembly to slide towards the back end of the machine. Insert push tool inside one end of the
blank. Place opposite end of blank around the mandrel. The advance assembly may also have to be slid
towards the back of the machine in order to allow the mandrel to be lifted slightly. The blank may have to
be rocked back and forth so that the mandrel lifts up enough to let the blank slide around it. Keep inserting
the blank until it has reached the universal advancing plate. Continue rocking the blank back and forth
and/or up and down until the back end of it has settled into its intended slot in the advance plate. Continue
inserting until the advancing assembly makes contact with the T-handle pin. The blank is now fully
inserted and can now be crimped.
*It is in recommended that the indexing plunger remain in the extended configuration so that the
blank is crimped in the fully inserted position. *
18in