7/11/2005 VERSION 2.0 23
11. ADJUSTMENTS AND TROUBLE SHOOTING
*** ENSURE ALL SETUP AND OPERATING PROCEDURES IDENTIFIED IN SECTION 7
HAVE BEEN FOLLOWED AND VERIFIED PRIOR TO ADJUSTING THE MACHINE ***
***READ ALL OF THE SECTION 10 ADJUSTMENT PROCEDURES AND SECTION 11
BEFORE
ADJUSTING THE MACHINE ***
11.1. GENERAL OPERATION
Some problems may be caused by inconsistent operation. Make sure handles are being actuated
consistently and fully. The first two sub-sections of this section may alleviate inconsistencies in the
finished elbow. If a problem still exists, proceed with the knife adjustment steps to adjust to the desired
profile.
11.2. CRIMPING/ADVANCING
It is recommended that the handles are pushed downward more so than pulled towards the operator.
Smooth, consistent actuation of the handles leads to a more predictable part. Slamming the handles from
one position to the next will decrease the consistency of the part and increase wear on the machine itself.
Proper leveraging will allow operator to move the handles smoothly. If changing the height of the
operating surface cannot solve a leverage problem, it is possible to change the orientation of the crimping
handle of the EL-2002.
11.2.1. Adjusting Position of Crimping Handle
Adjusting the crimping handle orientation will require a 7/16-in combination wrench and a 5/16-in L-
shaped hex wrench.
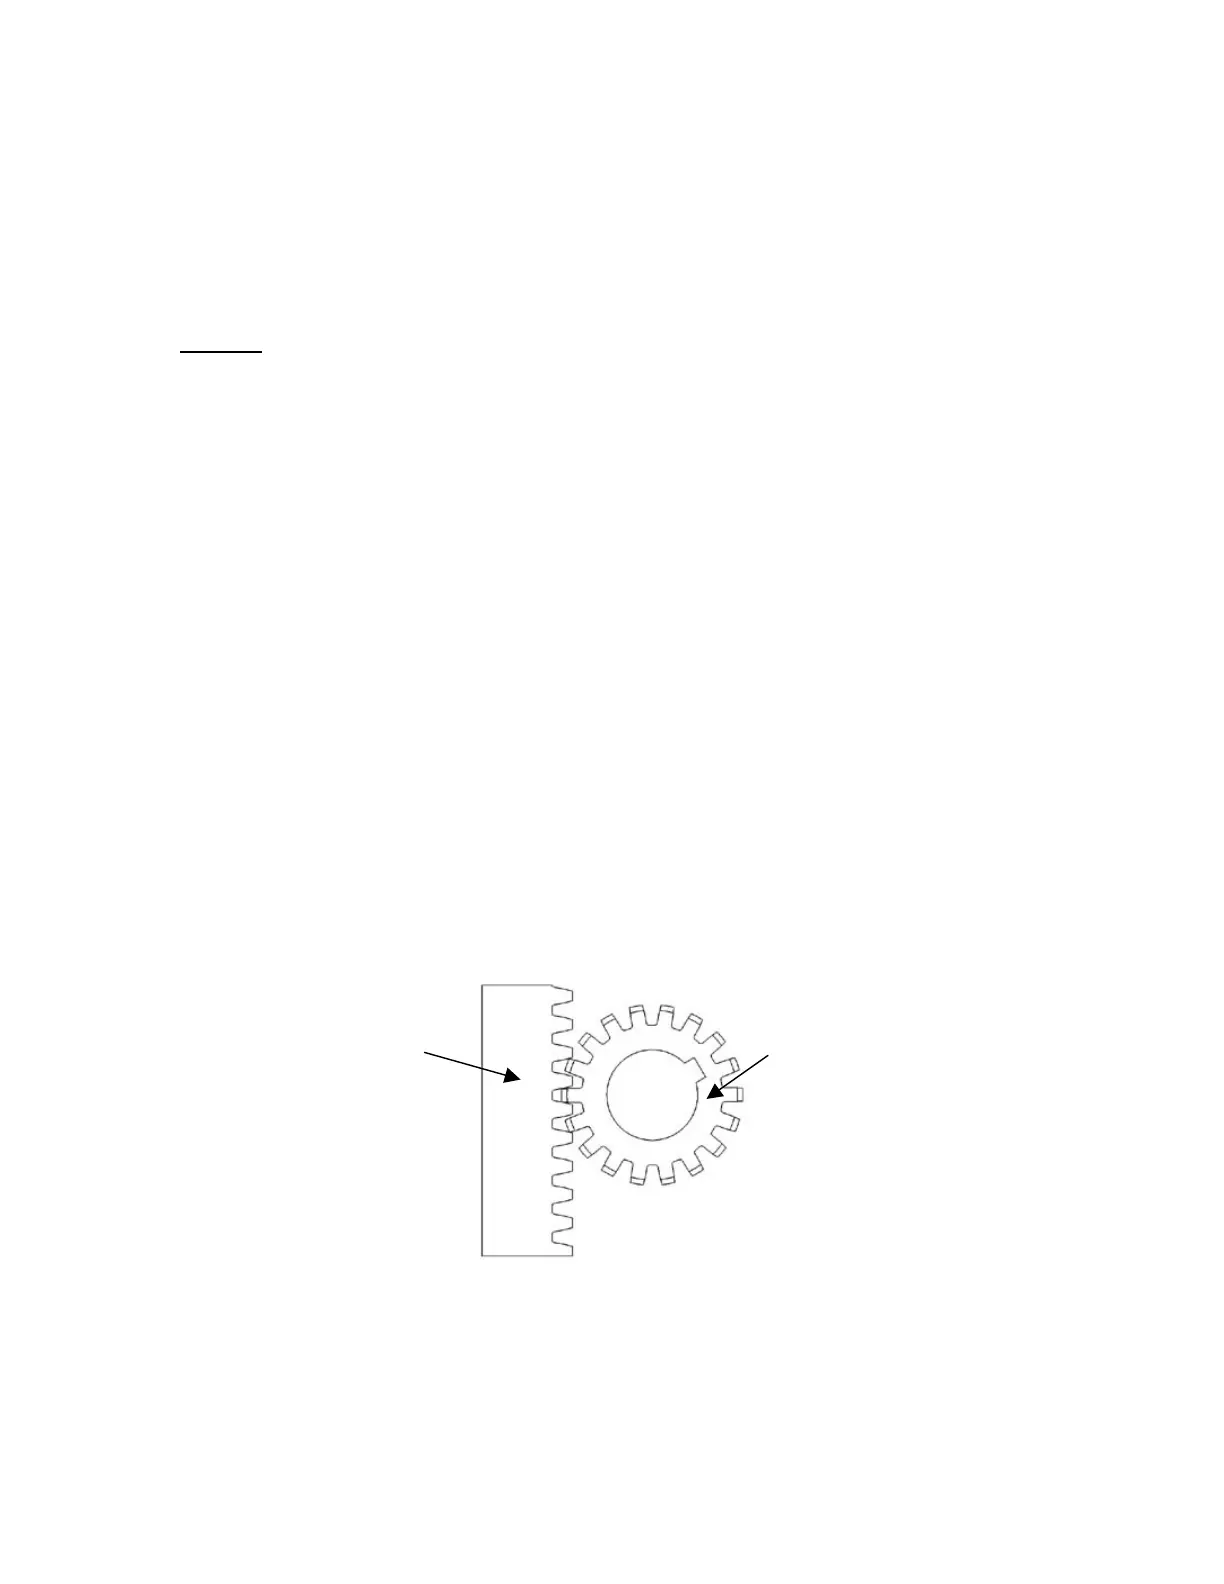
Begin by removing the blue top cover exposing the crimp shaft and gears. Make note of where the rack
gear meets with the pinion gear. In Figure 11-1, the two gears meet up four spaces down the rack. This
will need to be where the gears meet again once the handle adjustment is made. Another option would be
to turn the crimp depth adjustment knob clockwise until in makes contact with the front so that the crimping
assembly does not move when the handle is pulled.
Figure 11-1: The gears fully meet four spaces down the rack gear.
Next loosen the four outermost ¼-20 x 1.25-in, socket head screws on the front plate (Figure 11-2). Fully
remove the two screws on the left. This will cause the rack gear and spacer to come off the back of the
front plate. Fully remove the screws on the right side and this will allow the crimping handle to move
freely without actuating any of the crimping assembly.
Rack gear
Pinion gear