20
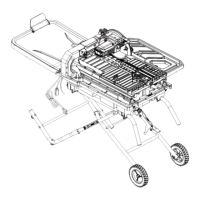
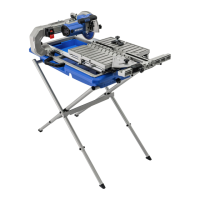
INSTALLING THE CARRY HANDLE TO FRAME
(FIG. 8) - BAG M
● Align the holes in the carry handle (Y) with the
holes on the table frame (J).
● Insert two socket head bolts (dd) through the
carry handle and frame, secure bolts in place
using hex nuts (ee).
● Finger tighten and then lightly tighten using the
provided 5 mm hex wrench (RR) and a 13 mm
wrench (not provided).
NOTICE: The tile saw can be transported by
holding the carry handle (Y) when all parts are
locked in position.
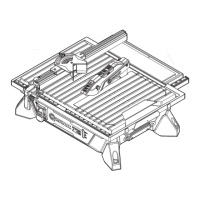
INSTALLING THE SLIDING TABLE (FIG. 9, 10, 11)
● Pull out the table release pin (X) on the left
side of table. (Fig. 9)
● Align the table rollers (1) with the rails (2) on
the frame, keeping the sliding table (I) and
the rails (2) parallel and then push the sliding
table toward the back of the saw.
NOTE: A set plate (3) is installed on the left
side of the sliding table to prevent the sliding
table from lifting upward while pushing the
sliding table toward the back of the saw.
● Push the table release pin (X) back in place.
8
J
Y
dd
ee
9
X
3
1
2
I
FRONT OF WATER TRAY
 Loading...