5 EN
Turning On & O
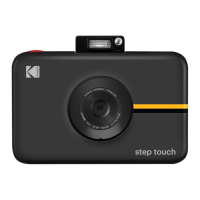
Press the power button. If the lash mechanism is in the closed position, it will open and the camera will power on.
To turn the camera o, press down the lash mechanism.
To wake the camera from sleep mode, press the power button. The camera will turn on.
When you unpack your camera the pop-up lash mechanism should be open. To turn on the camera, gently press down
on the mechanism until it clicks to close it, and then press again to open it.
Battery Charging
Charge the camera’s built-in battery by connecting it via the included micro USB cable to your computer’s USB port
or to a wall charger. The status indicator bar will show the charging progress. If the camera is turned o, the LCD will
automatically turn on and display the battery charging status for a few seconds and then turn o. You can check the
charging status at any time by tapping the screen.
It takes approximately 2 hours to fully charge the battery. Under normal conditions, the charge lasts for about 25 prints.
Memory
The camera’s internal memory can hold up to 10 photos. Insert a microSD card to expand the memory. The camera
accepts a microSD card up to 256GB.
Auto Shuto
The camera will automatically turn itself o after being idle for 5 minutes (the default time) to conserve battery power.
You can change the length of time in Settings > Auto O. (See section 10)
LCD Screen Timeout
The LCD viewinder will turn o after a minute if the camera is not in use. You can change this setting by going to
Settings > Screen Timeout. (See section 10)
Shutter Button
Press the shutter button to take still photos and photobooth shots, and to start and stop recording video. Press and hold
down the button to take photo burst shots (quick succession of photos.) Also, pressing the shutter button will bring you
back to the live viewinder whenever you’re in a dierent screen.
Touchscreen LCD Viewinder
Once you’ve set up your camera (See “First-Time Setup,” section 6), you’ll be taken to the live viewinder and main
screen. From here you’ll be able to take photos and videos, access settings, and view the gallery. You can get back to
this screen directly from any screen on the camera by pressing the shutter button. Tap anywhere on the viewinder
(except on the icons) to hide/show icons. The icons will also disappear if no action is taken after three (3) seconds.
4. USING YOUR CAMERA