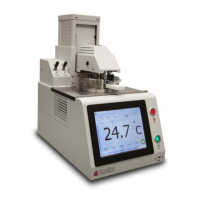
K71000 Automatic PMCC Flash Point Analyzer
Operation and Instruction Manual
K71000-Manual -21-
Side Bar - Test Parameters Section:
The Test Parameters section can be accessed by pressing the side bar on the far left side of the screen.
In this section the user can input the Expected Flash Point, Operator Name, Sample Name / ID. and
the Test Method. After all parameters are entered, Press the START button to initiate the test.
Main Display Section:
This section displays the current temperature as measured by the stainless steel PT100 probe located in
the cover assembly. Buttons for positioning the automatic lift system and checking the dip mechanism of
the igniter are also found in this section.
a. Test Position - Lowers lift to place cover assembly on test cup
b. Change Position - Raises (or lowers) lift to middle position for ease of changing test sample cup
c. Clean Position - Raises lift to highest position where is it easy to disassemble cover for cleaning
d. Stop Lift - Pressing this button stops lift while in motion
e. Check Dip - Pressing this button checks the operability of the dipping mechanism
Upper Tab Section:
a. Home: The Home tab is comprised of six (6) subsections:
- Parameters: Displays current Heater Temperature, Pressure, and Heater Ramp Rate
- Quick Test: Clicking the Quick test button will immediately start a test using the default quick
test parameters. This mode is to aid in determining the flash point of an unknown sample. Details
on this mode can be found in Section 2.4 of this document.
- LIMS: This function is only accessible when the user is in the results database screen. Data can
be exported to a Laboratory LIMS system by clicking this button.
- Print: This function is only accessible when the user is in the results database screen. Data can
be sent to a printer by clicking this button.
- Save to USB: This function is only accessible when the user is in the results database screen.
Data can be exported to a USB by clicking this button.
- Screenshot: This function is only accessible when a USB is connected to the analyzer. Clicking
this button will automatically take a screen shot of the analyzer's display screen and send an
image file to the USB device connected
b. Global Parameters: The Global Parameters tab is comprised of six (6) subsections:
- Temp Unit: Toggle between Temperature Units of Celsius or Fahrenheit
- Sensor Selection: To activate Thermocouple or Ionization Detection or Both
- Ignition Method: Toggle between Gas or Electric Ignition
- Test Method: Toggle between Standard test methods (ASTM D93 Procedure A, B and C or
Custom Test Method. Available test methods will be displayed in the Test Parameters - Side Bar
section in the Select Test Method pull down menu.
- Product Type Go-No-Go: This subsection serves as a database for any number of types of
products. All product types created are stored and can be accessed in the pull down menu. To
add a product type click on the Add New button. This brings up a pop up screen that allows for
the user to input the name of the product, the unit of measure (in °C or °F), and a minimum and
maximum flash point temperature limit. Clicking the Remove button brings up the same pop up
screen and allows the user to select a product type from the pull down menu and delete it.
Clicking the Set Prd - None button resets the product type in the pull down menu to the left.
- Lift Sound - Turns On or Off the audible sound alarm while the mechanical lift is descending.