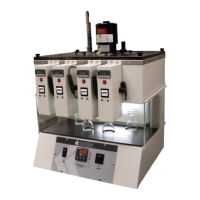
SV3000, SV4000 Saybolt Viscosity Bath
Operation and Instruction Manual
- 9 -
5. Operation
1. Remove the four binding post knobs on top of the bath. Remove the plug from behind the bath which is connected to
the terminal box. Gently remove the cover, making sure not to damage the heaters or stirrer shaft and place it in a safe
location.
2. Choose an appropriate viscometer tube. Remove the nut provided from the viscometer tube to be used. Install an orifice
into the bottom of the viscometer tube and tighten with the provided orifice wrench.
3. Insert a viscometer tube into one of the holes inside the bath. Be sure to place the lead gaskets between the top and
bottom surfaces of the tank. Screw on the nut from underneath the tank and tighten with the provided socket wrench. Up
to four viscometer tubes may be used
NOTE: If only two viscometer tubes are to be used, close off the two remaining holes with the two provided port closures
and tighten with the socket wrench. Be sure to place the Teflon gaskets between the top and the bottom surfaces of the
tank.
4. Fill the bath with oil (recommended by the test method) 1.5” from the top of the bath. Never turn the power ON unless
there is bath medium present otherwise the heaters will burn out which will automatically void the warranty. Do not let
any “bath” oil fall into the viscometer tubes.
5. Reinstall the cover on top of the bath into the screws and replace the two binding posts.
6. Place the port covers over the port holes.
7. Connect the plug from the terminal box into the back of the unit.
8. Install the RTD probe into the holder located on the right side on top of the bath.
9. Install a calibrated thermometer into the holder (cork) located in the center at the top of the bath.
10. Connect tubing from the overflow outlet (middle valve) located in the rear of the unit to a waste receptacle in case of oil
expansion.
11. Connect tubing to the cooling coil valves, located in the back of the instrument, to a suitable cold water supply (only if
needed).
12. Turn the Line and Light switches to ON.
13. To set to the desired temperature, use the UP/DOWN keys to set the temperature. After a few seconds, the
microprocessor will start the heater.
14. Place the chained corks into the bottom of the viscometer tubes.
15. Place the 60mL Pyrex™ receiving flask underneath the bath in the spaces provided, making sure the graduation marks
on the flasks are visible.
16. When the test temperature is stabilized, proceed to test in accordance with any of the test methods specified in Section
1.2.
For SV4000 Models only
17. Reset the timer on the auto timer using the red reset button.
18. Press the start/stop button on the auto timer to start the test. When the button is switched to start, the sample will flow
through the orifice and the timer will begin timing. The timer will automatically stop when 60mL of the sample has been
collected in the receiver flask.
19. Allow the entire contents of the reservoir to empty before switching of the start/stop button.
20. Record the value in seconds of the test results. Then, prepare the viscometer for the next test.