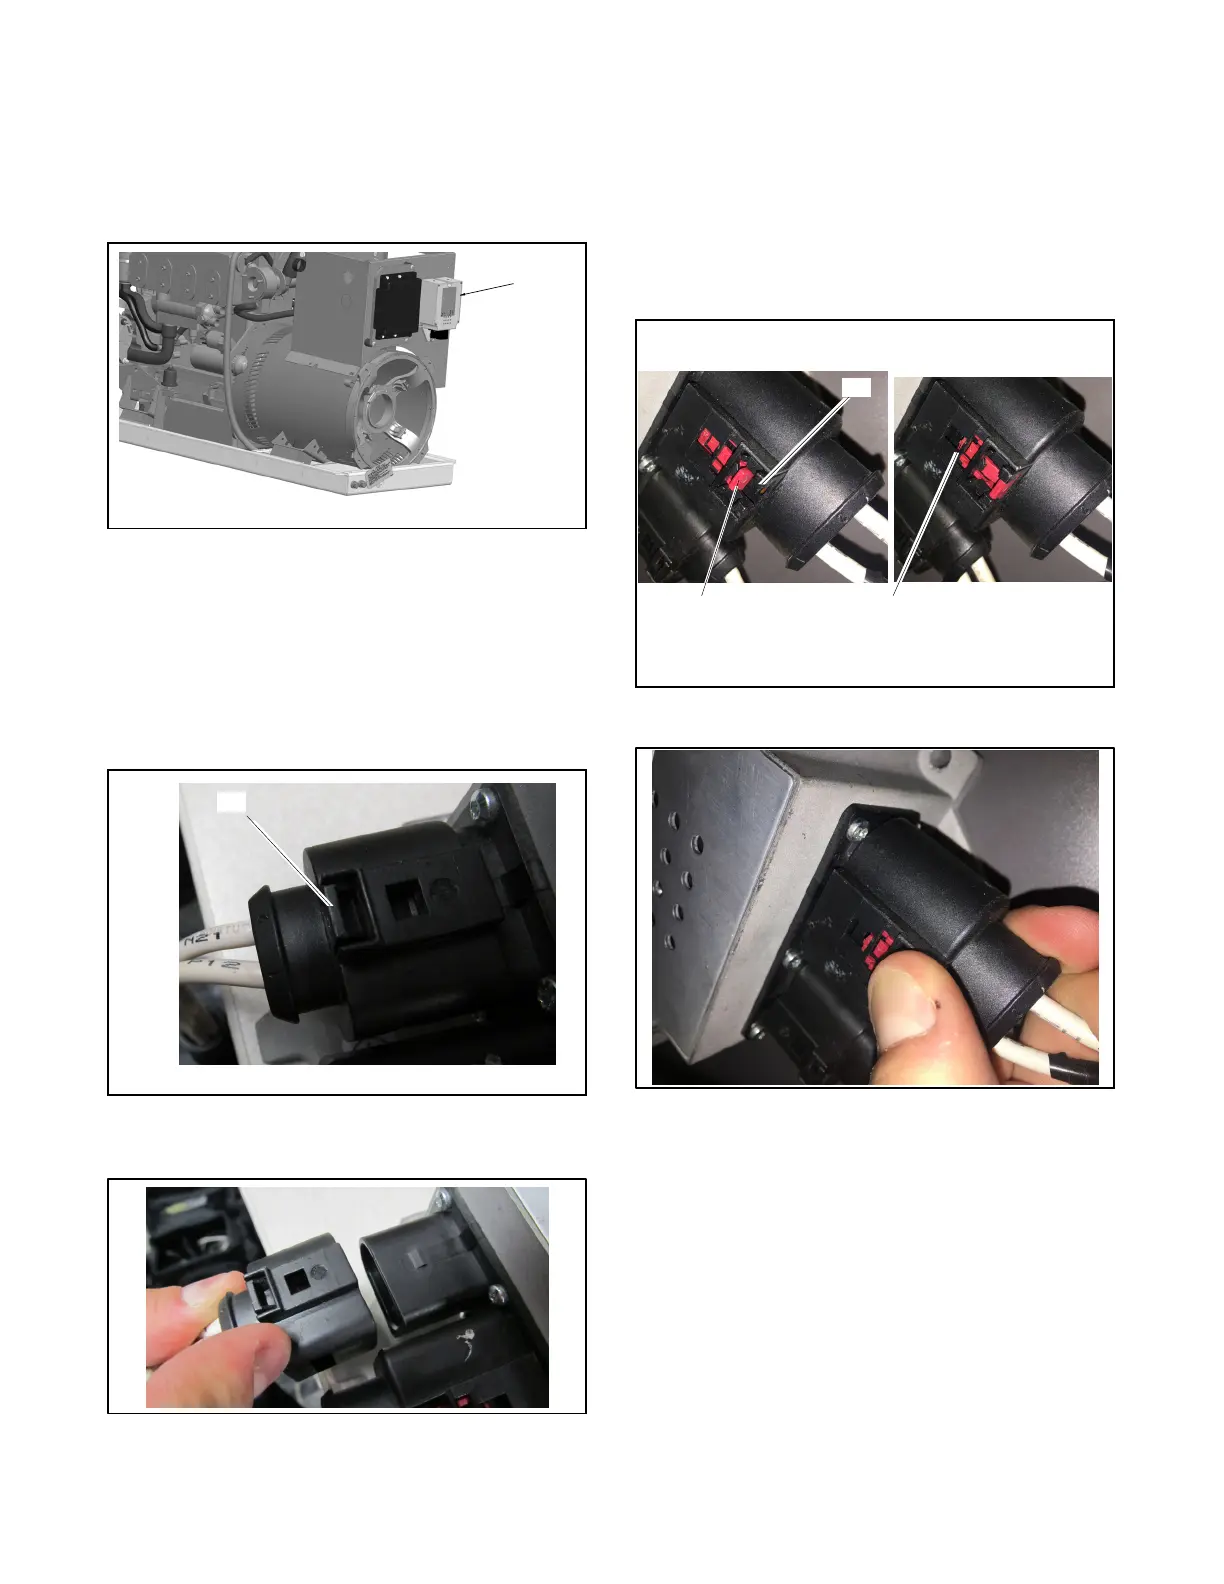
TP-6953 7/19156 Section 9 Component Testing and Adjustment
9.4.1 24- to 12-Volt Converter
(32/40EKOZD and 28/35EFKOZD
24-Volt Models Only)
If replacing the converter, carefully disconnect the two
connectors as follows.
GM95722-J
1. Converter (24-Volt Models)
1
Figure 9 -1 Converter Location (24-Volt Models)
Small Connector (with Black Tab)
1. Pull the b lack tab down on the connector until it
clicks. See Figure 9-2.
2. Gently slide the connector off of the converter. See
Figure 9-3.
1
1. Black tab
Figure 9 -2 Release the Small Connector (with Black
Tab )
Figure 9 -3 Remove the Small Connector
Large Connector (with Red Tab)
1. Pull the locking red tab down.
2. Press the red and black tab downward and inward
to raise the area of the connector shown in
Figure 9-4.
3. Gently slide the connector off of the converter. See
Figure 9-5.
3
1. Red tab
2. Black tab
3. Red tab with the end raised
Locked
Position
Unlocked
Position
1
2
Figure 9-4 Locked/Unlocked Position
Figure 9-5 Remove the Large Connector
 Loading...