Disassembly/Inspection and Service
6762 690 13 Rev. A KohlerEngines.com
Remove #1 Valley Baffl e
Dipstick Tube Mounting
C
A
B
A Spring Hose Clamp B
Fuse Holder
Bracket
C Dipstick Tube
1. Slide spring hose clamp upwards on dipstick tube.
2. On engines with control panel, remove fuses from
covers located in fuse holder bracket.
3. Remove two screws from fuse holder bracket that
secure valley baffl e to cylinder head.
4. Carefully remove clip from fuse holder bracket.
5. Remove third screw securing valley baffl e, remove
clips securing ECU plugs, and remove baffl e.
Remove #2 Valley Baffl e
1. Carefully remove clip securing low pressure fuel
lines to valley baffl e. Access clip through backing
shroud.
2. Remove two screws that secure valley baffl e to
cylinder head and remove baffl e.
Remove Oil Sentry
™
(if equipped)
NOTE: Unless Oil Sentry
™
switch is damaged or
malfunctioning, disassembly from closure plate
is unnecessary.
1. Disconnect lead from Oil Sentry
™
switch.
2. Remove Oil Sentry
™
switch from closure plate.
Remove Oil Cooler
NOTE: New clamps are recommended any time
disassembly is performed, or if clamps have
been loosened (expanded) several times.
NOTE: Make note of clamp orientation for reassembly.
1. Remove oil cooler mounting screws. Do not lose any
washers (if used).
2. Loosen clamps and disconnect hoses from oil
cooler.
Disconnect Fuel Lines from Fuel Pump Module
(FPM) and Fuel Pump
WARNING
Explosive Fuel can cause fi res and severe
burns.
Do not fi ll fuel tank while engine is hot or
running.
Gasoline is extremely fl ammable and its vapors can
explode if ignited. Store gasoline only in approved
containers, in well ventilated, unoccupied buildings,
away from sparks or fl ames. Spilled fuel could ignite
if it comes in contact with hot parts or sparks from
ignition. Never use gasoline as a cleaning agent.
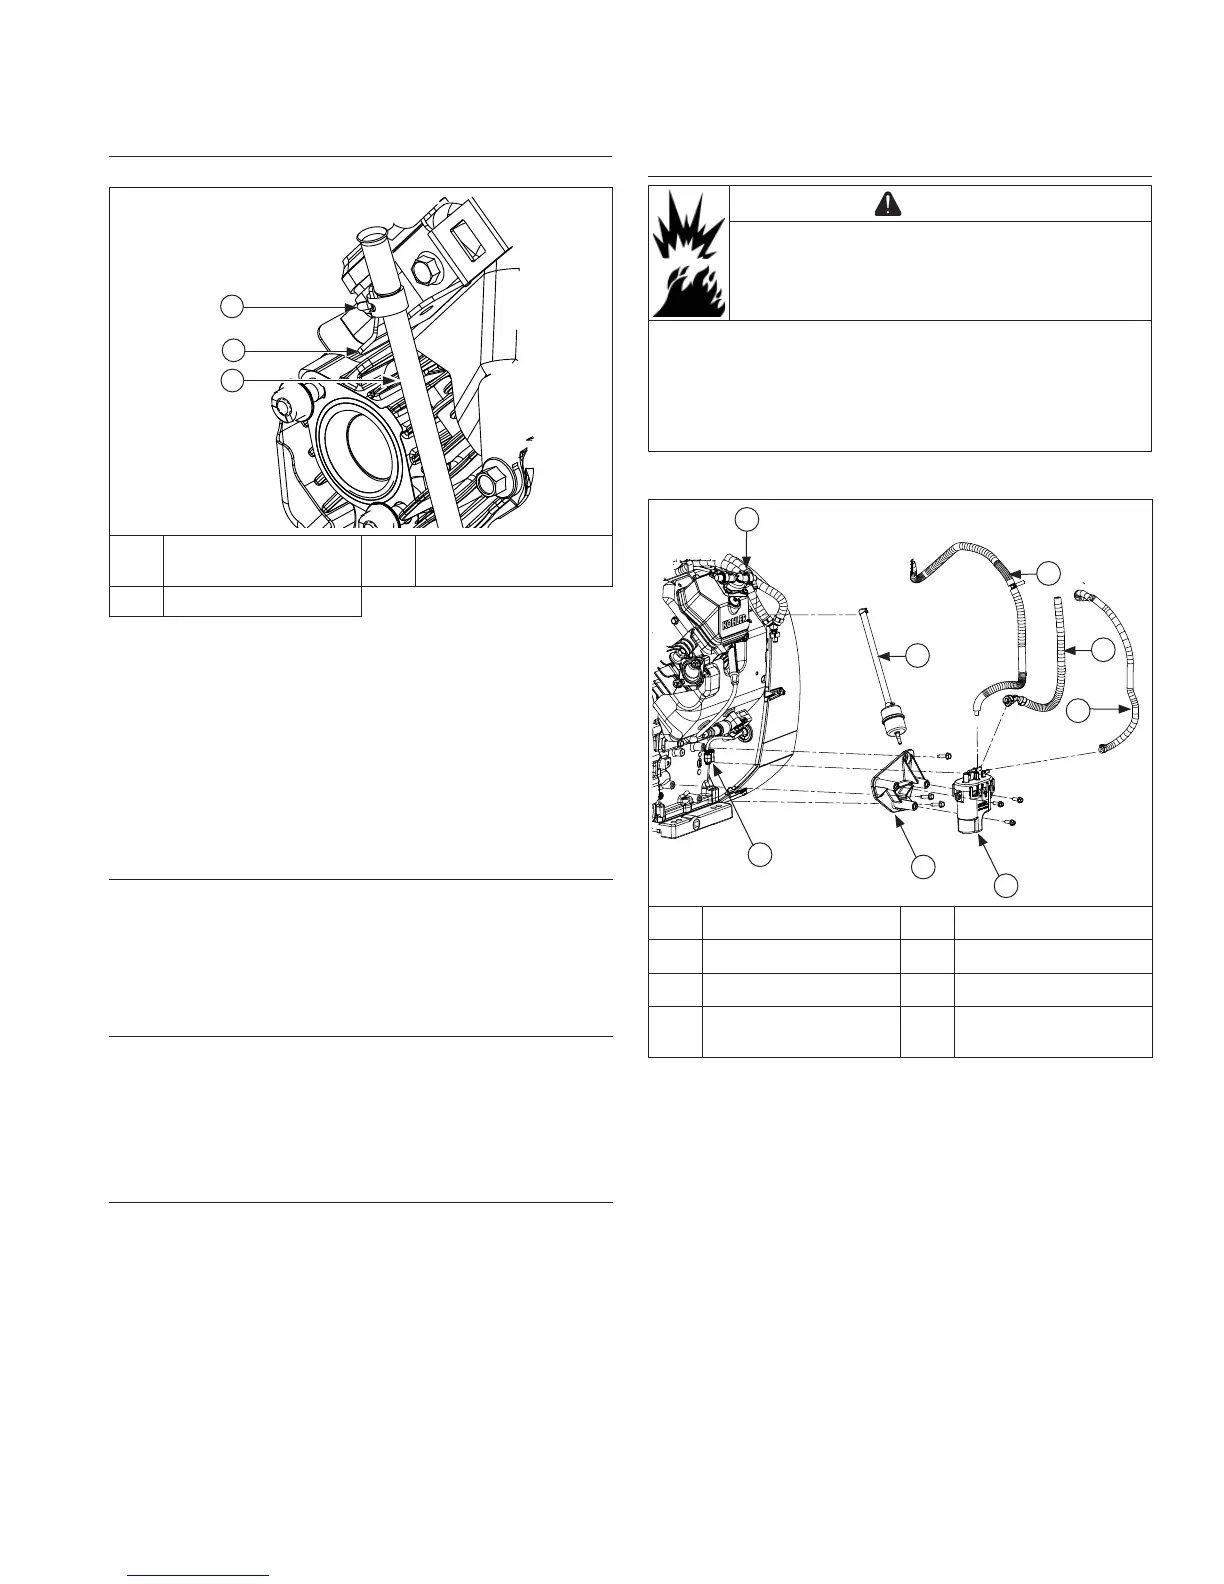
FPM Components
B
A
E
D
F
H
G
C
A Fuel Pump B Inlet Fuel Line
C Electrical Connector D FPM Baffl e
E FPM F Vent Hose
G
High Pressure Fuel
Line
H
Outlet Fuel Line to
FPM
NOTE: Do not cut Oetiker clamp unless fuel line or FPM
are being replaced.
1. Disconnect fuel lines at fuel pump.
2. Fuel pump will be removed with valve cover. Refer to
valve cover removal procedure.
3. Lift grey locking tab and squeeze to disconnect
electrical connector.
4. Using Hose Removal Tool (see Tools and Aids),
disconnect vent hose from top of FPM.
5. Wrap a shop towel completely around high pressure
fuel line connector.
Press release button and slowly pull connector away
from FPM, allowing shop towel to absorb any
residual fuel in high pressure fuel line. Any spilled
fuel must be wiped up immediately.
6. Keep inlet fuel line attached at FPM.