10.4
Section 10
Reassembly
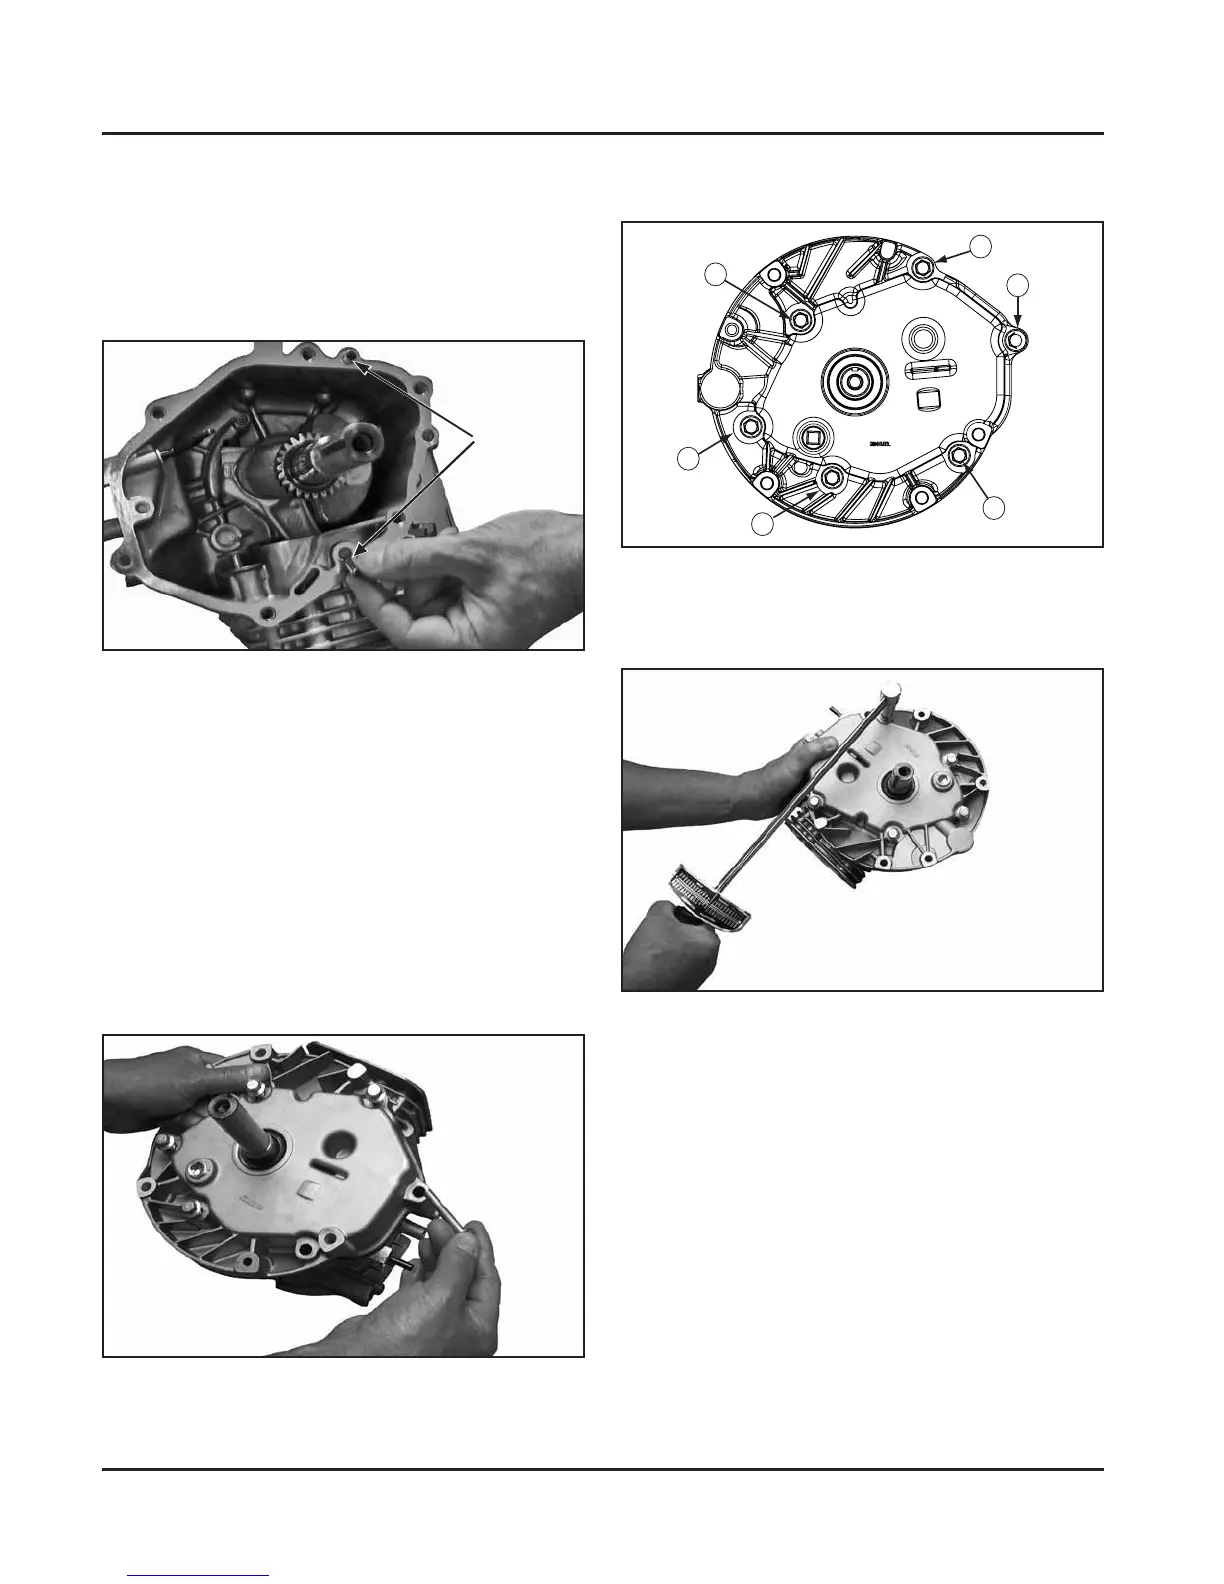
6. Using the torque sequence shown in Figure
10-13.
Figure 10-12. Installing Oil Pan Screws.
3. Using the crankcase dowels as a guide, install a
new oil pan gasket onto the crankcase.
4. Ensure the gasket, oil pan, and governor gear
assembly have been accurately matched with the
crankcase. Guide the oil pan onto the crankcase,
ȱȱĞȱȱȱȱȱ
ȱȱȱǯȱȱȱĞȱ
slightly to help engage the governor gear.
ȱ śǯȱ ȱȱęȱȱȱ¡ȱ¡ȱĚȱ
screws, securing the oil pan to the crankcase. See
Figure 10-12.
Figure 10-14. Torquing Oil Pan Screws.
Dowels
Install Oil Pan
1. The sealing surfaces of the crankcase and oil pan
should be clean, dry and free of any nicks or
burrs.
2. Install the two crankcase dowels into the
crankcase. See Figure 10-11.
Figure 10-11. Installing Crankcase Dowels.
1
2
3
4
5
6
Figure 10-13. Torque Sequence.
7. Torque the oil pan screws to 12.3 N·m (109 in.
lb.). See Figure 10-14.
 Loading...