64
ST_34
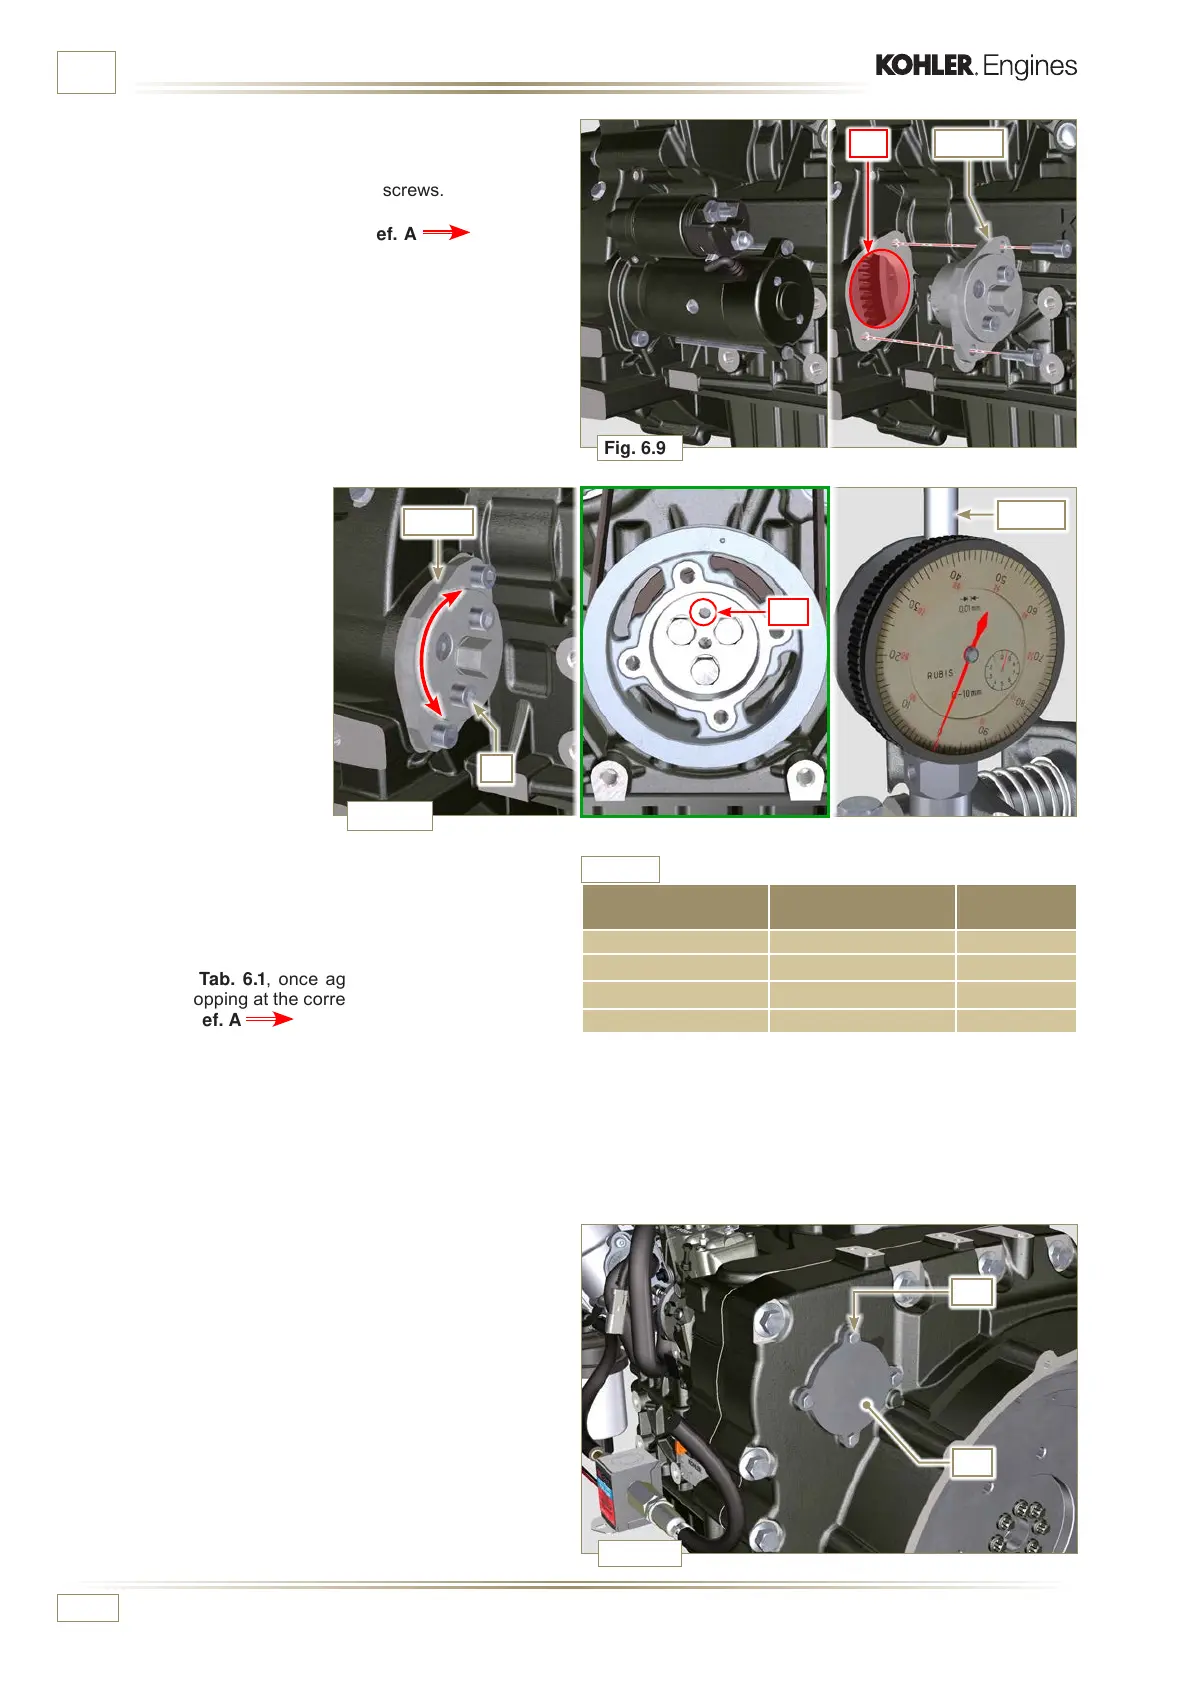
Fig. 6.9
Fig. 6.10
X1
W
ST_30
Y
A1
B1
Fig. 6.11
Tab. 6.1
ST_34
ED0053030410
INFORMATION FOR REPLACING THE FUNCTIONAL UNITS
5 - With reference X pointed
upwards, find the TDC
through tool ST_30, then
bring the dial gauge
indicator to 0.
2 -
Disassemble the starter motor.
3 - Mount the tool ST_34 in the seat of the starter motor Y and
fit it with the two starter motor fixing screws.
4 - Rotate the crankshaft clockwise (Ref. A Par. 1.4)
through the ST_34 tool bringing reference X upwards.
NOTE:
When positioning reference X, make sure cylinder N°
1 is in compression phase (the valves on piston N° 1
must all be closed).
6 -
By means of the identified pump code, refer to Tab. 6.1 to
know the advance degrees and the corresponding value
to lower the piston.
7 -
Having identified the value to lower the piston, rotate
the crankshaft anti-clockwise by going beyond the value
described in Tab. 6.1, once again, rotate the crankshaft
clockwise, stopping at the correct advance value by using
tool ST_30 (Ref. A
Par. 1.4).
NOTE: The value indicated in Tab. 6.1 must be reached by
rotating the shaft with the piston in compression phase.
Use the ST_34 tool to totate the crankshaft.
8 - Lock the ST_34 tool through J screws and ensure that the
crankshaft does not rotate, which would alter the correct
advance value. If this happens, repeat the instructions
described in points 4, 5, 6, 7 and 8.
9 -
Undo the screws A1, remove the plate B1.
PUMP CODE
PISTON
LOWERING (mm)
ADVANCE
a
ED0065905290-S 0,733 8°
ED0065905430-S 0,562 7°
ED0065905440-S 0,828 8,5°
ED0065905690-S 0,413 6°

 Loading...


