9
136
_07
Fig. 9.25
1
6
52
4
3
8
7
Fig. 9.24
BT
E
BV
BU
BW
BS
CA
CD
Fig. 9.26
CB
CA
ED0053029590
ASSEMBLY INFORMATION
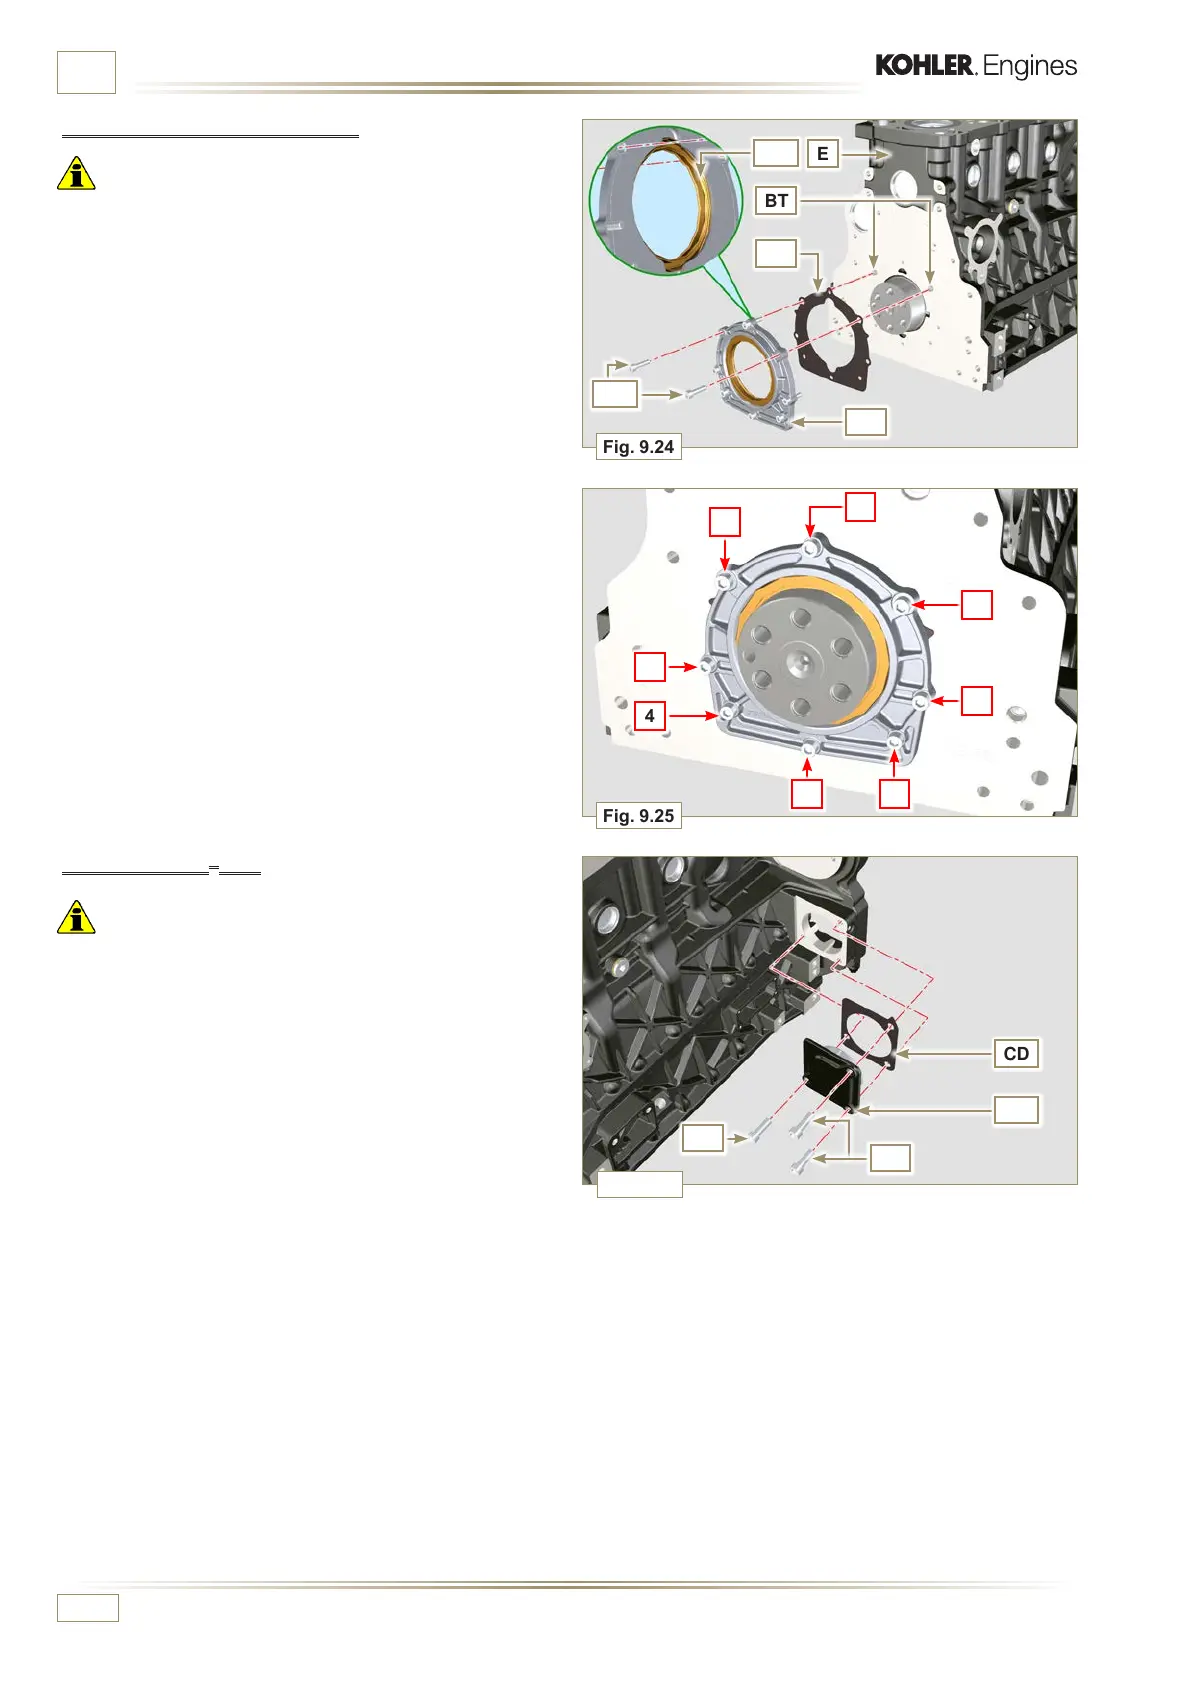
9.3.10 Crankshaft gasket ange
Important
• Check that the contact surface between the flange and the
crankcase is free of grit and dirt.
• Always replace the gasket BS at each assembly.
1 -
Check that there are bushings BT on the crankcase E.
2 -
Lubricate the oil seal lip BU.
3 - Position the gasket BS and flange BV on the crankcase E
in correspondence with the bushings BT.
4 - Put Loctite 243 on the 2 screws BW matching the
bushings BT.
5 -
Screw the fastening screws all the way in BW without
tightening them.
6 -
Tighten all the screws BW strictly following the tightening
sequence indicated (tightening torque to 10 Nm).
9.3.11 Cover 3
rd
PTO
Important
• Replace capscrews CA with each assembly or alternatively
apply Loctite 2701 on the thread.
1 - Secure the cover CB with the screws CA and CC inserting the
gasket CD (tightening torque 25 Nm).

 Loading...


