9
158
_07
BE
BA BC
BD
BF
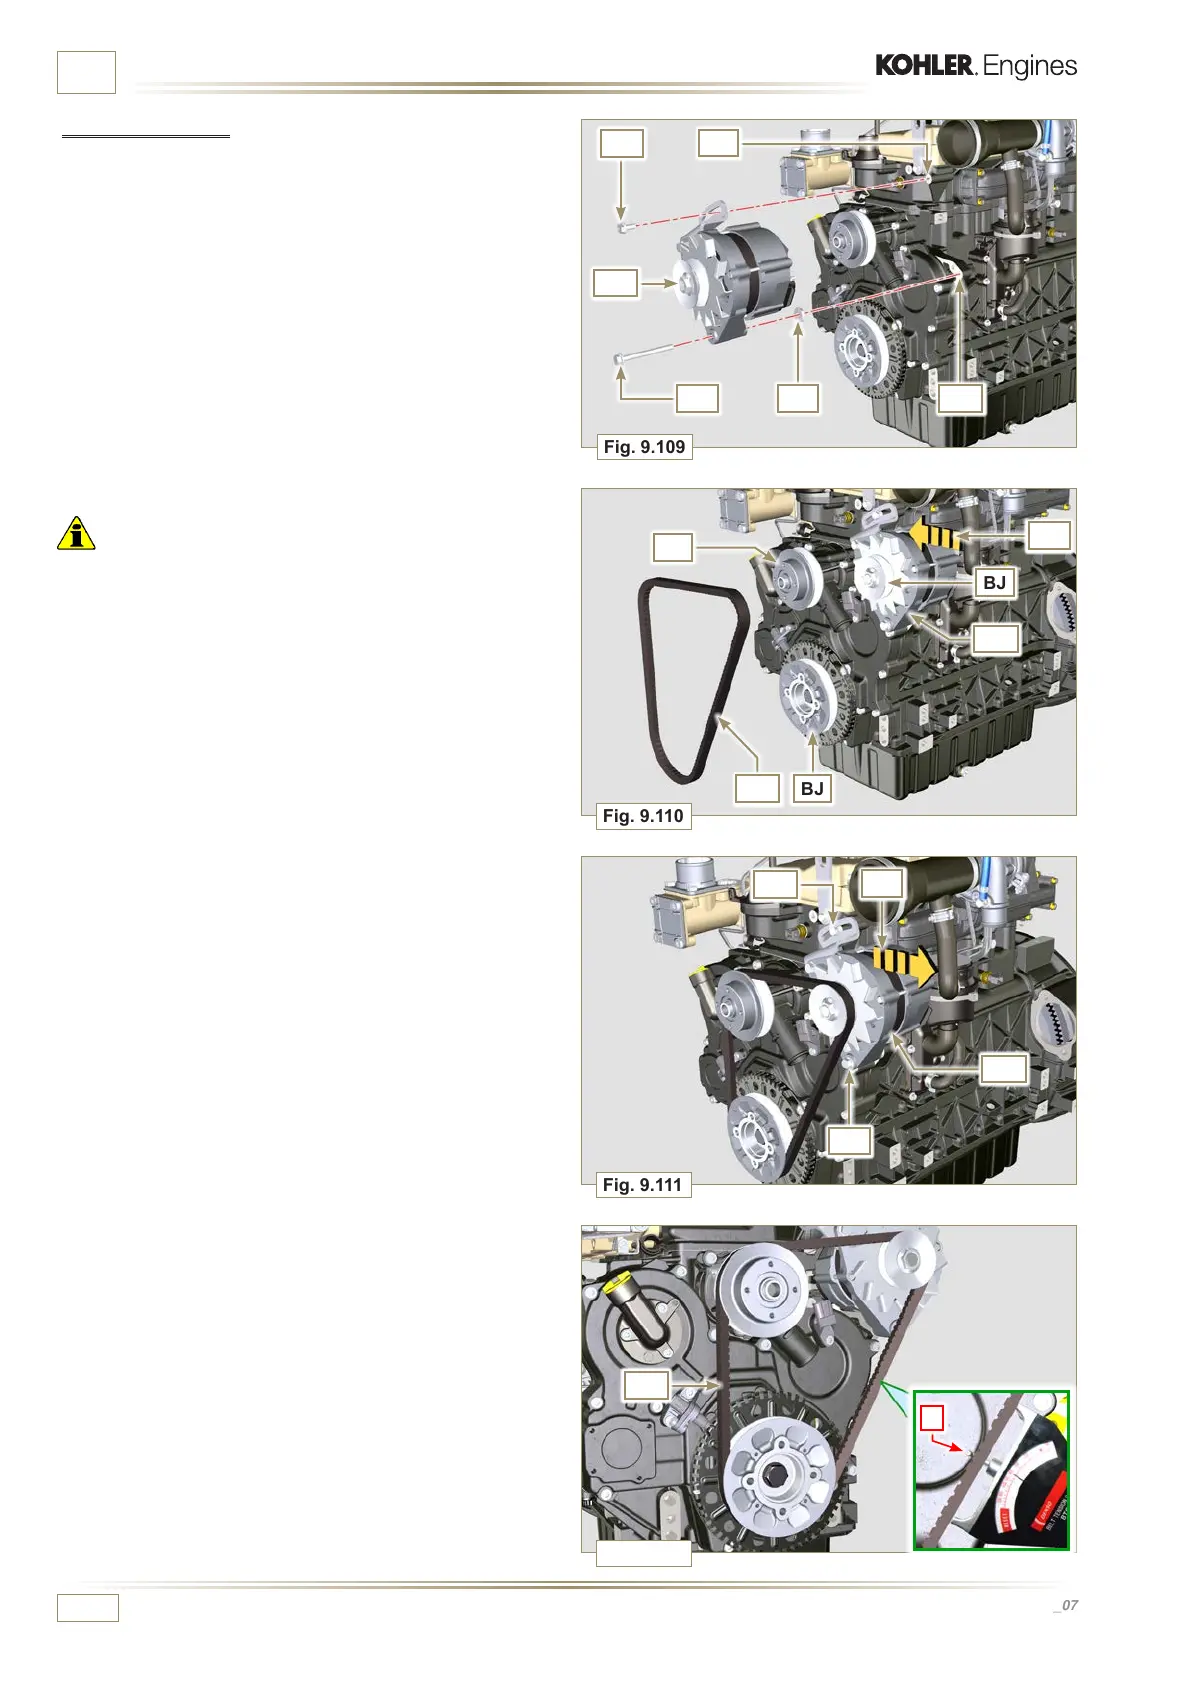
Fig. 9.109
BJ
BH
BJ
BJ
BG
BB
Fig. 9.110
BK
Fig. 9.111
BE
BB
BA
BH
Fig. 9.112
BB
P
ED0053029590
ASSEMBLY INFORMATION
5 - Pull out the dipstick BB in the direction of the arrow BG.
Important
• The belt BH must always be replaced every time it is
assembled, even if it has not reached the scheduled hours
for replacement.
6 - Insert the belt BH on the pulleys BJ.
9.15.2 Alternator
1 - Insert the screw BA onto the alternator BB.
2 - Insert the washer BC onto the screw BA.
3 - Manually fit the screw BA all of the way onto the crankcase
BD without tightening.
4 - Manually fit the screw BE all of the way onto the head BF
without tightening.
7 -
Pull out the dipstick BB in the direction of the arrow BK.
8 - While tensioning the alternator BB, first clamp screw BE
(tightening torque at 25 Nm) and then screw BA (tightening
torque at 69 Nm).
9
- Check the tension of the belt BH with a Clavis type
instrument, positioning it in point P (the tension must be
between 350 and 450 N).
10 - If the tension values do not correspond, tighten screws BA
and BE, then repeat operations 7, 8 and 9.

 Loading...


