EasyManua.ls Logo

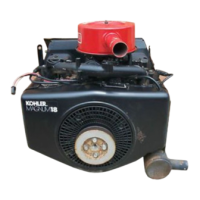
Kohler MAGNUM M18

Kohler MAGNUM M18
139 pages
To Next Page IconTo Next Page
To Previous Page IconTo Previous Page
Loading...
SECTION
11
REASSEMBLY
r
Posi-Lock
Connecting
Rods
Dowel
Sleeve
un-
M18
Match
Marks
Shank
Angled
Down
And
Away
From
Camshaft
M20
Match
Marks
Figure
11-10.
Installing
Posi-Lock
Connecting
Rods.
2.
Install
the
connecting
rod
caps.
Make
sure
the
match
marks
are
aligned
and
the
proper
cap
is
reinstalled
to
each
connecting
rod.
3.
Install
the
hex.
nuts
and
torque
as
follows:
Torque
New
Service
Rod
140
In.
Ib.
Used/Reinstalled
Rod
100
in. Ib.
NOTE:
To
prevent
damage
to
the
connecting
rods
and
engine,
do
not
overtorque--ioosen--and
retorque
the
hex.
nuts
on
Posi-Lock
connect-
ing
rods.
Torque
the
nuts,
in
increments,
di-
rectly
to
the
specifled
values.
INSTALL
BEARINGS
AND
CRANKSHAFT
1.
Lubricate
the
crankshaft
bearing
journals
with
en-
gine
oil.
Install
the
.130"
thrust
washer
to
РТО
end
of
crankshaft.
Refer
to
Figure
11-11.
Sleeve
Bearings
PTO
End
Connecting
Rods
Thrust
Washer
Figure
11-11.
Installing
Thrust
Washer
and
Bearings
to
Crankshaft.
2.
Install
the
bearings
to
PTO
and
flywheel
end
of
crankshaft.
3.
Install
the
crankshaft
with
connecting
rods
and
bearings
into
crankcase.
Make
sure
the
locating
tab
of
PTO
end
sleeve
bearing
is
positioned
in
notch
in
crankcase
(refer
to
Figure
11-12).
The
oil
hole
in
flywheel
end
sleeve
bearing
must
be
aligned
with
the
oil
gallery
in
crankcase
(refer
to
Figure
11-13).
PTO
Sleeve
@
Bearing
заль
econ,
Figure
11-12.
Position
of
PTO
Bearing/Measuring
Crankshaft
End
Play.

Related product manuals