This document provides an electrical installation and operation manual for Komfovent Domekt series air handling units with a C4 controller. It covers essential steps for setting up and managing the ventilation system, ensuring proper functionality and user convenience.
Installation Manual
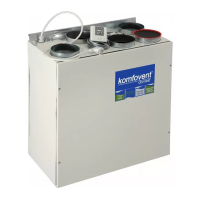
The installation process for Komfovent Domekt air handling units must be carried out by qualified specialists to ensure safety and optimal performance. Key requirements include maintaining a minimum distance of 20 cm between control cables and power cables to prevent interference.
Electric Power Supply Connection:
The air handling unit operates on 230V AC, 50 Hz. It requires connection to a grounded socket with appropriate capacity, as detailed in the wiring diagram. The unit must be connected to a stationary installation using a solid cable, protected by a 10A circuit breaker and a maximum 30mA current leakage relay. Before connecting, it is crucial to verify that the earthing system is properly installed according to electrical safety standards.
Control Panel Installation:
The control panel should be installed in a room where the ambient temperature ranges from 0°C to 40°C and relative humidity is between 20% and 80%. It must be protected from vertically falling water drops (IP X2). The installation height should be at least 0.6 meters from the ground. The control panel connects through a hole in its backside and is secured by screwing it to the fastening surface. The cable connecting the control panel to the air handling unit should not exceed 20 meters in length.
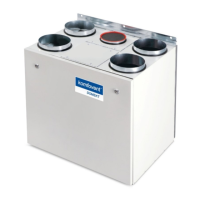
Kitchen Hood Connection:
Komfovent Domekt REGO 200VE air handling units offer the possibility of connecting a kitchen hood. The cable for this connection, marked as KH in the functional diagram, is routed through a rubber gasket in the unit's wall and connected to the J11 connection box. It is vital to follow the numeration in the wiring diagram for correct connector connection. When disconnecting unit sections, avoid pulling by the wires or cables. Always switch off the unit and shut off the power supply before performing any operations inside.
Control Contacts Connection:
Units with the C4 controller allow for the connection of additional devices such as switches, sensors, timers, or buttons. An external cable for this function is brought out from the unit. Detailed connection possibilities are provided in the operation manual.
Operation Manual
The control panel serves as the remote interface for managing the air handling unit. It can be installed in any user-friendly location, providing convenient access to unit settings and operational modes. Light diodes on the panel indicate the current operation status of the unit, while switches are used to set ventilation intensity and operating modes.
Unit Control:
The control panel features several key indicators and switches:
- Heat exchanger operation / failure indication diode: Shows if the heat exchanger is working correctly or if there's a fault.
- Electrical air heater operation / failure indication diode: Indicates the status of the electrical air heater.
- "Summer / Winter" mode setting switch: Allows selection between summer and winter operating modes.
- Ventilation intensity selection switch: Used to adjust the ventilation speed.
Control Panel Indications:
The control panel uses various symbols and light indications to communicate the unit's status:
- Shines: Indicates heat recovery is active.
- Blinks: Signifies a heat recovery failure.
- Shines: Shows that the air heater is operating.
- Blinks 3 times per second: Indicates a heating function failure.
- Blinks 8 times per second: Points to a temperature sensor failure.
- Blinks successively every second: Suggests that a unit maintenance inspection is required.
Ventilation Intensity Setting:
The air handling unit offers three ventilation intensity levels, adjustable via switch (4) on the control panel: minimum, normal, and maximum. The normal (second) ventilation intensity level for both supply and exhaust fans can be customized based on the specific ventilation system project. For AC fans, adjustment is in steps, while for EC fans, it's gradual from 20% to 100%. Desired ventilation levels are set using potentiometers located on the wall of the automatic box inside the unit.
Temperature Setting:
The desired supply air temperature is set using a screw potentiometer located on the wall of the automatic box inside the unit.
"Winter / Summer" Mode:
Switch (3) on the control panel allows selection of the unit's operating mode:
- "Summer": Electrical heater operation is blocked.
- "Winter": Electrical heater operation is available.
It is recommended to select the "Summer" operating mode when the outdoor temperature is near the setpoint (15...30°C) to conserve electrical energy.
"OVR" Function (Override):
The "OVR" function provides remote control of the unit by an additional external device. When activated, it overrides the current operating mode, causing the unit to operate at a predefined intensity.
Applications of the "OVR" function include:
- CO₂ quantity maintenance: By connecting an additional CO₂ sensor with a relay, the unit can switch to maximum intensity ventilation when CO₂ levels are high, returning to the user-defined intensity once the room is ventilated.
- Relative humidity maintenance: Similarly, an external relative humidity sensor can trigger maximum or different set ventilation intensity to maintain desired humidity levels.
- Ventilation on demand: When a motion sensor is connected, ventilation adjusts based on occupancy. If people are indoors, ventilation operates at the set "OVR" intensity; if nobody is present, it reverts to the main user intensity (e.g., minimum).
- Ventilation with additional air extraction: This function is for connecting an additional extracting device, such as a kitchen hood without a separate fan. Upon activation, the unit's supply and exhaust air fans operate at maximum intensity to facilitate air extraction.
- Negative pressure compensation: For systems with a separate air extraction fan, the "OVR" function can be activated to compensate for negative pressure in the room. In this mode, the unit's exhaust air fans operate at maximum intensity, and the separate exhaust air fan turns off. To enable this, jumper No. 4 on the automation box must be set to ON.
Activation of the "OVR" Function:
The "OVR" function can be activated in two ways:
- With an external control device: By short-circuiting the FC contacts (as shown in the wiring diagram), the unit operates in the selected "OVR" mode. Disconnecting the contacts returns the unit to its previous operating mode.
- With the control panel: This method does not require external connections. The function is activated via the control panel and remains active until the unit's internal timer expires.
The "OVR" mode activation procedure involves:
- Enabling the maximum ventilation level using switch (4) (the unit must be at minimum or normal intensity beforehand).
- Within 5 seconds, toggling the "Summer / Winter" mode setting switch (3) back and forth a specific number of times to set the timer duration (1 time for 30 min, 2 times for 60 min, 3 times for 90 min).
- After activating the timer, set the desired ventilation level at which the unit will operate once the "OVR" mode time expires. To disable "OVR" mode before the timer runs out, repeat steps (1) and (3), omitting step (2).
Configuration of Automation Functions:
Switches on the automatic box allow configuration of the heat exchanger type, heater, fan, and "OVR" function mode. These settings take effect only after rebooting the power supply.
Troubleshooting
This section provides guidance for resolving common issues with the air handling unit.
If the unit is inoperative:
- Verify that the feeding cable is securely plugged into an electrical outlet.
- Check all safety fuses in the automatic control block. Replace any faulty fuses with new ones of the same electrical parameters, as specified in the wiring diagram.
If air flow is reduced:
- Check the set ventilation intensity level.
- Inspect the air filters and replace them if necessary.
- Adjust supply/exhaust air diffusers as needed.
- Ensure the outside air intake grille is not clogged.
- Check if the system ducting is damaged or obstructed.
If supplied air is too cold:
- Verify the temperature setting.
- Confirm that "Winter" mode is selected on the control panel.
- Check for any failure indications on the control panel.
- Inspect fuse F2 located on the automatic box.
Important Notes for Troubleshooting:
- If at least one light diode on the control panel blinks, it indicates a failure. Refer to the detailed failure table for specific indications and their elimination.
- Before performing any operations inside the unit, always ensure the unit is switched off and the power supply voltage is shut off.
Failures indicated on the control panel, possible reasons and their elimination:
-
Unit with rotary heat exchanger (Blinks 3 times per second):
- Description: No signal from the rotor's rotation sensor. If "Winter" season is set, the unit stops operating in 2 min. If "Summer" season is set, it continues operating.
- Possible failure cause: Broken belt, failure of the rotor motor or rotor sensor.
- Failure elimination: Check rotor drive and rotation sensor condition.
-
Unit with plate heat exchanger (Blinks 3 times per second):
- Description: Freezing protection of the heat exchanger is activated and not restored in 10 min, the unit stops operating.
- Possible failure cause: Temperature of the air passing through the plate heat exchanger dropped below allowable level.
- Failure elimination: Check by-pass damper condition and actuator performance. Decrease ventilation level.
-
Unit with electric heater (Blinks 3 times per second):
- Description: Electric heater has emergency protection from overheating at 90°C (automatic reset) and at 120°C (manual reset).
- Possible failure cause: Heater is disconnected due to low air flow; electric heater overheating protection is on.
- Failure elimination: When heater cools down, protection restores automatically. Increase ventilation intensity level. Restore emergency overheating protection with "RESET" button (on heater) only after clarifying and eliminating the cause.
-
Unit with water heater (Blinks 3 times per second):
- Description: Water temperature falls below +9°C, the unit stops operating.
- Possible failure cause: Failure of the hot water preparation and supply function in the heating system.
- Failure elimination: Check circulation pump and heating system condition, heating valve actuator performance.
-
Independent of unit type (Blinks 8 times per second):
- Description: Supply air temperature is not within +5°C to +45°C, unit stops operating with 10 min delay. If temperature exceeds -30°C to +75°C, unit stops immediately.
- Possible failure cause: Supplied air is too cold or too hot; supply air temperature sensor is not connected or broken down.
- Failure elimination: Check temperature and season settings. Check heat exchanger and heater operation. Check sensor connections or change the sensor.
-
Independent of unit type (Blinks every second):
- Description: Periodic inspection message appears on the control panel depending on unit operation intensity.
- Possible failure cause: ---
- Failure elimination: Disconnect unit from power supply. Perform periodic inspection: check air filter clogging, heat exchanger, heater, and fan conditions.
Detailed information regarding unit maintenance inspection is available in the Installation and Maintenance Service Manual.