EasyManua.ls Logo

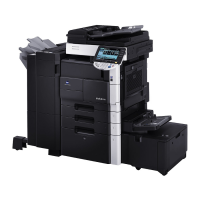
Konica Minolta bizhub 361 User Manual

Konica Minolta bizhub 361
604 pages
To Next Page IconTo Next Page
Page #1 background imageLoading...
Page #1 background image
Copy Operations
501/421/361

Table of Contents

Other manuals for Konica Minolta bizhub 361

Questions and Answers:

Konica Minolta bizhub 361 Specifications

General IconGeneral
FunctionsPrint, Copy, Scan, Fax
Print TechnologyLaser
Print Resolution1200 x 1200 dpi
Scan Resolution600 x 600 dpi
Copy Resolution600 x 600 dpi
ConnectivityUSB, Ethernet, Wi-Fi
Duplex PrintingAutomatic
Fax Transmission Speed33.6 kbps
Max Paper SizeA3
Print Speed36 pages per minute
Copy Speed36 pages per minute
DisplayTouchscreen

Summary

1 Introduction

1.1 Available features

Overview of the machine's features, including paper selection, zoom, and batch scanning.

1.4 User manuals

Lists the available printed manuals and PDF manuals provided on the User manual DVD.

2 Before making copies

2.1 Machine configuration

Details the main unit and optional components, with a diagram of machine configuration.

2.1.1 Options

Lists and describes the various optional components and their functions.

2.1.9 Control panel

Identifies and describes the functions of each key and indicator on the control panel.

2.3 Turning on the main power and the sub power

Explains the procedure for turning the machine on and off using the main and sub power switches.

2.3.1 Turning on the machine

Step-by-step guide to turning on the machine, including the main and sub power switches.

2.3.6 Automatically conserving energy (Low Power mode)

Explains how the machine enters Low Power mode to conserve energy after a period of inactivity.

2.3.10 Controlling each user’s use of this machine (User Authentication)

Details how to control machine usage by registering users and specifying authentication settings.

2.4 Loading paper into tray 1/2/3/4

Provides instructions for loading paper into trays 1, 2, 3, and 4, which use the same method.

2.7 Loading paper into the bypass tray

Instructions for loading paper into the bypass tray for special paper types or manual feeding.

3 Basic copy operations

3.1 General copy operation

Describes the fundamental steps for performing a single-sided copy using basic operations.

3.3 Feeding the original

Explains the two methods for feeding originals: using the ADF or the original glass.

3.3.1 Loading the original into the ADF

Step-by-step guide for loading originals into the Automatic Document Feeder (ADF).

3.3.2 Placing the original on the original glass

Instructions for placing originals directly on the original glass for scanning.

3.4 Specifying original settings

Guides on specifying settings like size, direction, and binding margin for originals.

3.4.1 Specifying the original size (Original Size settings)

Instructions on how to specify the original size when it cannot be detected automatically.

3.5 Selecting a paper setting

Describes how to select paper size automatically or manually for copies.

3.5.1 Automatically selecting the paper size ("Auto" paper setting)

Explains the "Auto" paper setting for automatically selecting paper size based on the original.

3.6 Specifying a zoom setting

Details how to set the zoom ratio to enlarge or reduce copy images.

3.6.1 Automatically selecting the zoom ratio ("Auto" zoom setting)

Explains the "Auto" zoom setting for automatically selecting the appropriate zoom ratio.

3.11 Selecting finishing settings

Describes various settings for sorting and finishing copies in the output tray.

3.11.1 Separating copies by sets ("Sort" setting)

Instructions for separating copies into sets using the "Sort" finishing setting.

3.11.4 Stapling copies (Staple settings)

Explains how to staple copies together in the corner or at two places.

3.11.5 Punching holes in copies (Punch settings)

Instructions for punching holes in copies for filing purposes.

4 Additional copy operations

4.1 Checking the copy settings (Check job)

Details how to check and change current copy settings using the "Check Job" function.

4.1.1 To check the settings

Step-by-step guide to checking the current copy settings on the machine.

4.2 Printing a proof to check the settings (Proof Copy)

Explains how to print a single proof copy to check settings before making a large number of copies.

4.3 Checking the print image as a preview image (Advanced Preview)

Describes how to preview the print image before printing to prevent errors.

4.4 Interrupting a copy job (Interrupt mode)

Details how to temporarily interrupt a current copy job to perform another task.

4.5 Registering copy programs (Mode Memory)

Explains how to store and recall frequently used copy settings as programs.

5 Troubleshooting

5.1 When an error code appears

Provides guidance on how to handle and clear error codes displayed by the machine.

5.2 When the message "misfeed detected." appears

Describes how to identify and clear paper misfeeds detected by the machine.

5.2.2 Paper misfeed indications

Illustrates the locations of potential paper misfeeds with numbered diagrams.

5.2.3 Clearing a paper misfeed in tray 1

Step-by-step instructions for clearing paper misfeeds specifically from tray 1.

5.3 Simple troubleshooting

Offers solutions for common machine issues, categorized by symptom and possible cause.

6 Specifications

6.1 Specifications

Provides technical specifications for the main unit of the machine.

6.1.1 Main unit

Details the specifications of the main unit, including power, dimensions, and copy speed.

6.2 Option Specifications

Lists the specifications for various optional equipment available for the machine.

7 Copy paper/originals

7.1 Copy paper

Provides information on available paper sizes and types compatible with the machine.

7.1.2 Paper weight

Details the supported paper weights for different trays and machine components.

7.1.5 Paper size

Lists the available paper sizes supported by the main unit and various optional equipment.

7.4 Originals

Explains how to load originals into the ADF or onto the original glass for copying.

7.4.1 Originals that can be loaded into the ADF

Specifies the types and sizes of originals that can be loaded into the Automatic Document Feeder (ADF).

7.4.3 Originals that can be loaded on the original glass

Outlines the types of originals that can be placed and scanned on the original glass.

8 Application functions

8.1 Inserting paper between OHP transparencies ("OHP Interleave" function)

Explains how to insert paper between OHP transparencies to prevent sticking during copying.

8.2 Adding cover pages ("Cover Sheet" function)

Details how to add cover pages using different paper for the front and back of copies.

8.3 Inserting different paper into copies ("Insert Sheet" function)

Describes how to insert different paper types into copies at specified page locations.

8.4 Inserting copies of a different original for a specified page ("Insert Image" function)

Explains how to insert pages from another original into a copy job at specific locations.

8.11 Adding a binding margin to copies ("Page Margin" function)

Guides on adding a binding margin to copies for easier filing and adjusting image orientation.

8.13 Copying with the page layout of a magazine ("Booklet" function)

Instructions for arranging pages for center binding, like a magazine, using the Booklet function.

8.14 Erasing specified area of copies (Erase)

Explains how to erase unwanted areas like borders or punch holes from copies.

8.14.1 Erasing black marks along borders ("Erase" function)

Details how to erase black marks along the borders of printed sheets using the Frame Erase function.

8.15 Printing the date/time or page number on copies (Stamp/Composition functions)

Describes how to add date/time, page numbers, or copy protection text to copies.

8.15.1 Printing the date/time ("Date/Time" function)

Instructions for printing the date and time on copies using the Date/Time function.

8.15.5 Printing repeating stamps ("Stamp Repeat" function)

Explains how to print registered stamps repeatedly across a page.

8.16 Saving the scanned original in a user box ("Save in User Box" function)

Guides on how to save scanned originals into user boxes for later printing.

9 Replacing toner cartridges and staple cartridges and emptying punch scrap box

9.1 Replacing the toner cartridge

Step-by-step instructions for replacing the toner cartridge when it is low or empty.

9.2 Replacing the staple cartridge

Details the procedure for replacing staple cartridges in the finishers when they are empty.

9.2.1 To replace the staple cartridge for finisher FS-523

Specific instructions for replacing the staple cartridge in the FS-523 finisher.

9.3 Emptying punch scrap boxes

Explains how to check and empty punch scrap boxes for the FS-523 finisher and PU-501 unit.

10 Care of the machine

10.1 Cleaning

Provides instructions for cleaning various parts of the machine to maintain print quality.

10.1.1 Cleaning the left partition glass

Describes how to clean the left partition glass of the ADF to prevent copy marks.

10.1.2 Cleaning the original glass

Instructions for cleaning the original glass to prevent spots on copies.

10.1.7 Cleaning the control panel

Guidance on how to clean the control panel and touch panel safely.

10.3 When the message "It is time for the scheduled inspection of the device." appears

Explains the procedure for requesting periodic maintenance when the inspection message appears.

11 Managing jobs

11.1 Overview of Job List screen

Introduces the Job List screen for checking and managing jobs.

11.1.3 Job List screens

Describes the different tabs and lists available within the Job List screen.

11.2 Performing operations on jobs

Details how to perform operations on jobs, such as deleting or checking settings.

11.2.1 Deleting a job

Instructions on how to delete a queued or currently printing job.

11.2.4 Displaying the Current Jobs list (stored jobs and active jobs)

Explains how to display lists of currently running, queued, and stored jobs.

11.2.8 Increasing printing priority

Describes how to change the output priority of jobs to print them sooner.

12 Utility mode

12.1 Overview of Utility mode parameters

Provides a list and description of parameters available in Utility mode.

12.3 Specifying user settings

Guides on how to specify various user settings like language and paper tray preferences.

12.3.1 System Settings

Covers settings for language, measurement units, paper trays, and power save modes.

12.3.2 Custom Display Settings

Details how to customize the display of basic screens and shortcut keys.

12.4 Specifying administrator settings

Explains how administrators can configure system, network, and security settings.

12.4.1 System Settings

Covers settings for power save, output trays, date/time, and weekly timers.

12.4.4 User Authentication/Account Track

Details settings for managing user authentication and account tracking.

12.4.10 Security Settings

Covers administrator passwords, user box security, and other security-related configurations.

12.4.12 Displaying the Administrator Settings screen

Instructions on how to access the Administrator Settings screen.

12.6 Finisher Adjustment

Provides procedures for adjusting finisher settings like paper folding and stapling positions.

12.6.1 Half-Fold Position

Explains how to adjust the folding position for the Half-Fold setting.

12.6.2 Center Staple Position Adjustment

Details how to adjust the stapling position for the Center Staple & Fold setting.

12.8 Authentication Method

Explains how to configure authentication methods for controlling machine access.

12.8.1 User authentication and account track

Describes the settings for user authentication and account track management.

12.8.4 Selecting an authentication method

Guides on selecting the appropriate authentication method (e.g., User Auth, Account Track).

12.9 User Authentication Setting

Details how to specify user authentication settings, including administrative settings and user registration.

12.9.1 Administrative Settings – List

Explains how to manage user lists and default function permissions.

12.9.4 User Registration

Step-by-step instructions for registering new users with authentication details.

12.10 Account Track Setting

Covers the process of registering accounts and tracking their usage.

12.10.1 Account Track Registration

Guides on registering accounts, setting passwords, and specifying print allowances.

12.11 Password Rules

Outlines the limitations and conditions for applying password rules to enhance security.

12.12 Enhanced Security Mode

Explains how to apply various security settings to increase machine security.

13 Authentication unit (Biometric type AU-101)

13.1 Safety information

Provides essential safety precautions and regulatory notices for the biometric authentication unit.

13.4 Using Authentication unit (Biometric type) AU-101

Guides on specifying settings and registering users for the biometric authentication unit.

13.4.1 Multifunctional product settings

Explains how to set up the multifunctional product for machine authentication using the biometric unit.

13.4.2 Registering users

Provides methods for registering users by connecting to the multifunctional product or using Data Administrator.

13.4.3 Logging on to a multifunctional product

Describes the procedure for logging on using finger vein patterns.

13.4.4 ID & Print function

Explains how to save and print jobs from the ID & Print user box after authentication.

13.7 Troubleshooting

Lists common problems with the biometric authentication unit and their solutions.

14 Authentication unit (IC Card Type AU-201)

14.1 Safety Information

Provides essential safety precautions and regulatory notices for the IC card authentication unit.

14.4 Using Authentication unit (IC card type) AU-201

Guides on specifying settings and registering users for the IC card authentication unit.

14.4.1 Multifunctional product settings

Explains how to set up the multifunctional product for machine authentication using the IC card unit.

14.4.2 Registering users

Provides methods for registering users by connecting to the multifunctional product or using Data Administrator.

14.4.3 Logging on to a multifunctional product

Describes the procedure for logging on using an IC card.

14.4.4 ID & Print function

Explains how to save and print jobs from the ID & Print user box after authentication.

14.7 Troubleshooting

Lists common problems with the IC card authentication unit and their solutions.

15 Appendix

15.1 Entering text

Explains how to use the on-screen keyboard for entering text, names, and numbers.

15.1.2 To type text

Detailed instructions on typing text using the on-screen keyboard, including shift and undo functions.

15.2 Glossary

Provides definitions for terms used in Copy mode and abbreviations.

Related product manuals