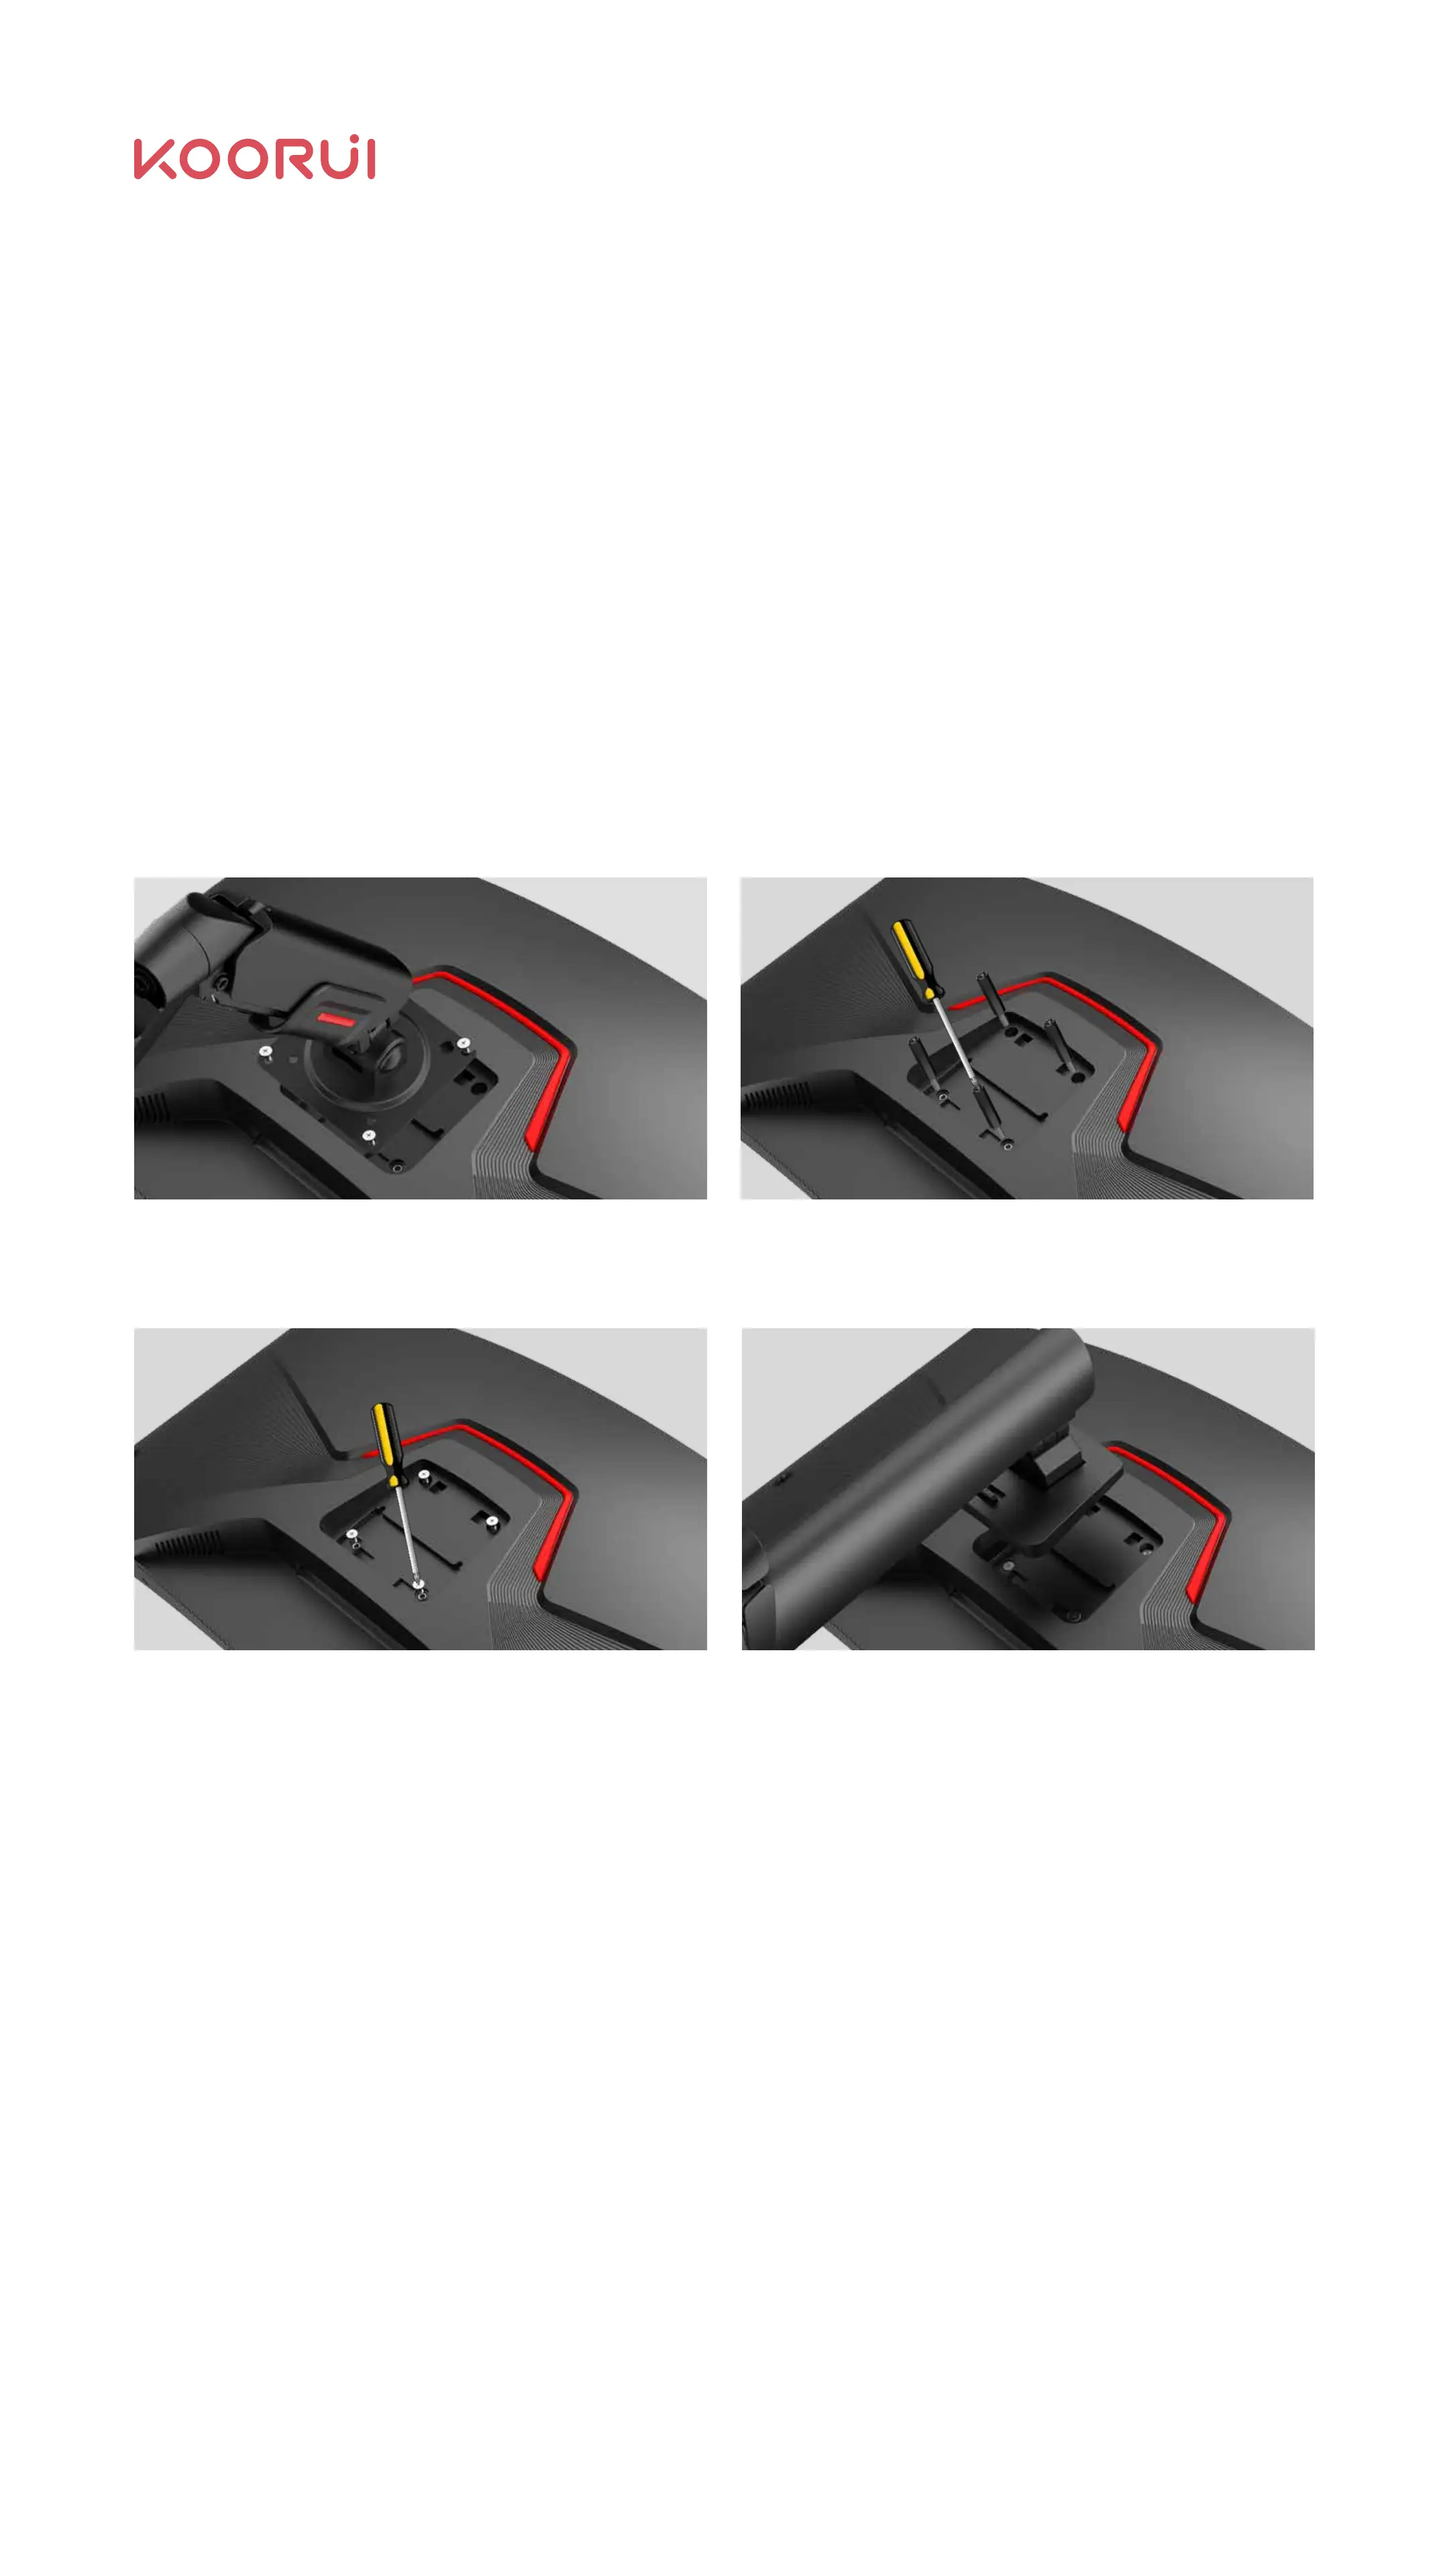
2.3.1 Schematic diagram for VESA bracket changing to display
bracket Replace the actual monitor color and the foot frame
2.3 Bracket Disassembly
Remove VESA holder screws Remove the VESA screw post (If the screw post
is not used, skip this step).
Use the original back shell screws removed in
2.2.2.1 to lock (or use M4 flat-head screws with
a thread length of 6-8mm);
Install the base. For details, see 2.2.2
Installing Stand.
Wall Mount Notes:
Ν
Ν
Please purchase the VESA bracket device separately.
For more information, please refer to the user guide provided with your VESA
bracket device.
Note: During disassembly, you should protect the monitor properly. Make sure that
properties are not damaged.
06