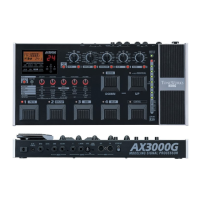
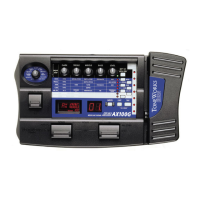
AX3000G / 3000B TEST MODE instructions
How to start
Turn the power on by pressing following switches for each operation as follows.
LCD shows AX3000G (or AX3000B) and software version number.
Each checking mode starts when you release from those switches.
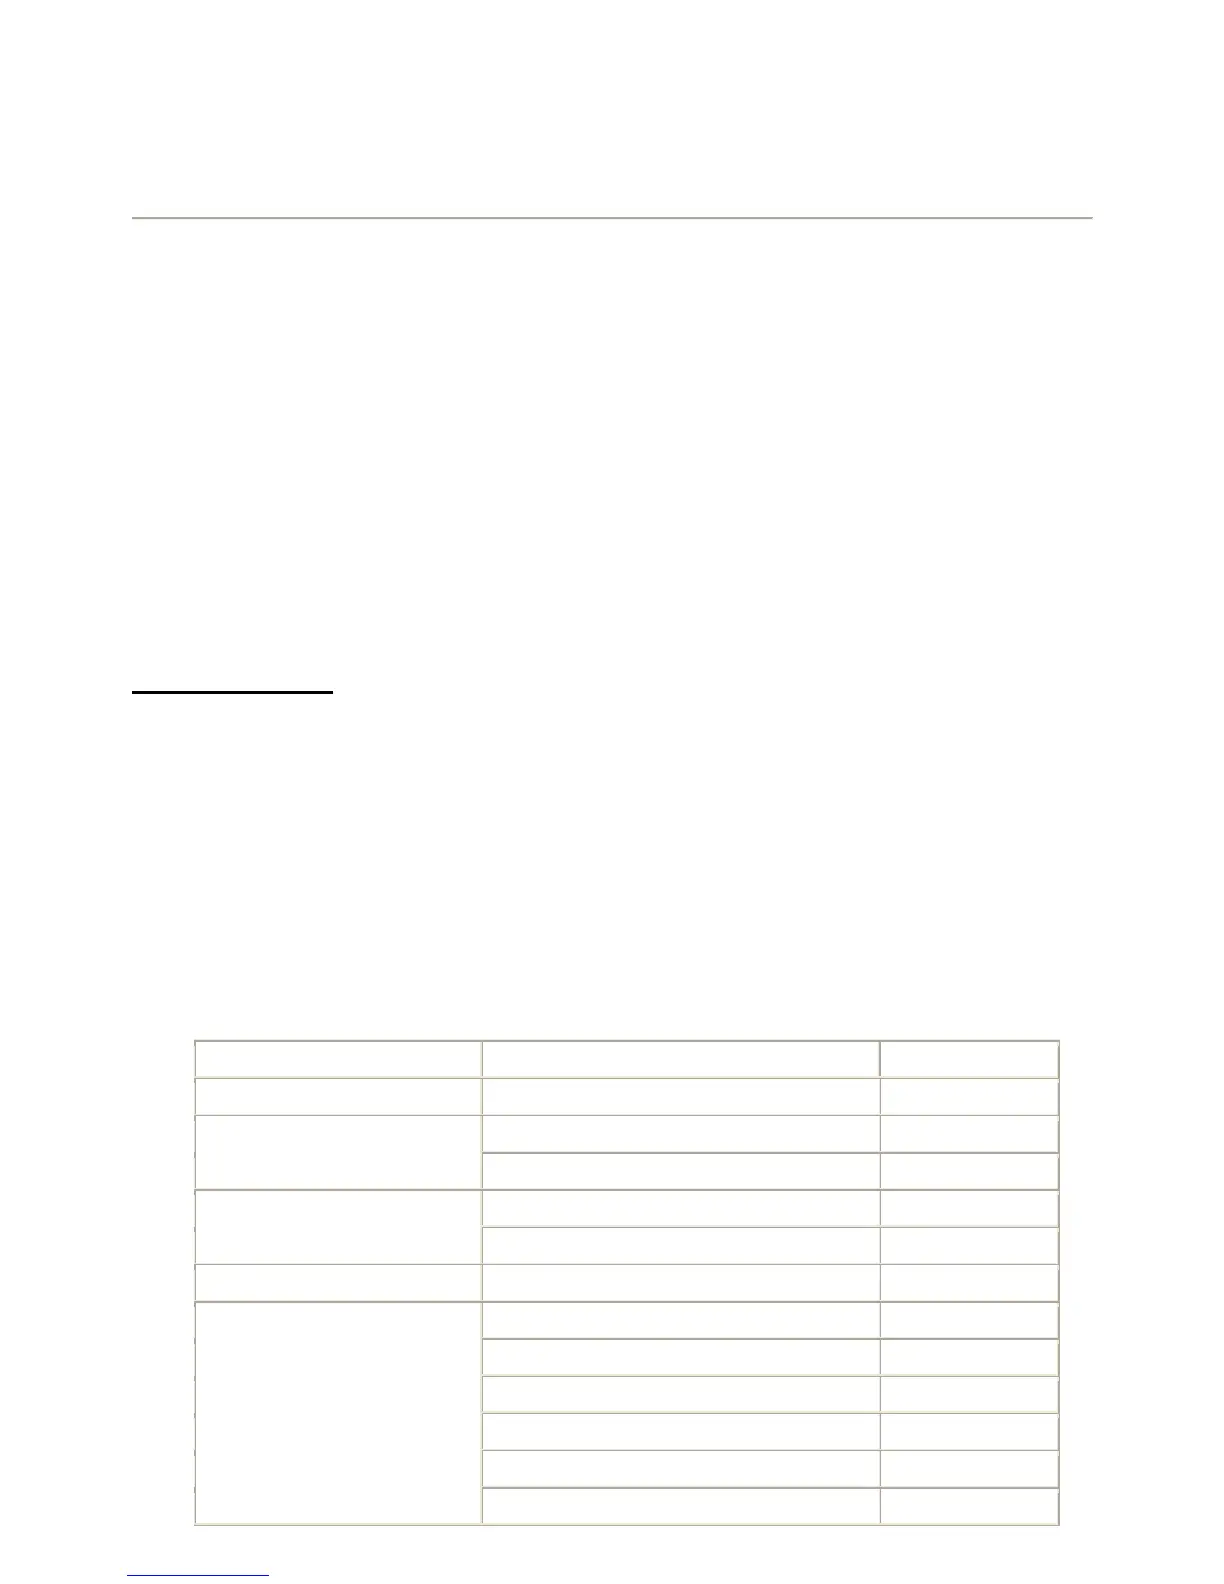
Switches (to press) Modes
[INTERNAL CHECK] CABINET + EXP/CTL Internal check → Operation Check
[OPERATION CHECK] PRE FX + MODULATION Operation Check
[MIDI CHECK] AMP/LINE + WRITE MIDI Check → Audio Check
INTERNAL CHECK
Before the power on, please connect the testing cable into both PHONE and INPUT jack. Also,
put another testing cable into SEND and RETURN jack. Then rotate the LEVEL knob (next to
PHONE jack) into maximum.
The following inspection items are run automatically.
During the procedure, item number and step are shown on BANK LED.
If any item is NG (no good), item name with NG is shown on LCD and BANK LED (item number
and step number) stops with blinking.
Item Step Display on NG
1. I2C I/F (EEP ROM) 1. EEPROM EEP IC2
1. DSP Serial I/F DI/F IC2
2. DSP
2. DSP IRQ Port I/F DIRQ IC2
1. Data Bus RDAT IC1
3. DSP DRAM
2. Adress Bus RADR IC1
4. CODEC POWER DOWN 1. CODEC POWER DOWN MUTE IC5
1. So1L --> Si1R LVL L->R
2. So1L --> Si1L LVL L->L
3. So1R --> Si1R LVL R->R
4. So1R -> SEND -> RETURN -> Si1R LVL RTN
5.RET RMVE(Plug off RETURN jack) ----
5. LEVEL
6. So1R --> Si1R LVL IN