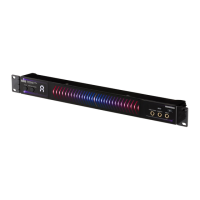
En-5
Operation
Tuning procedure
1
. Connect the instrument to be tuned to the INPUT1 jack or to the INPUT2 jack.
NOTE:
If a plug is connected to the INPUT1 jack on the front panel, the INPUT2 jack on the rear
panel will be disabled and cannot be used.
2
. Press the STANDBY/ON button to turn on the tuner.
e POWER ON LED will light up, and the calibration setting (0–9) will ash in the note display
for a few seconds.
NOTE:
If there is no user input for up to 4 hours, the auto power-o function will automatically
put the tuner in the standby power mode. Holding down the MUTE button and pressing
the STANDBY/ON button while the tuner is turned on will disable the auto power-o
function.
3
. Set the calibration, meter display and display color as necessary.
(→“Reference pitch settings” on page 5, “Meter display setting” on page 6, “Meter display
color settings” on page 7).
4
. Play a single note on your instrument.
5
. Tune while watching the meter display. e note display will indicate the note name that is closest
to the pitch you input.
Reference pitch settings
Set the reference pitch for tuning (the A note in the middle of the piano keyboard = A4).
e default setting is “0: 440 Hz”.
1
. Press the CALIB button.
e current setting is shown for several seconds on the display (lit → blinking).
2
. While the current setting is shown, press the CALIB button to set the reference pitch.
Each time you press the CALIB button you will cycle through the following settings.
0: 440 Hz, 1: 441 Hz, 2: 442 Hz, 3: 443 Hz, 4: 444 Hz,
5: 445 Hz, 6: 436 Hz, 7: 437 Hz, 8: 438 Hz, 9: 439 Hz
3
. When you’ve chosen the desired setting, wait for two seconds without pressing any buttons.
e new setting will blink in the note name display indicating that the reference pitch has been
set, and you can now use the tuner normally.

 Loading...