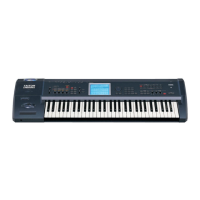
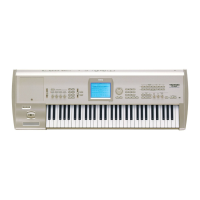
TRITON STUDIO Easy Start
4
Arpeggiator mode
TRITON has dual polyphonic arpeggiators, fully editable and syncable to MIDI clock. One program uses one arpeggio
pattern - Combi or Sequence modes can use up to two arpeggio patterns at once.
1. Programs have an arpeggio pattern assigned to them even if the Arpeggiator [ON/OFF] key does not “wake up” in the
ON position. Example: Select Program C54, Wah Space Bass
Ä Press the Arpeggiator [ON/OFF] key so it is on (lit) Ä
Work with the realtime controls: TEMPO, GATE (overall step length), and VELOCITY (loudness of arpeggiated notes) Ä
Press the Arpeggio tab at the bottom of the screen Ä Work with the Octave radio button, change the clock Reso
(=Resolution), check the Keyboard box.
2. View the Arpeggiator grid: Press the [GLOBAL] key, press [MENU], press P.6 User Arpeggio
Ä Press the Pattern
Edit tab
Ä The procedure to edit or create your own arpeggio patterns is covered in the Owners Manual Basic Guide,
pgs. 134-137.
3. Combinations may have up to two arpeggio patterns assigned to them even if the Arpeggiator [ON/OFF] key does not
“wake up” in the On position
Ä Example:Select COMBI A48, Wine& Cheese Ä Note that Realtime controls affect both
arps globally
Ä Press the Arpegg. A or Arpegg. B tab at the bottom of the screen to work with individual parameters Ä
Press the X popup at the Pat: (Pattern) field and try substituting a different arp pattern.
Sequence mode: Creating songs quickly with Song Templates
1. Press the [SEQ] key
Ä Press the ► popup by S### (song number) and press any number not in use Ä Press OK in
response to the query “Create new song this Song No.”
2. Press the upper right ▼ popup, and then press “Load Template Song”
Ä Press the ► popup in the From: field and
select one of the Preset song templates (P00,etc) by pressing it. Each song selection will load eight programs to the first
eight tracks, together with the appropriate effects and routing. Before you press OK…
3. Check the box “Copy Pattern to Track too?” and then press OK.
Ä Make sure that the Pattern: ► popup is set to
“Preset”
Ä Press the ► popup by P### and select a Pattern in the same style as your Song Template choice ÄPress
the OK button 4 to 8 times, to copy the pattern into the track for a number of measures (as noted by the Measure value),
and then press Exit
Ä Press theSEQUENCER [START/STOP] key to audition the copied drum pattern Ä Press the
SEQUENCER [START/STOP] key again to stop.
! Before you press OK to copy a pattern, you can first select a new pattern to create a mapped set of patterns in the track.
Record a new track:
1. Press the [LOCATE] key to return to the to the beginning of the Song Ä Press the ► popup to the left of Track beneath
the Song name) and select Track 2 (except for the Orchestral Template, Track 2 is always Bass)
Ä Press the
[REC/WRITE] key, and then press the SEQUENCER [START/STOP] key, and record 2 to 4 measures
Ä When finished,
press the SEQUENCER [START/STOP] key to stop recording.
Set a Play Loop for track 2:
2. Press the PlyLoop 1-8 tab at the bottom of the display Ä Press the Track Play Loop checkbox for Track 2 Ä Leave the
Loop Start Measure at “001”
Ä Press the Loop End Measure (“001”) and set it to the last measure you played on Track
2 (using S value key, DIAL, or keypad)
Ä Press the SEQUENCER [START/STOP] key to play back the song and
looped bass track
Ä Press the SEQUENCER [START/STOP] key again to stop.
3. Repeat previous steps 4 and 5 as you record additional tracks and set desired Play Loops.
! The Play Intro checkbox when set, allows a track to play from measure 1 up until the Loop Start Measure and then
begin looping the selected measures.
 Loading...
