Kortho Hot Quickcoder User manual
8
The Control box contains a Control Panel with which specific functions can be performed such as
switching the HQC on and off and setting the print parameters. The Control Panel can also be used to
issue a test print signal.
2.2.1 The Control Panel
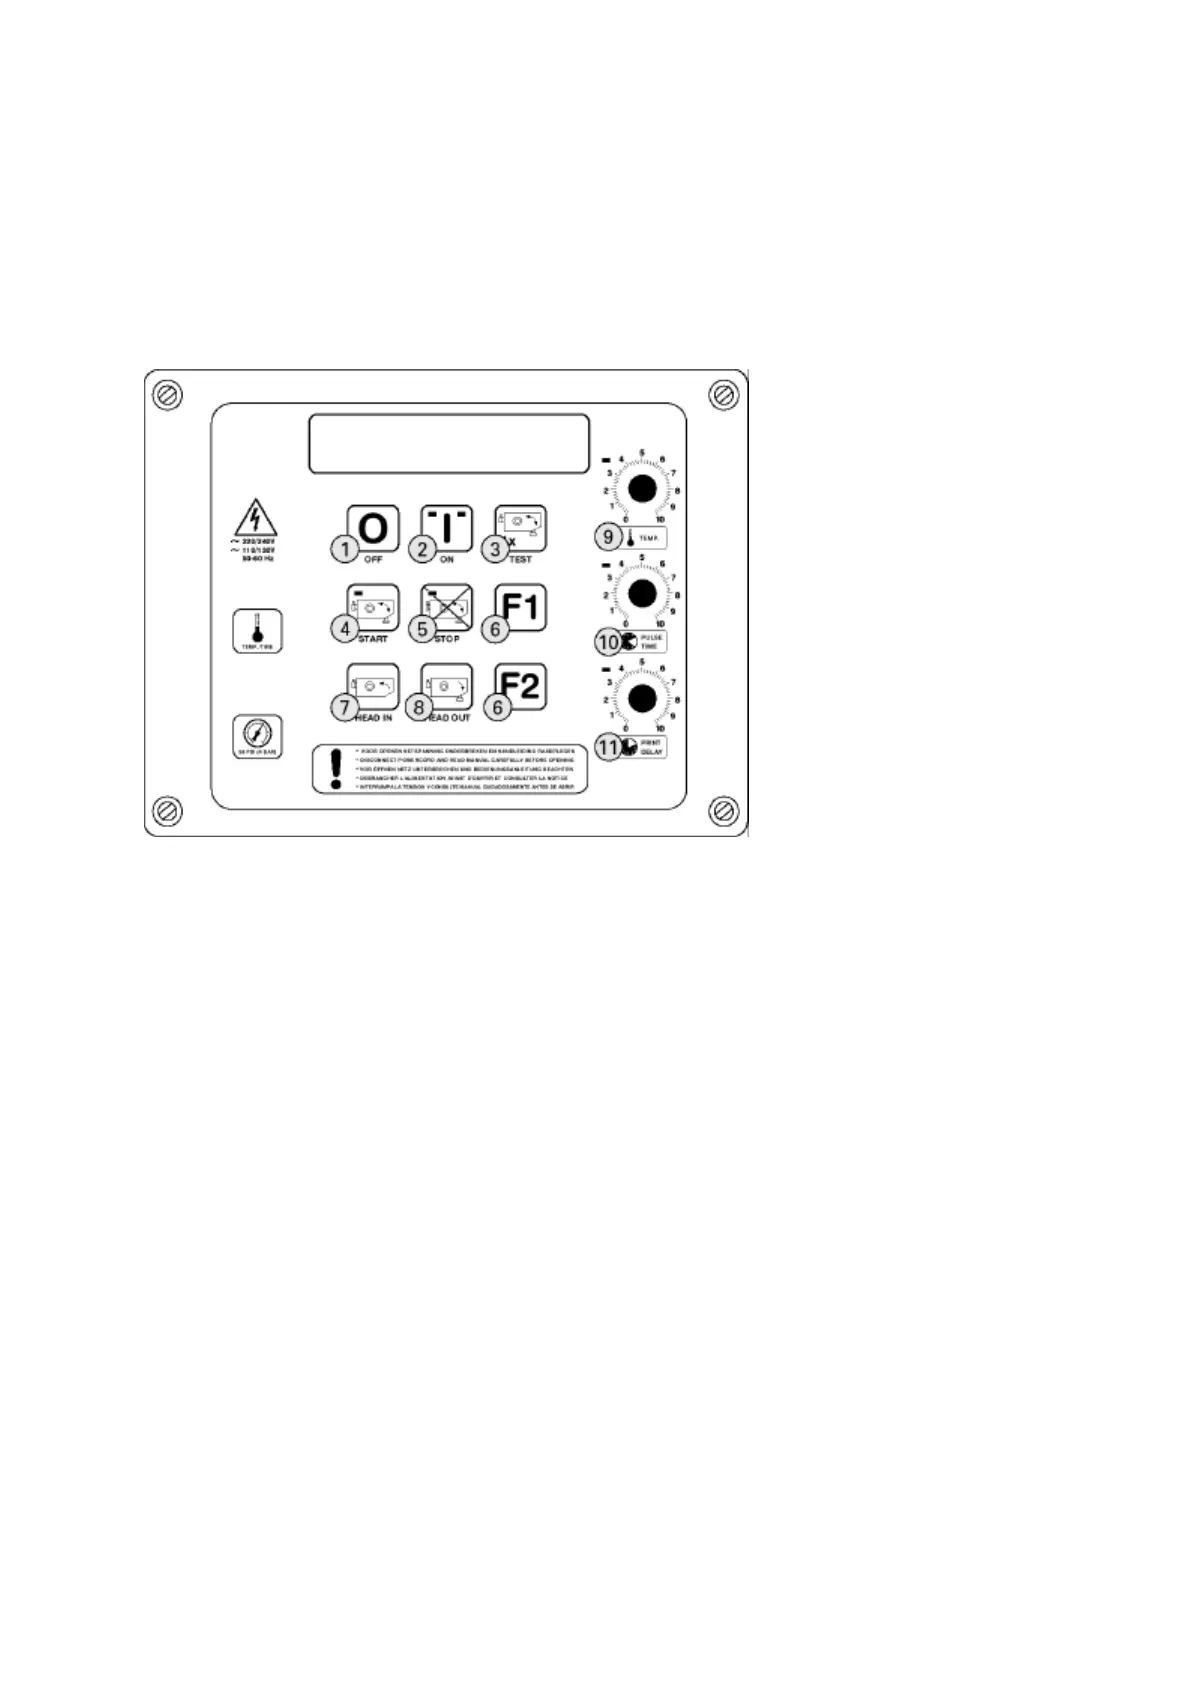
The Control Panel of the Control box contains the following buttons (see figure 3).
Figure 3: The Control Panel
OFF (1) This button is used to switch off the system. The mains power remains connected to
the system.
ON (2) If it is connected to the mains power, this button is used to switch the system on.
The two green lights indicate that the two low voltages for the electronics and the
magnetic valve are present.
TEST (3) The HQC performs a test print. The system should first be enabled by activating the
START button.
START (4) Once this button is pressed, the HQC is enabled for coding. The green light on the
START button is illuminated when a print signal is received from the signal emitter.
This may be a switch, photocell, relay contact, inductive sensor or 24V DC voltage
pulse. The orange light on the STOP button goes out once the START button has
been pressed.
STOP (5) Once this button is pressed, the HQC stops coding.
The orange light on this button will illuminate to indicate that the system is in
preheating mode. The control will keep the text head at temperature.
F1..F2 (6) As standard these buttons do not have a function. A specific function may be
assigned to them if customer-geared options are incorporated.
HEAD IN (7) If the text head holder is in the outermost position, pressing this button moves the
text head into the HQC.
HEAD OUT (8) This button moves the text head holder to the outermost position. This button should
be pressed to change a text head or text. It can then be used to fix the HQC to the
1 OFF button
2 ON button
3 TEST button
4 START button
5 STOP button
6 Function button F1, F2
7 Text head IN
8 Text head OUT
9 Temperature adjustment
10 Pulse/time adjustment
11 Print/delay adjustment