Always switch off the power to each device before connecting it to your
6410N, 6420N. After connecting your 6410N, 6420N, connect its
power and then switch on the power to each device.
Sections 5.1 and 5.2 describe how to connect the 6410N Digital to Analog Audio
Converter and the 6420N Analog to Digital Audio Converter, respectively.
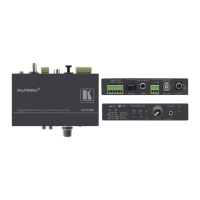
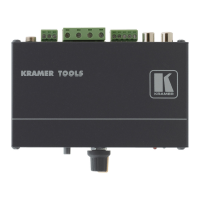
5.1 Connecting the 6410N Digital to Analog Audio
Converter
To connect your 6410N Digital to Analog Audio Converter, as illustrated in the
example in Figure 6, do the following:
1. Connect up to four sources to the four digital input connectors, as follows:
Connect an AES-75 source (for example, a DAT-Player) to the
AES-75 BNC input connector
Connect an AES/EBU source (for example, a DAT-Player) to the
AES/EBU detachable terminal block input connector using a shielded
twisted pair cable
Connect an S/PDIF source (for example, a DVD Player) to the S/PDIF
RCA input connector
Connect an optical source (for example, a CD Player) to the optical
input connector
2. Connect up to two analog acceptors, as follows:
Connect the ANALOG OUT LEFT and RIGHT detachable terminal
block connectors via shielded twisted pair cables to an analog
balanced stereo acceptor (for example, an amplifier with a pair of
loudspeakers)
If required, connect the PHONES 3.5mm output jack to a headphone
set
The headphone output is usually used for diagnostics and setup of the audio
system. It is recommended to disconnect the headphones (or to minimize the
headphone volume level) when not in use.