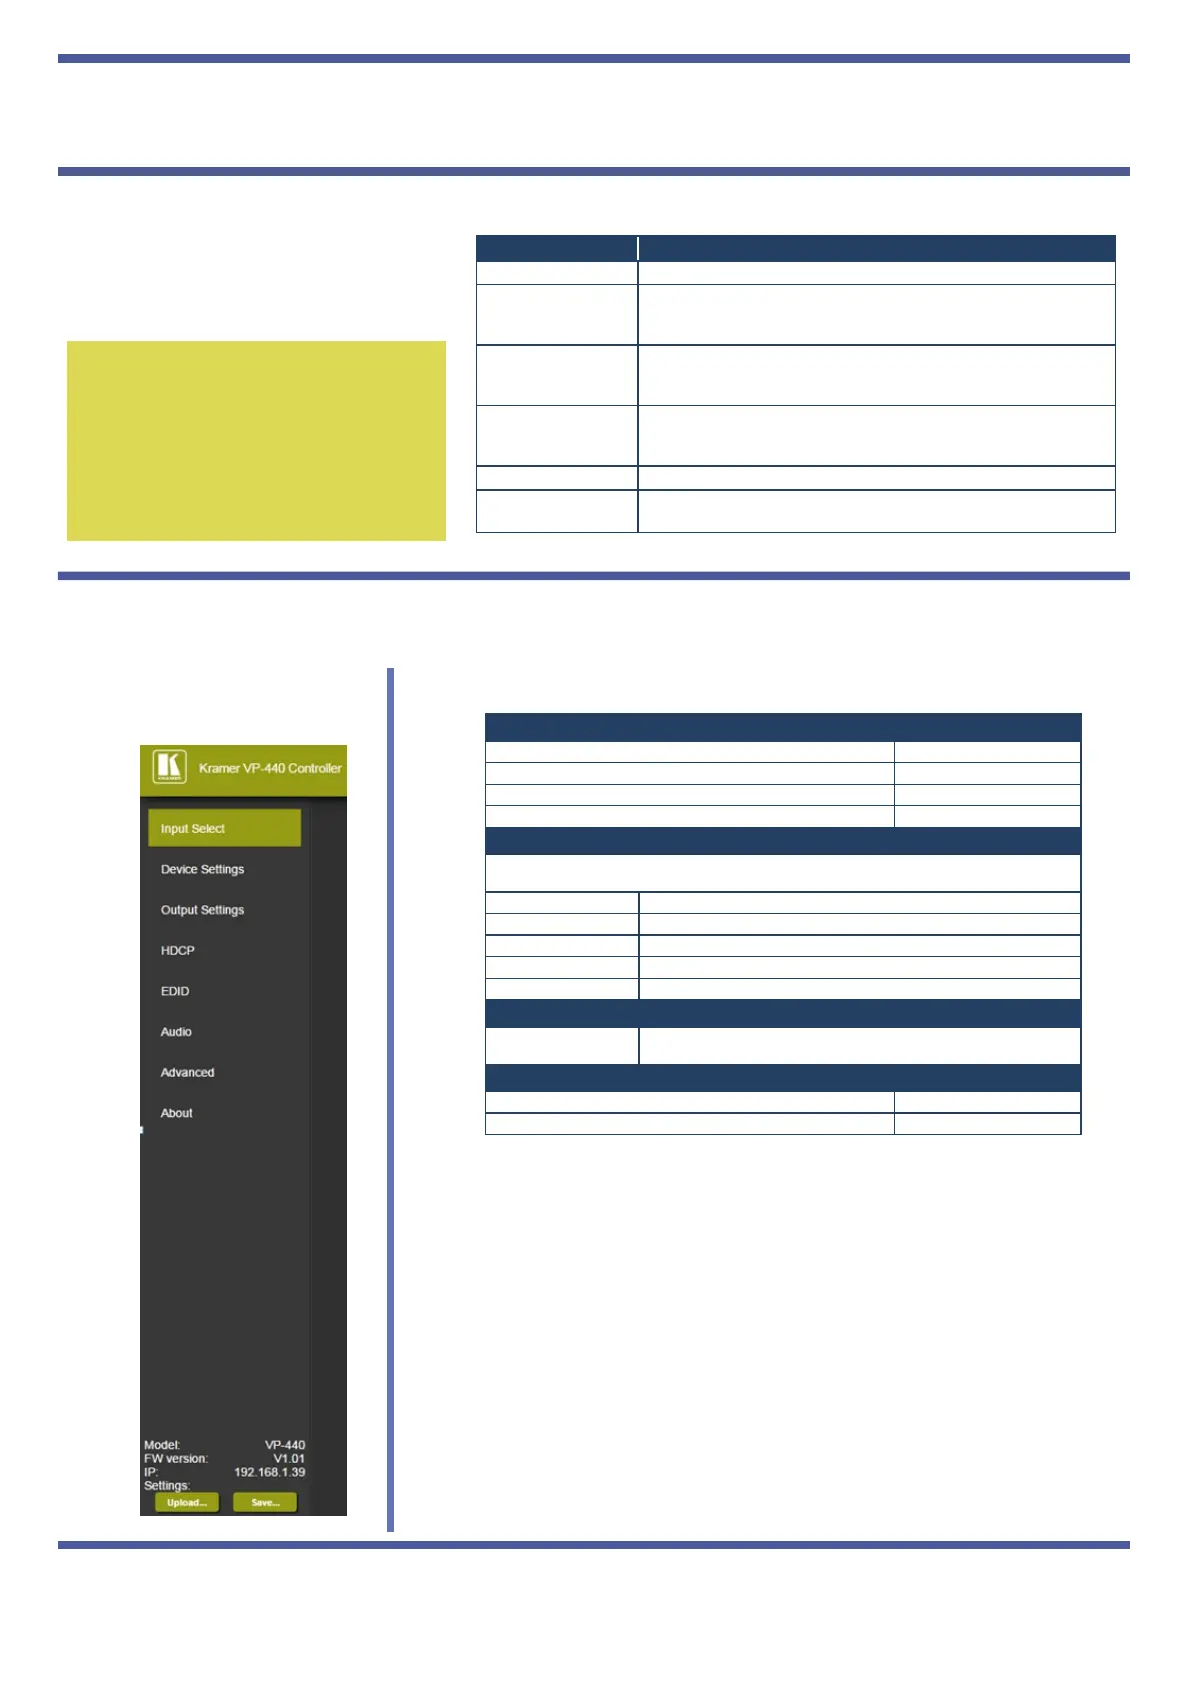
Step 6: Operate via the front panel buttons and via the:
RS-232 and Ethernet:Embedded Web
Page:
Step 4: Connect the power
Connect the 5V DC power adapter to the rear of the VP-440 and connect the adapter to the mains electricity
Step 5: Set operation parameters via OSD menu
Enter the OSD menu via the MENU button
on the front panel. Select a menu item
and set parameters as required.
If you cannot see any images, verify that
the display, TV, or projector is in good
working order and is connected to the
VP-440. If you still don't see an image,
press and hold the RESET TO
XGA/720P button for 3 seconds to reset
the output to XGA or 720p resolution.
OUTPUT Select the input, the image size and the resolution
PICTURE
Set the contrast, brightness, red, green and blue levels. Set the
hue, saturation, sharpness, noise reduction. When PC is the
selected input, finetune the image
AUDIO
Set the input and output volumes, the audio delay time and
mute/unmute. Select the audio source for each HDMI input. set
the microphone mixer mode and the microphone volume
ADVANCED
Set HDCP on input and on output, auto sync off and the OSD
parameters. Set the auto switch mode, the Ethernet parameters
and the Timing shift
FACTORY RESET Perform factory reset
INFORMATION
Display the input and output resolutions, the HDCP status, the
firmware version and the IP address
Baud Rate: 9,600
Data Bits: 8
Stop Bits: 1
Parity: None
To reset the IP settings to the factory reset values go to : Menu-> Factory-> RESET->Change
the option to YES and press Enter
IP Address: 192.168.1.39
Subnet mask: 255.255.0.0
Default gateway: 0.0.0.0
Default UDP Port #: 50000
Maximum UDP Ports: 4
OSD Go to : Menu-> Factory-> RESET->Change the option to YES and
press Enter
RS-232/Ethernet (UDP) Command Protocol
Command Format: ASCII protocol 3000
Example (Route the video HDMI3 input to the output): #ROUTE 12,1,2<cr>

 Loading...