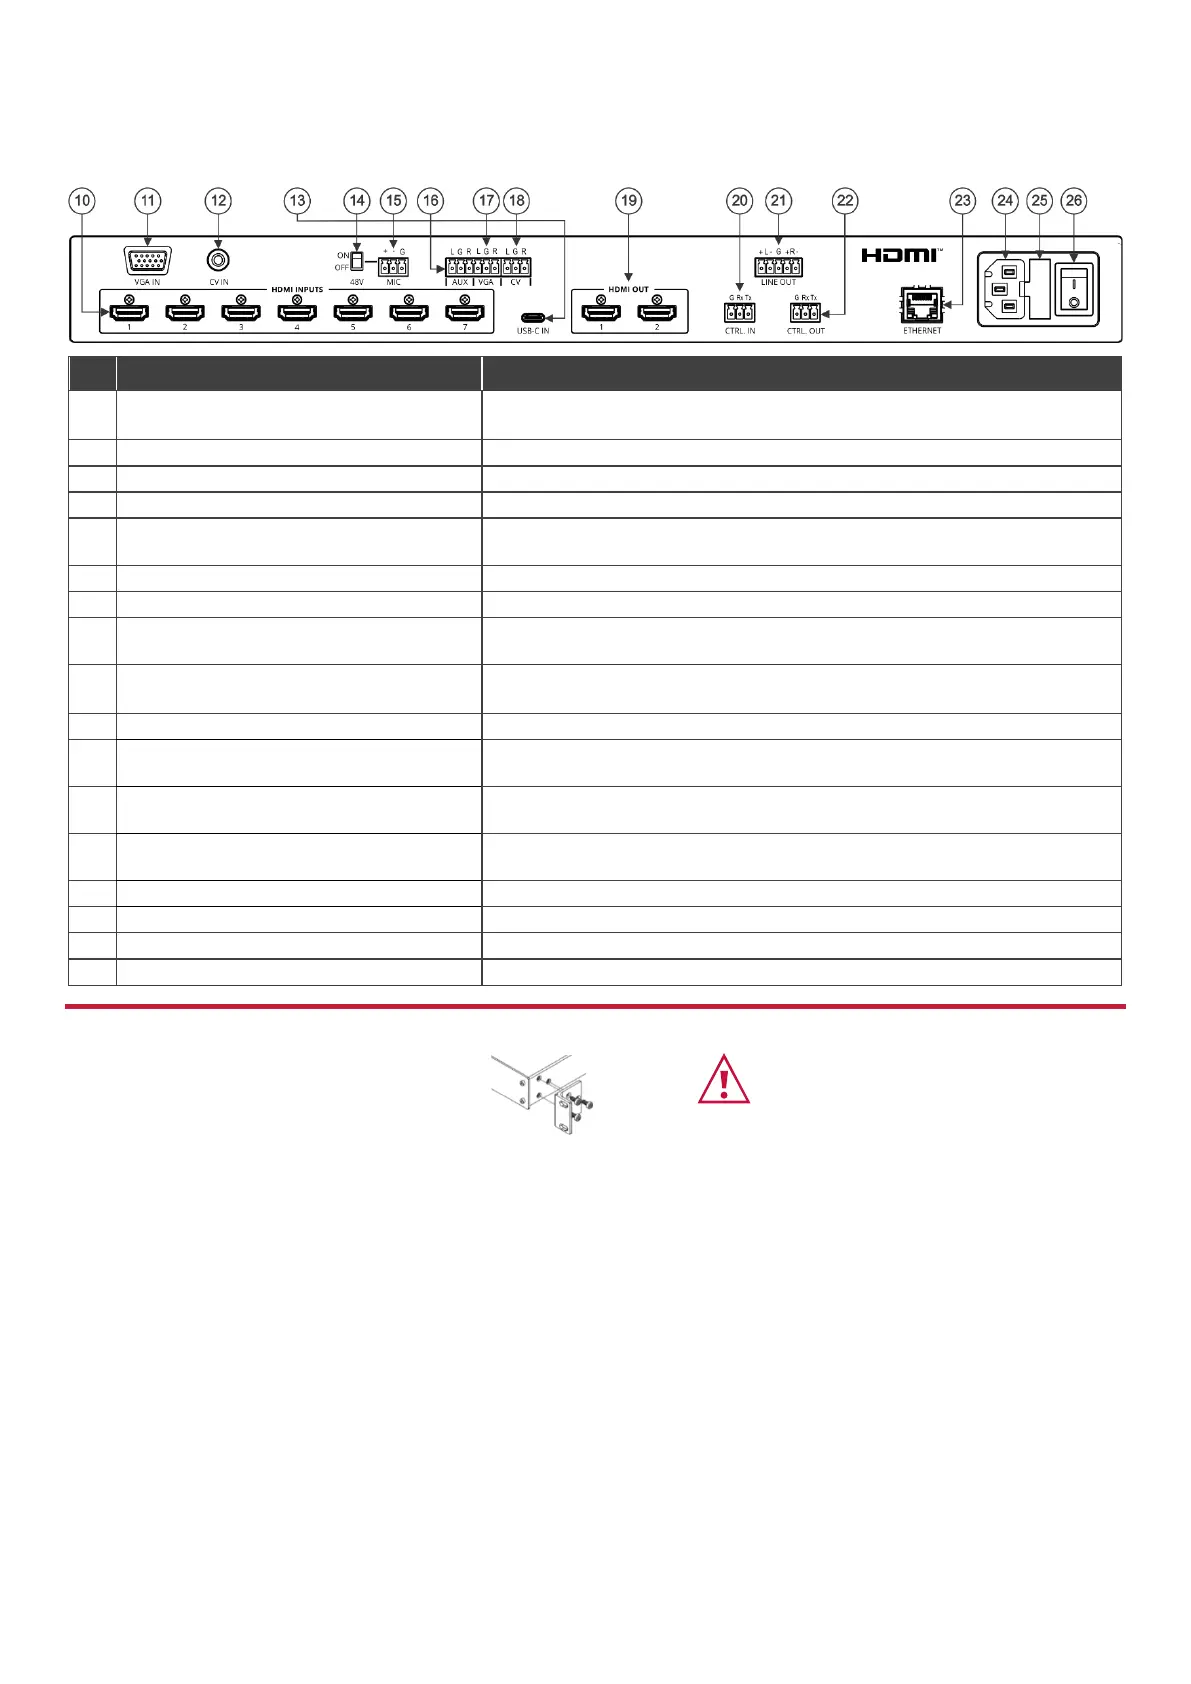
Connect to an HDMI source (from 1 to 7).
You can connect Step-in devices to inputs 1 and 2.
Connect to a computer graphics source.
Connect to a composite video source.
Connect to a USB-C port, charging up to 18W.
Move up (ON) to select a condenser type microphone; down (OFF) to select
a dynamic-type microphone.
MIC 3-pin Terminal Block Connector
Connect to a microphone source.
AUX 3-pin Terminal Block Connector
Connect to an auxiliary source.
VGA 3-pin Terminal Block Connector
(audio signal related to VGA IN)
Connect to the analog audio associated with the computer graphics source.
CV 3-pin Terminal Block Connector
(audio signal related to CV IN)
Connect to the analog audio associated with the composite video source.
Connect to HDMI acceptors (from 1 to 2).
CTRL IN 3-pin Terminal Block Connector
Connect to a PC or remote controller to control VP-550X via RS-232 Protocol
commands.
LINE OUT Balanced Stereo 5-pin Terminal
Block Connector
Connect to a balanced stereo analog audio acceptor.
CTRL OUT 3-pin Terminal Block
Connectors
Connect to an acceptor (for example, a display) to control it via RS-232
Protocol 3000 commands.
Connects to the PC or other Serial Controller through computer networking.
Connect the mains power cord.
Fuse for protecting the device.
Switch for turning the unit ON or OFF.
To rack mount the machine, attach both rack
ears (by removing the screws from each side of
the machine and replacing those screws through
the rack ears) or place the machine on a table.
• Ensure that the environment (e.g., maximum ambient
temperature & air flow) is compatible for the device.
• Avoid uneven mechanical loading.
• Appropriate consideration of equipment nameplate ratings
should be used for avoiding overloading of the circuits.
• Reliable earthing of rack-mounted equipment should be
maintained.

 Loading...